
USB Debugging is a vital feature for developers and tech enthusiasts alike. It allows your Galaxy Tab S9 to communicate with a computer using Android SDK (Software Development Kit), making it possible to perform various advanced operations.
Whether you’re a developer looking to test apps or a regular user wanting to perform system-level tweaks, enabling USB Debugging is essential. In this comprehensive guide, we’ll walk you through the process, explain why you might need it, and provide potential workarounds for common problems.
Contents
Why Enable USB Debugging?
Enabling USB debugging on a Galaxy Tab S9 is often a crucial step for developers, tech enthusiasts, or anyone who wants to interact with the device on a more technical level. USB debugging allows the device to communicate with a computer using Android Debug Bridge (ADB), facilitating direct access to the device’s operating system. This can be essential for tasks like installing custom ROMs, running commands, debugging applications, or accessing hidden features. It’s also a common prerequisite for using certain third-party software that manages or modifies the device.
For Developers:
- Testing and Debugging Apps: USB Debugging allows developers to run and test applications directly on the device.
- Access to Developer Tools: It provides access to various developer tools within Android Studio, enhancing the development process.
For Regular Users:
- Rooting and Custom ROMs: For those looking to root their device or install custom ROMs, USB Debugging is a necessary step.
- Data Backup and Recovery: It can be used for comprehensive data backup and recovery solutions.
While USB debugging opens up powerful capabilities, it should be used with caution, as improper use can lead to security risks or unintended changes to the device’s functionality. Therefore, it’s typically recommended for those who have a clear understanding of what they are attempting to achieve.
How to Enable USB Debugging on Galaxy Tab S9
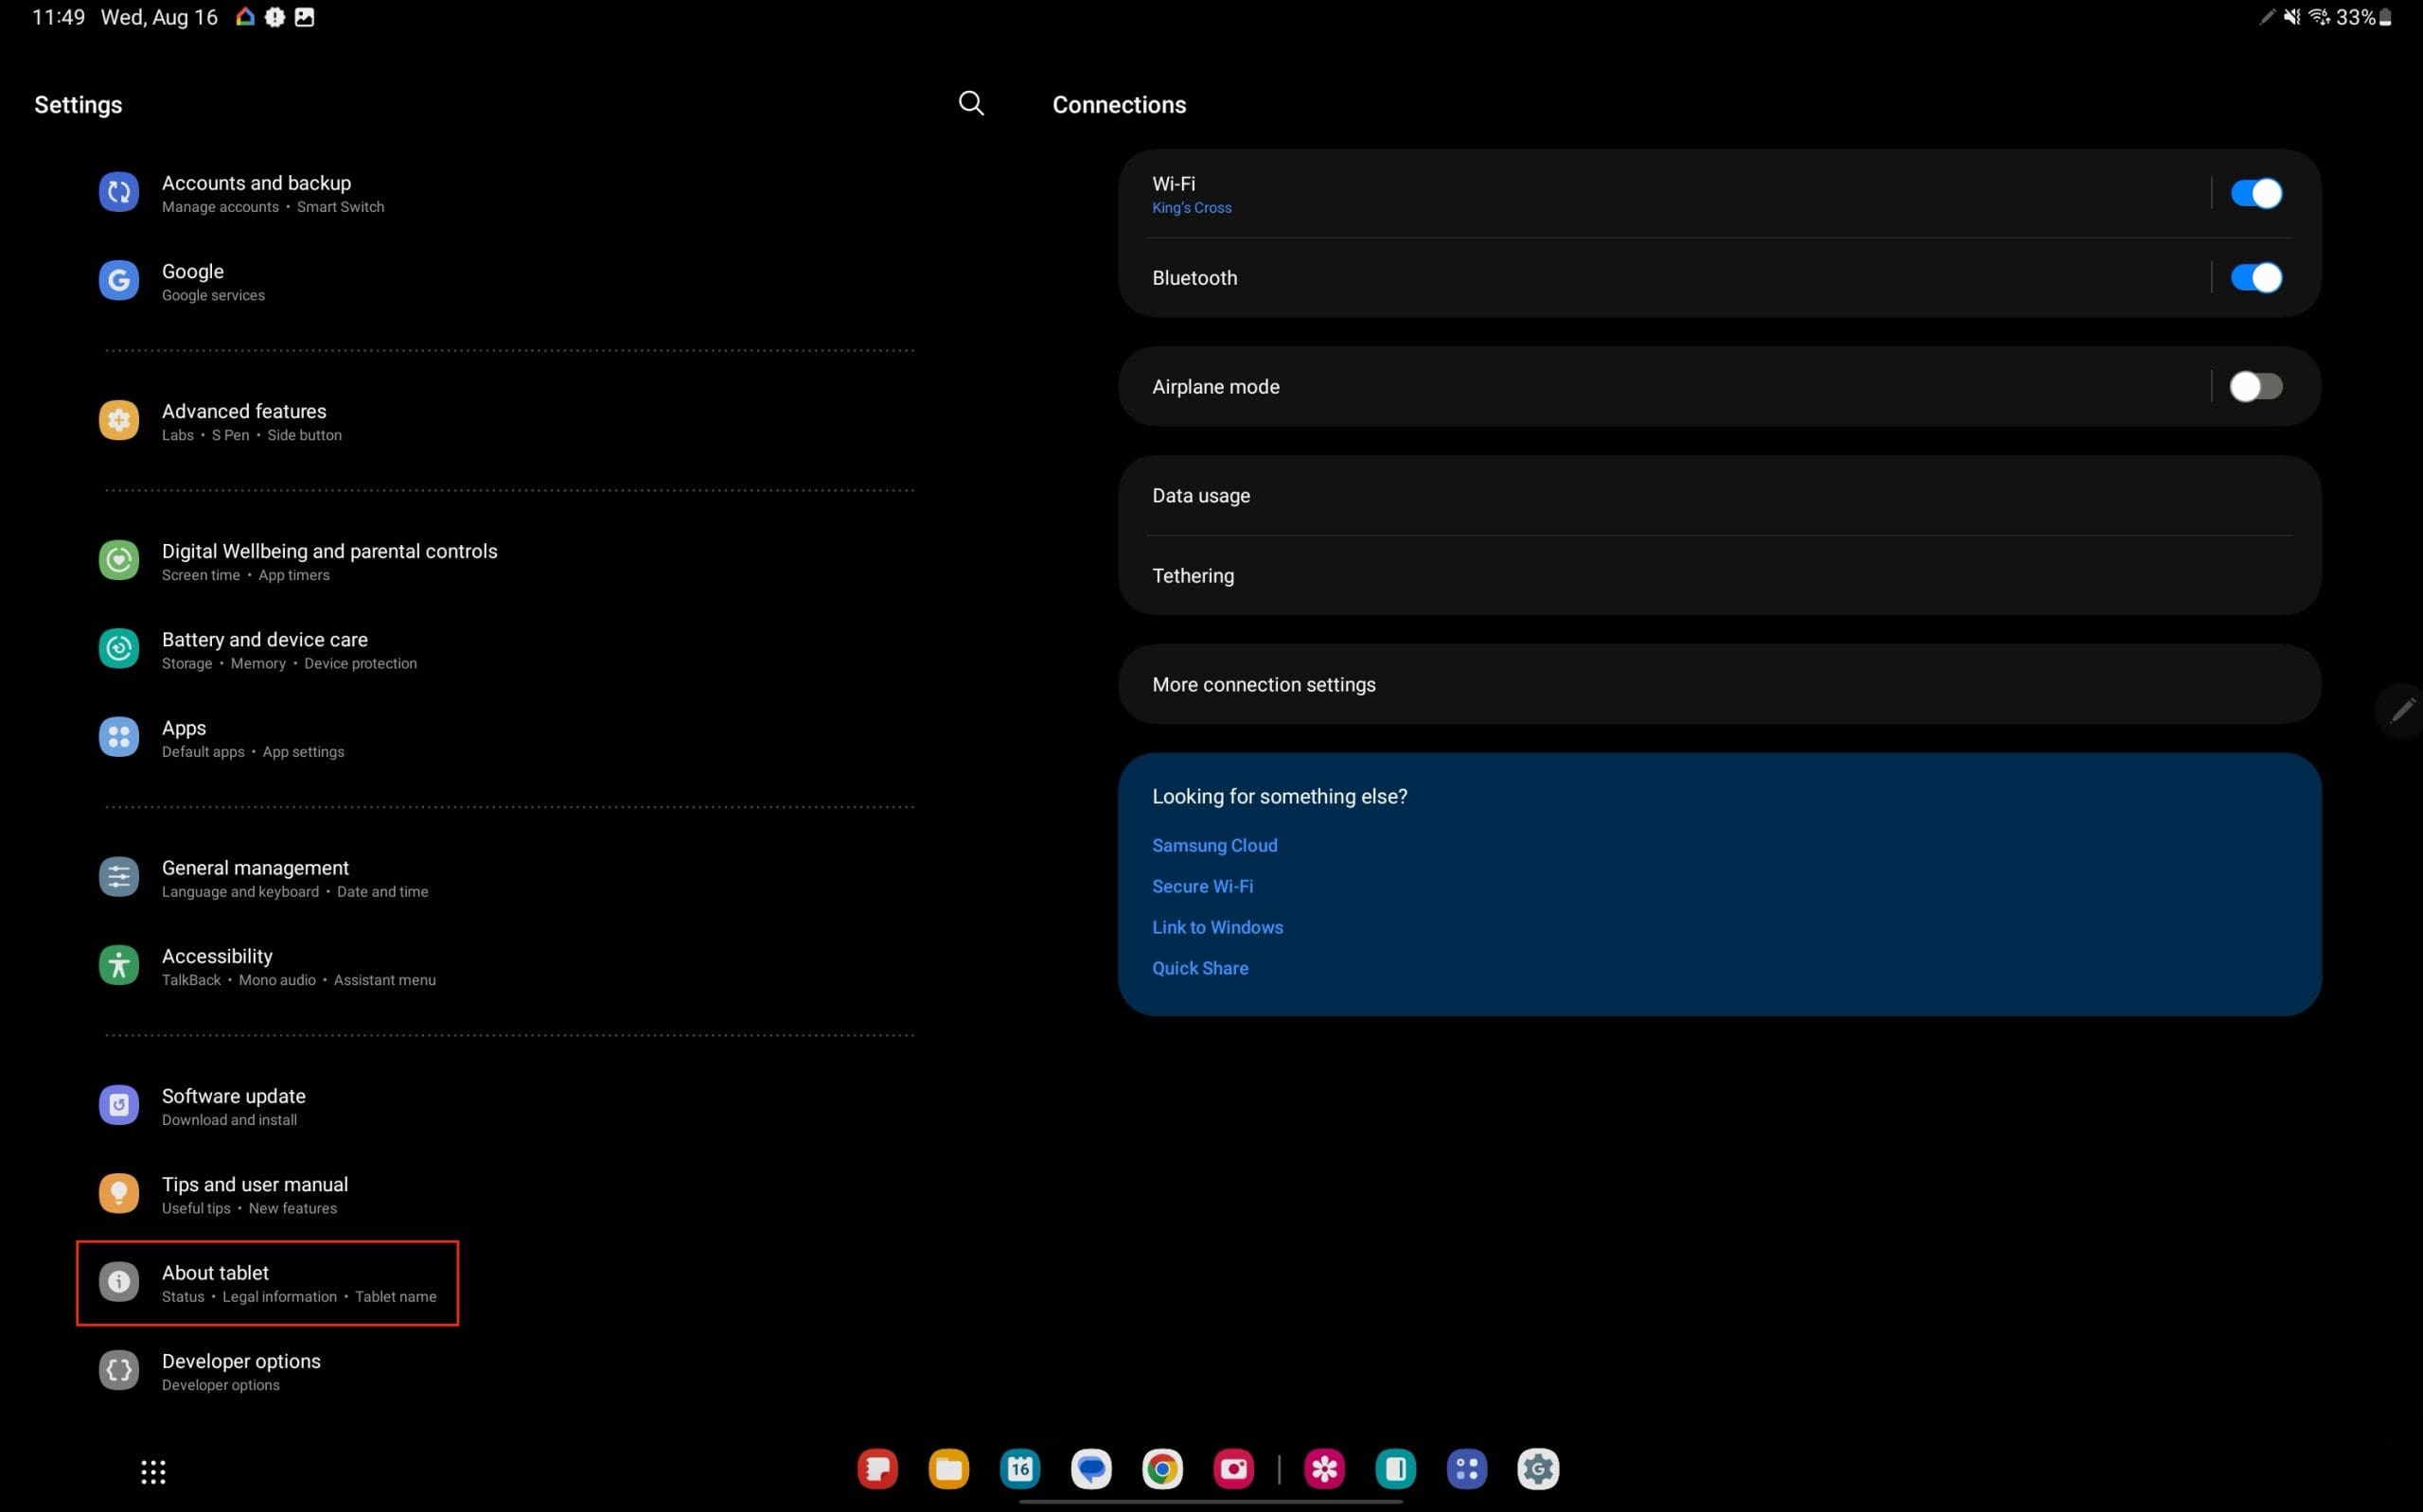
Step 1: Enable Developer Options
- Open ‘Settings’: Tap on the ‘Settings’ app on your Galaxy Tab S9.
- Go to ‘About Tablet’: Scroll down and tap on ‘About Tablet.’

- Find ‘Build Number’: Tap on ‘Software Information,’ then find and tap on ‘Build Number’ seven times.
- Enter PIN if Prompted: If you have a PIN or password set up, you’ll need to enter it.
- Developer Options Enabled: A message will appear saying “You are now a developer!”
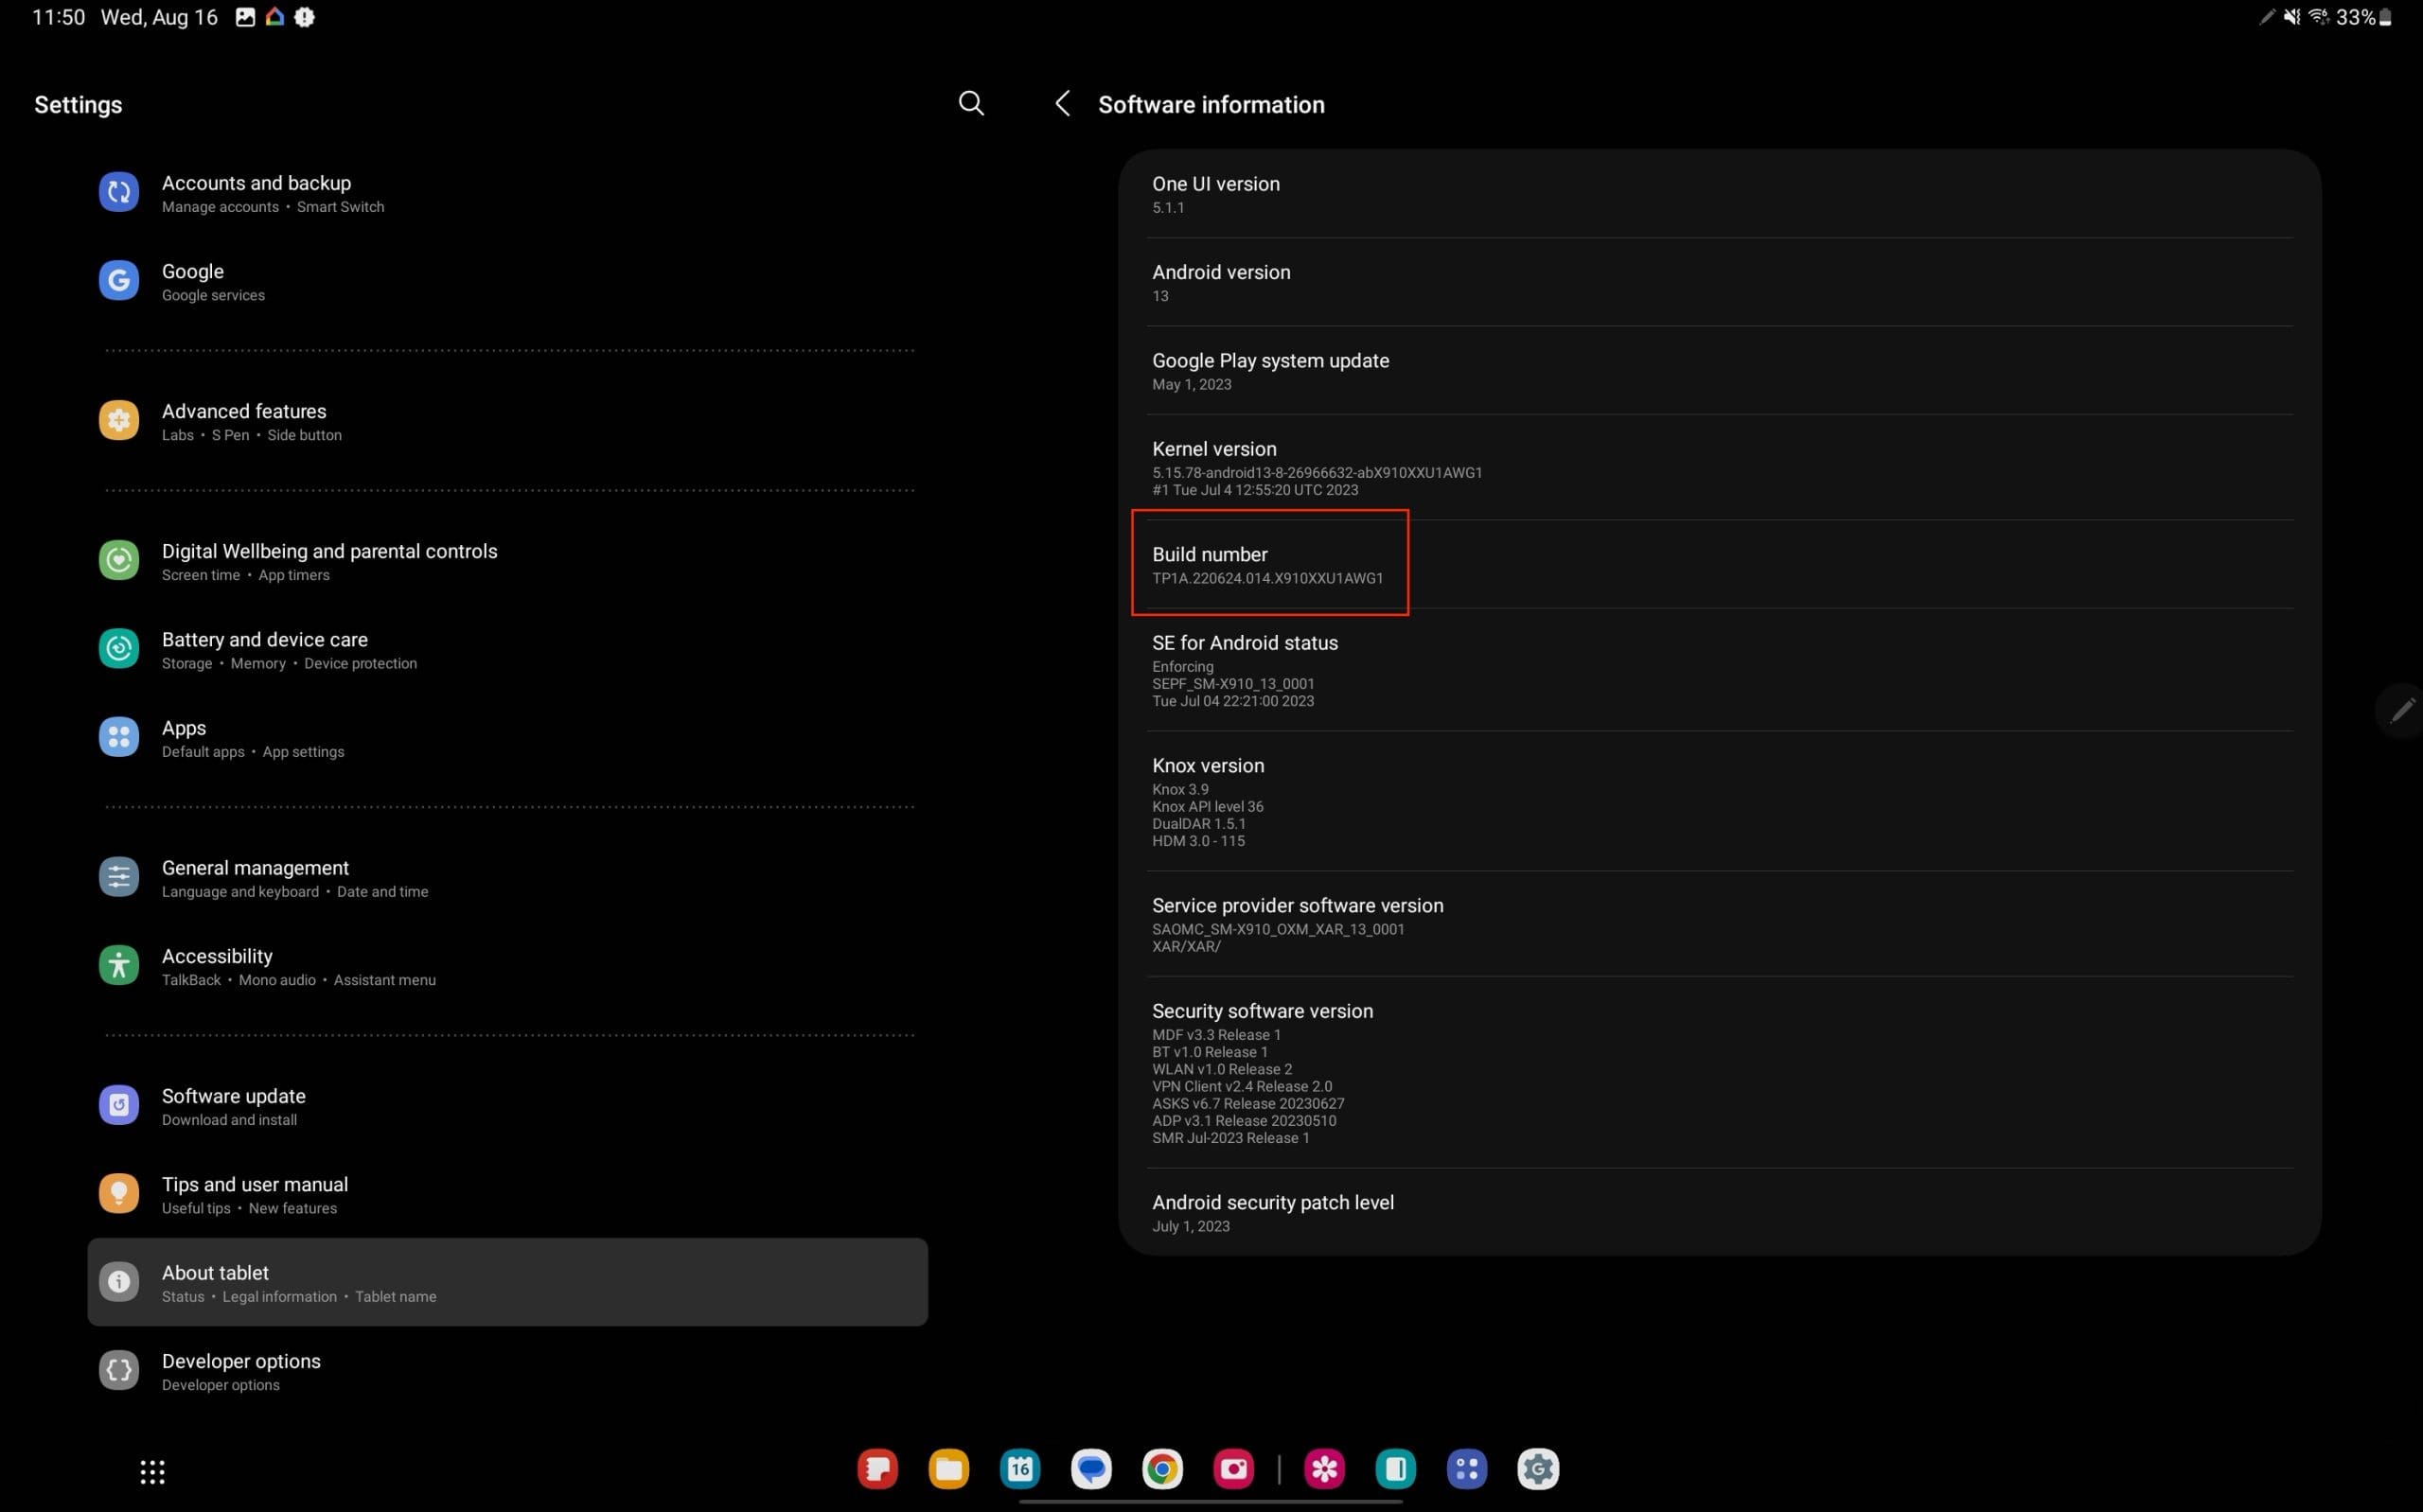
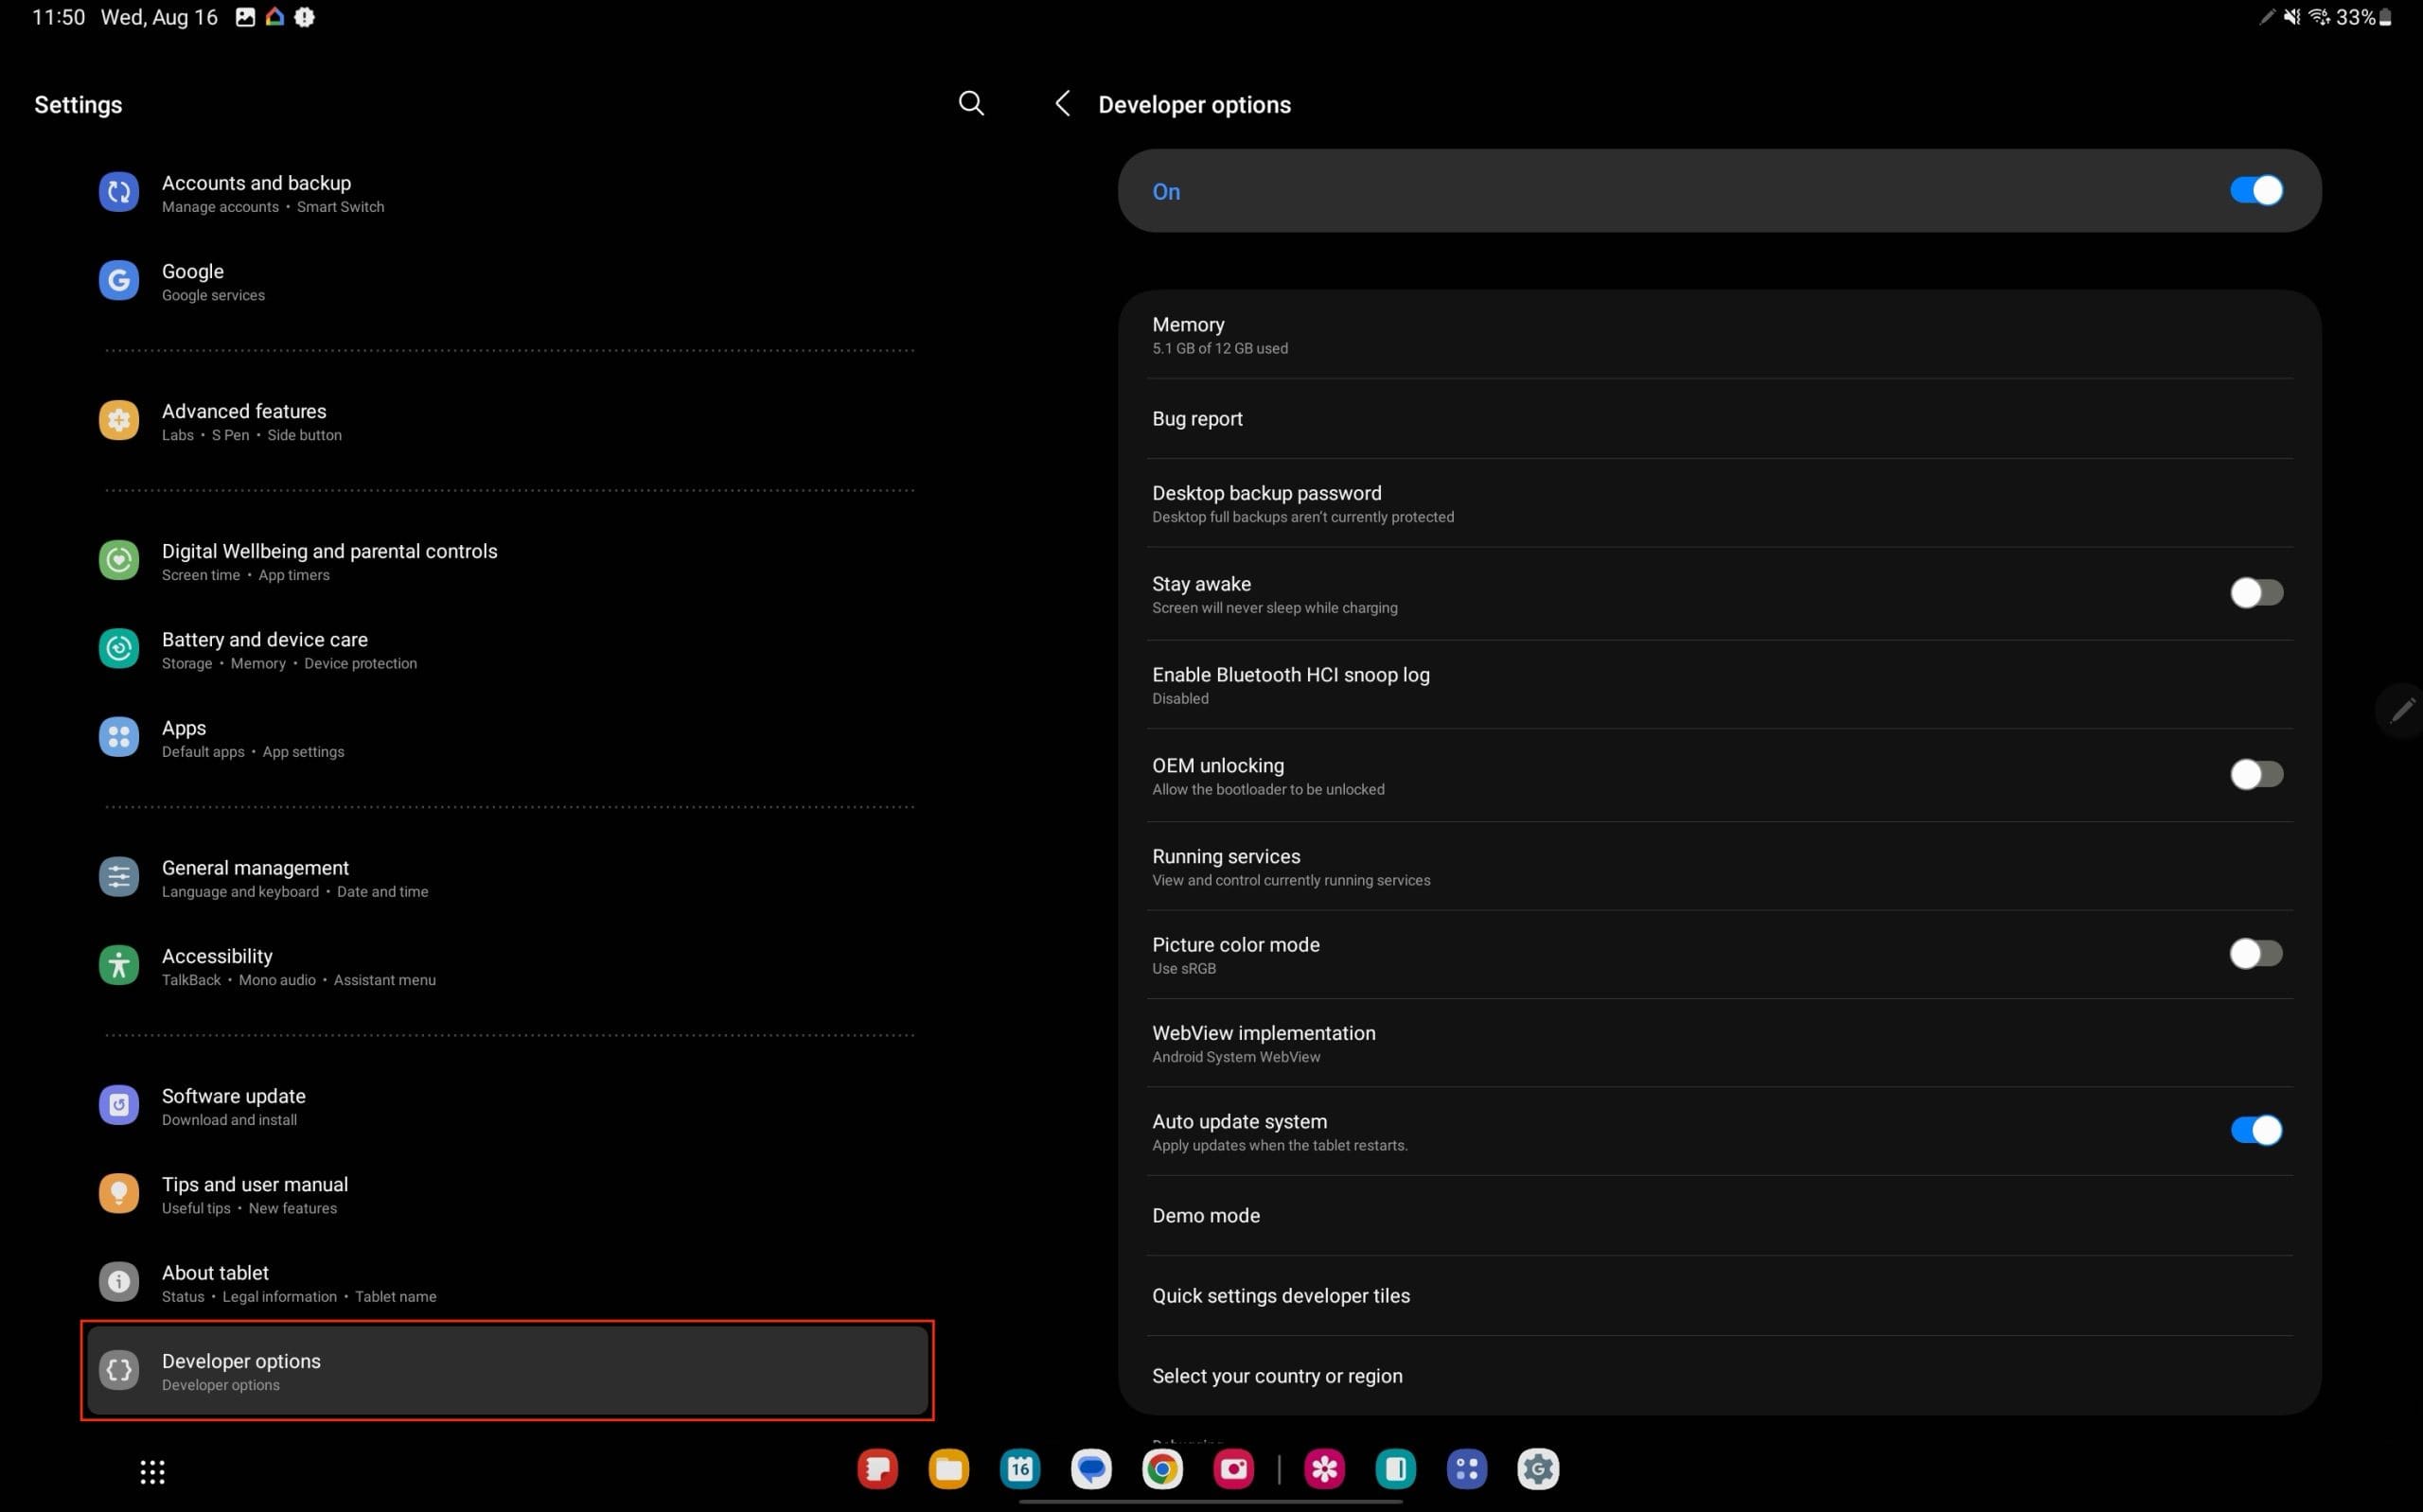
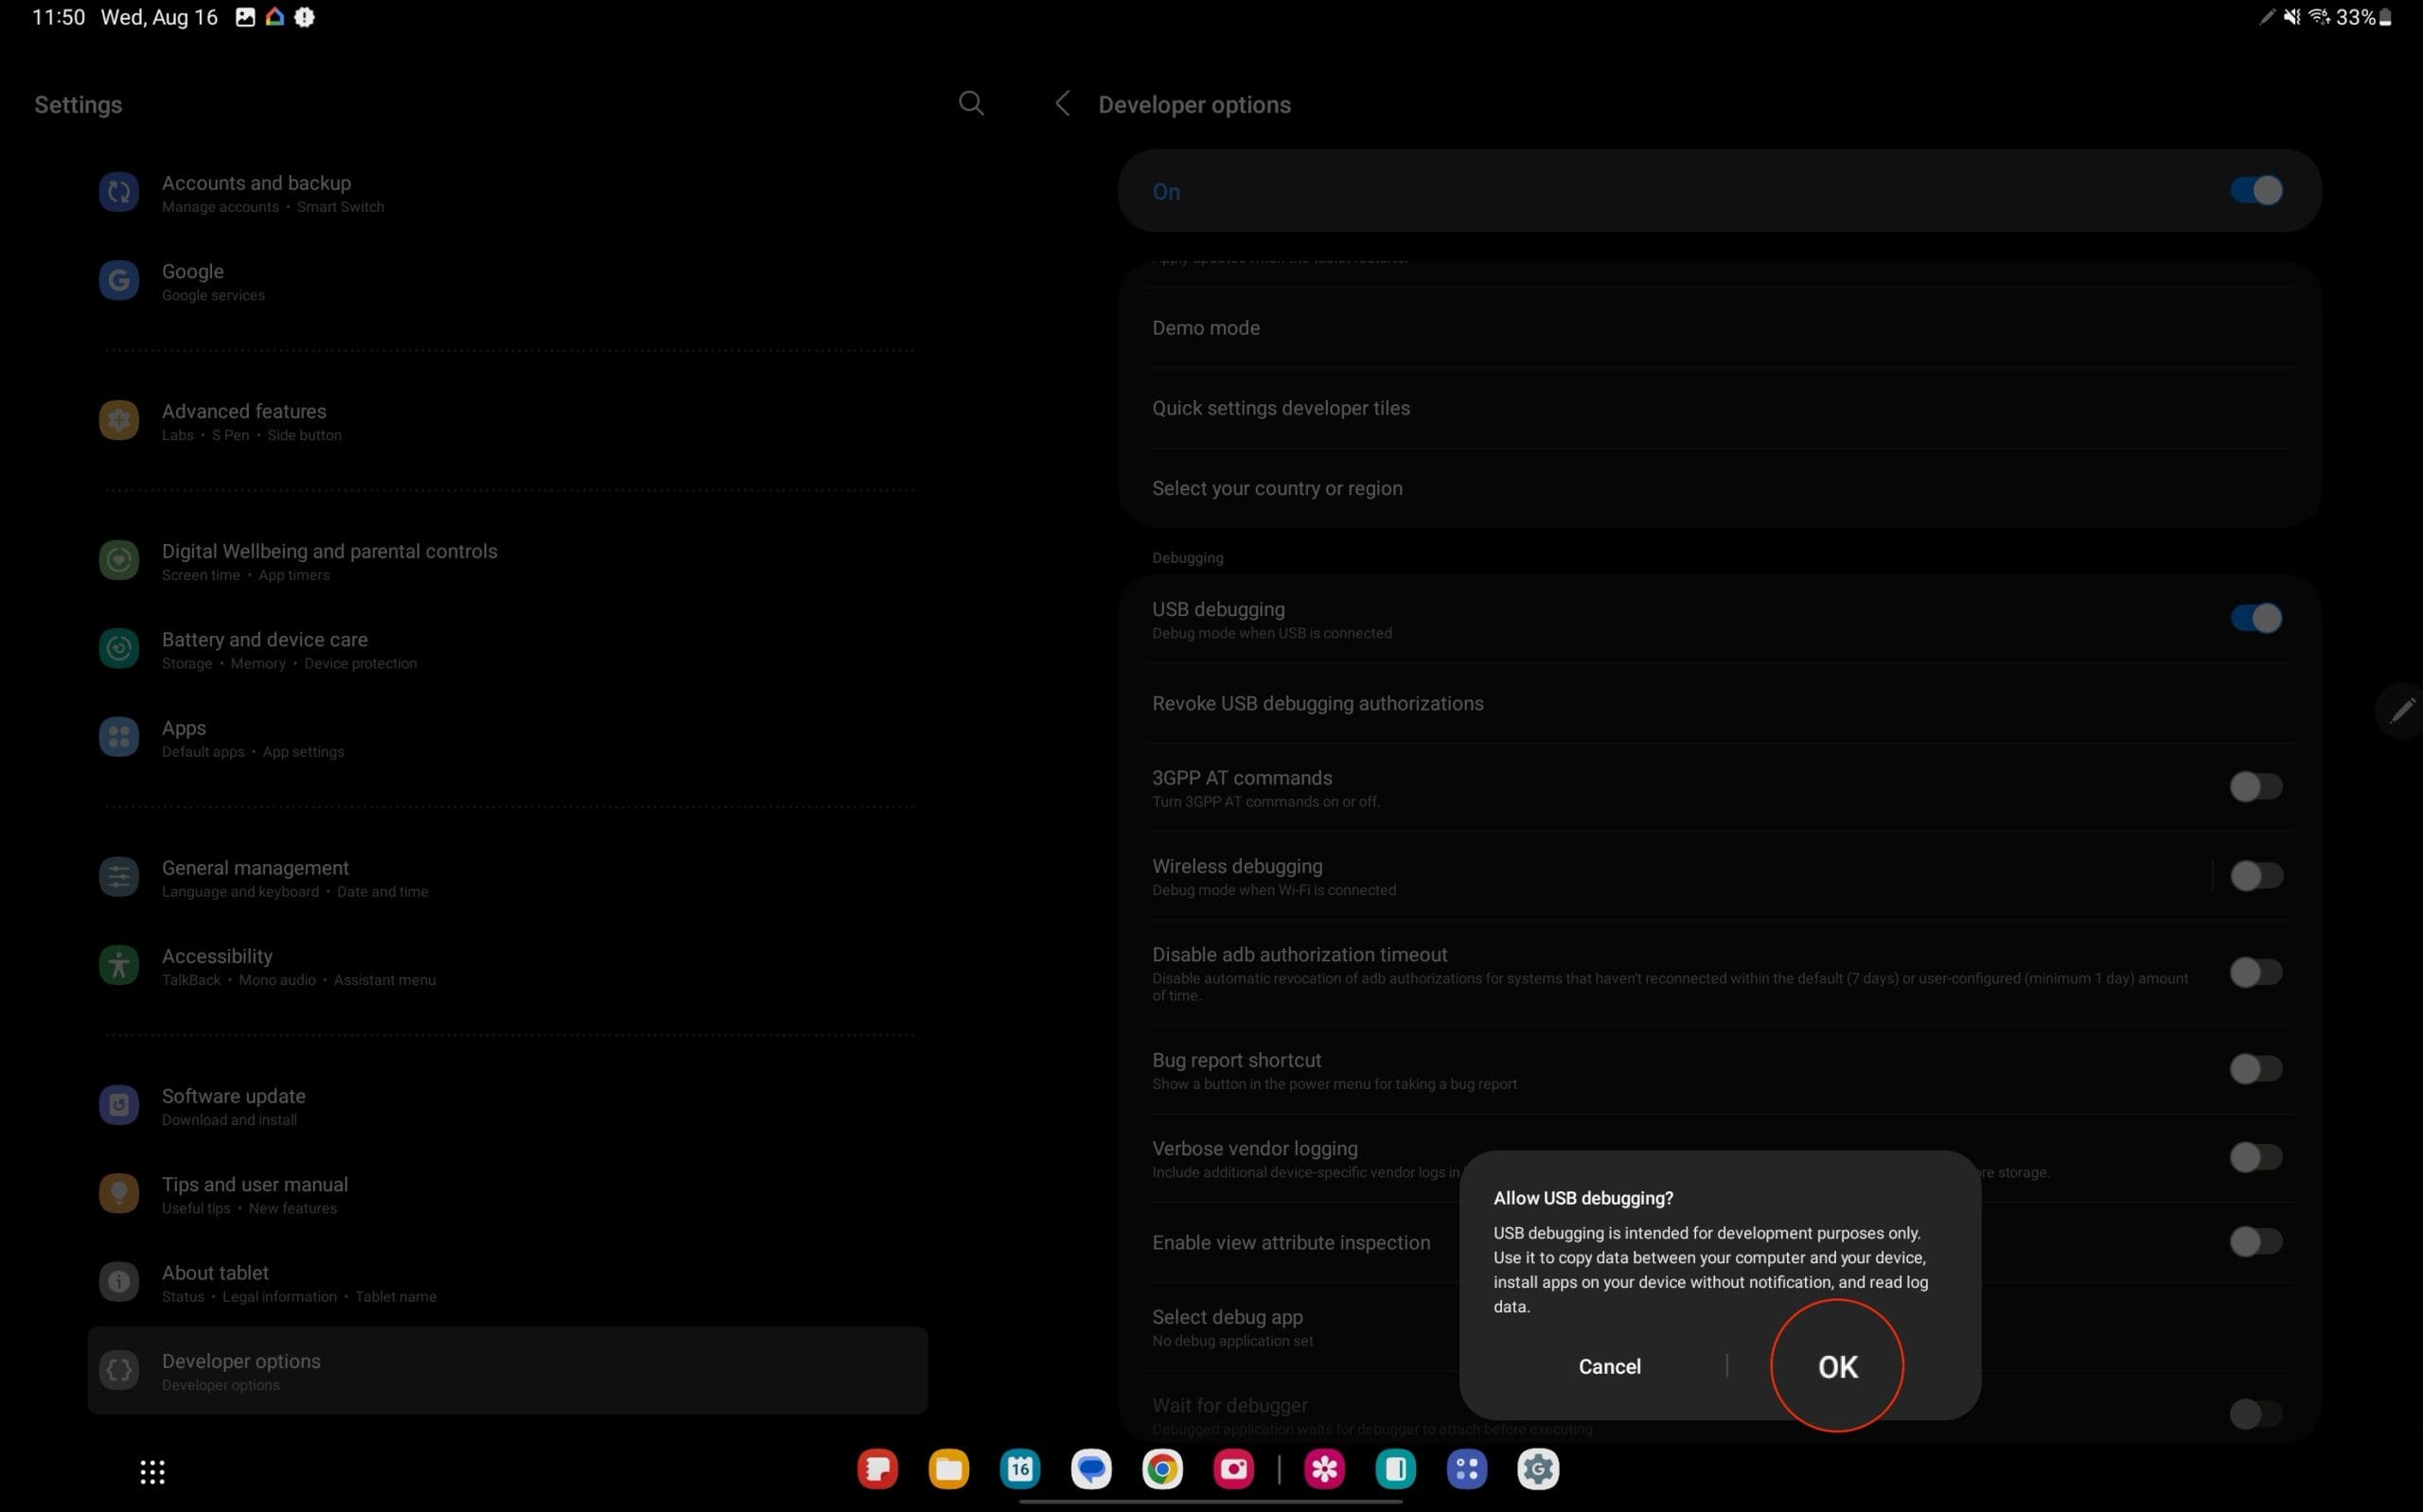
Step 2: Enable USB Debugging
- Go Back to ‘Settings’: Return to the main ‘Settings’ menu.
- Tap on ‘Developer Options’: This new option is now available at the bottom of the ‘Settings’ menu.
- Find ‘USB Debugging’: Scroll down to find the ‘USB Debugging’ option.
- Toggle the Switch: Tap the switch to enable USB Debugging.
- Confirm Your Choice: A warning will pop up. Tap ‘OK’ to confirm.

Potential Workarounds for Common Problems
Problem: Developer Options Not Appearing
- Solution: Make sure you tap ‘Build Number’ seven times. If it still doesn’t appear, try restarting your tablet.
Problem: USB Debugging Not Enabling
- Solution: Try a different USB cable or port. If the problem persists, restart your device and try again.
Problem: Computer Not Recognizing Device
- Solution: Ensure that the correct drivers are installed on your computer. Visit the Samsung website to download the latest drivers for the Galaxy Tab S9.
Advanced Uses of USB Debugging
1. Running Shell Commands:
USB Debugging allows you to run shell commands on your device from your computer. This can be useful for automation, scripting, and advanced troubleshooting.
2. Inspecting App Performance:
Developers can use USB Debugging to monitor the performance of their apps, identifying bottlenecks and optimizing resource usage.
3. Accessing Hidden Features:
Some hidden or experimental features in Android can be accessed through USB Debugging, allowing for customization and tweaking beyond standard settings.
Safety Considerations
Security Risks:
USB Debugging can pose security risks if left enabled, especially if you connect your device to an untrusted computer. Always disable USB Debugging when not in use.
Potential Damage:
Incorrect use of USB Debugging can lead to system instability or even permanent damage to your device. Always follow trusted guides and understand the commands and actions you are performing.
Troubleshooting Tips
Update Your SDK:
If you’re facing issues with USB Debugging, ensure that your Android SDK is up to date. Outdated SDK tools can lead to compatibility issues.
Use OEM USB Cable:
Always use the original USB cable that came with your device or a high-quality replacement. Cheap or damaged cables can cause connection issues.
Check USB Port:
Try different USB ports on your computer. Sometimes, specific ports may not provide a stable connection.
Conclusion
Enabling USB Debugging on the Galaxy Tab S9 opens up a world of possibilities for both developers and regular users. From app development to system-level customization, this feature is a gateway to deeper interaction with your device. Always remember that USB Debugging is a powerful tool, and it should be used with caution. When not in use, it’s wise to keep it disabled to maintain the security of your device.
This guide has aimed to provide a comprehensive overview of how to enable USB Debugging, why you might need it, and how to navigate potential problems. With careful consideration of the associated risks and a responsible approach, USB Debugging can be a valuable asset for any Galaxy Tab S9 user.
Disclaimer: Enabling USB Debugging and performing actions that require it can potentially harm your device if not done correctly. Always follow instructions carefully and consult professional support if needed. The author and this blog are not responsible for any issues that may arise from following this guide.


I did it but nothing worked…:(