• Skip to main content
  • Skip to primary sidebar

Technipages

Tutorials and fixes for smartphone, gadget, and computer problems

  • Topics
    • Android
    • Gaming
    • Hardware
    • Internet
    • iOS
    • MacOS
    • Office
    • Software
    • Windows
    • Definitions
  • Product Reviews
  • Downloads
  • About Technipages
Edge for Windows: How to Disable Microsoft Defender SmartScreen

Edge for Windows: How to Disable Microsoft Defender SmartScreen

By Mel Hawthorne 1 Comment

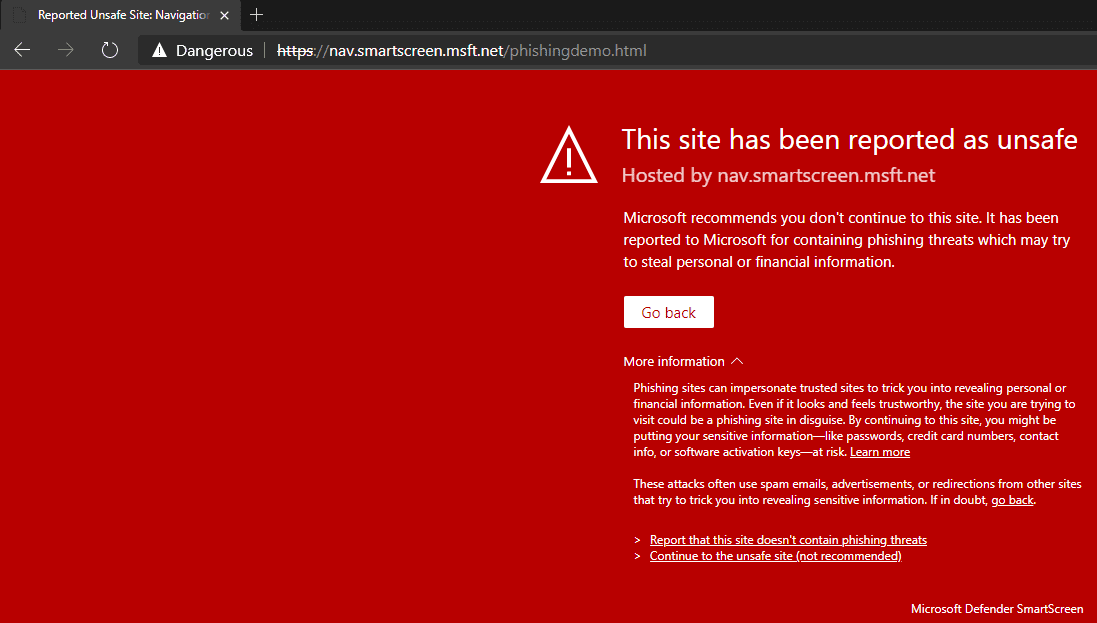
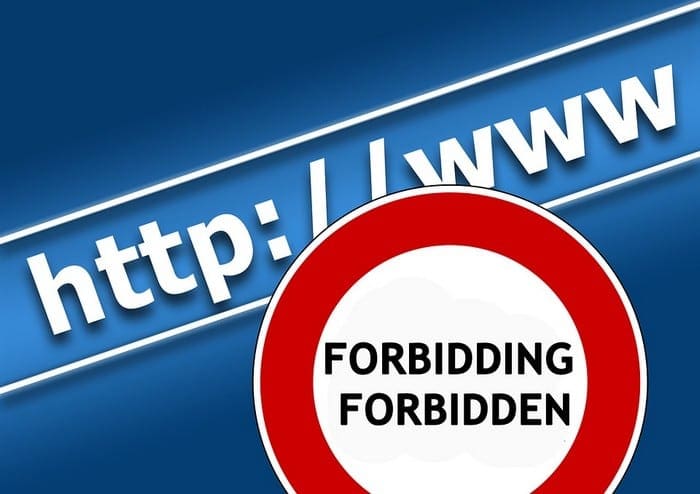
Microsoft Defender SmartScreen is a security service built into the Microsoft Edge browser. It’s designed to protect you against phishing and malware websites, malicious downloads, and potentially unwanted programs. The data for Microsoft Defender SmartScreen is taken from a range of sources, including intelligence modelling, data providers, and user feedback.

If you know that a webpage or download is safe, it is possible to bypass the warning messages, but you still may not want the feature. For instance, if you regularly access a website and have to click through warnings every time it can be annoying. Alternatively, you may have privacy concerns about the data that Microsoft gets and how they will use it.

Tip: In case you’re not aware, Microsoft Defender SmartScreen passes “relevant information about a URL or file” for the repudiation check. This data is then stored anonymously to contribute to Microsoft’s security services.

Thankfully it’s not too difficult to disable the feature.

Tip: If you’re using a corporate device that is managed then you may not be able to disable Microsoft Defender SmartScreen as it is generally a setting that would be enabled via group policy.

How to disable Microsoft Defender SmartScreen

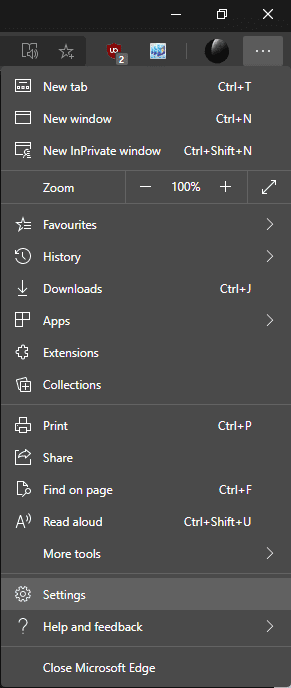
You can disable Microsoft Defender SmartScreen from Edge’s settings. To do so you first need to click the triple-dot icon in the top-right corner, then click on “Settings”, the third to last option in the dropdown menu.

Click the triple-dot icon in the top-right corner, then click on “Settings”.

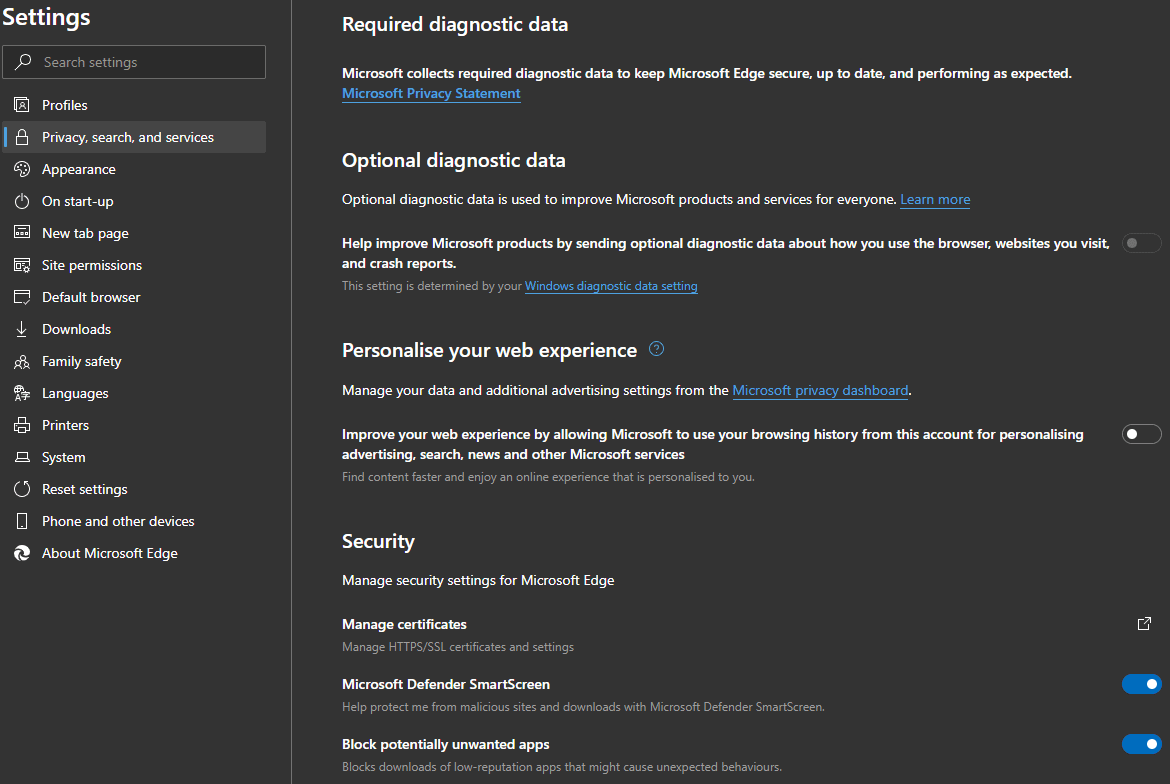
Once in Edge’s settings, switch to the “Privacy, search, and services” tab on the left, and scroll down to the “Security” section. In the “Security” section, you want to click the first slider, labelled “Microsoft Defender SmartScreen” to the “Off” position.

Tip: Disabling Microsoft Defender SmartScreen will also disable the feature below it “Block potentially unwanted apps”. If you later decide to reenable Microsoft Defender SmartScreen, you will have to manually reenable “Block potentially unwanted apps” too, as this isn’t done automatically.

In the “Privacy, search, and services” tab, click the click the “Microsoft Defender SmartScreen” slider to the “Off” position.

You Might Also Like

  • Windows 10: Enable/Disable Sample Submission for Windows Defender
    Windows 10: Enable/Disable Sample Submission for Windows…
  • How to Disable/Enable Crapware Blocker in Microsoft Edge
    How to Disable/Enable Crapware Blocker in Microsoft Edge
  • How to Enable and Disable Vertical Tabs in Microsoft Edge
    How to Enable and Disable Vertical Tabs in Microsoft Edge
  • How to Disable Restore Pages Prompt in Microsoft Edge
    How to Disable Restore Pages Prompt in Microsoft Edge
  • How to Fix Windows Defender Won't Start
    How to Fix Windows Defender Won't Start
  • Windows 10: How to Exclude a File From Windows Defender
    Windows 10: How to Exclude a File From Windows Defender
  • Fix: You Need a New App to Open Windows Defender Link
    Fix: You Need a New App to Open Windows Defender Link
  • Antivirus Comparison: Windows Defender Vs Avast
    Antivirus Comparison: Windows Defender Vs Avast
  • Block or Unblock Programs in Windows Defender Firewall
    Block or Unblock Programs in Windows Defender Firewall

Filed Under: Software

Reader Interactions

Comments

  1. Michael Martens says

    February 18, 2022 at 6:00 pm

    No help. Did all this and shut off everything else and still keep getting the unsafe site block. How do I stop this????

Did this help? Let us know!

Your email address will not be published. Required fields are marked *

This site uses Akismet to reduce spam. Learn how your comment data is processed.

Primary Sidebar

Recent Posts

  • Windows 11: How to Add Clocks with Different Time Zones
  • Google Assistant: How to Never Miss a Birthday
  • Windows 11: How to Disable Notifications and Ads
  • How to Use Oculus Quest 2 Air Link
  • How to Create an Avatar in the Oculus Quest 2
  • 5 Free and Fun Math Apps for Kids
  • Windows 11: How to Discover What Graphics Card You’re Using
  • How to Change Display Resolution on Windows 10 and 11

Who’s Behind Technipages?

Baby and Daddy My name is Mitch Bartlett. I've been working in technology for over 20 years in a wide range of tech jobs from Tech Support to Software Testing. I started this site as a technical guide for myself and it has grown into what I hope is a useful reference for all.

You May Also Like

  • Microsoft Windows NT
  • Microsoft Windows
  • Microsoft Windows 95
  • Microsoft
  • Microsoft Word
  • Microsoft Internet Explorer
  • Windows 95/98
  • Top 8 Itunes Alternatives for Windows

© Copyright 2022 Technipages · All Rights Reserved · Privacy