• Skip to main content
  • Skip to primary sidebar

Technipages

Smart phone, gadget and computer tutorials

  • Topics
    • Android
    • Gaming
    • Hardware
    • Internet
    • iOS
    • MacOS
    • Office
    • Software
    • Windows
    • Definitions
  • Product Reviews
  • Downloads
  • About
Click the “Show Me Personalised Ads” Slider to the “off” Position to Disable Ad Tracking.

Click the “Show Me Personalised Ads” Slider to the “off” Position to Disable Ad Tracking.

Posted on December 23, 2020 by Mel Hawthorne Leave a Comment

You can never be streaming 24/7, at some point you need some downtime, even if it’s only to sleep. During this time your Twitch channel just sits idly, not doing anything. While you could leave your page sitting on a banner image welcoming new viewers or informing visitors of when your next stream will start, you could instead choose to use your stream to support and promote other streamers too.

This process of using your channel to support other streamers is called “hosting” and it essentially plays someone else’s stream on your channel page. While you could choose to host other streamers manually, this would require you to regularly remember and require a stream you recommend being available at the right time. Instead, it’s easier to configure your channel to automatically host one or more channels whenever they are live and you are not.

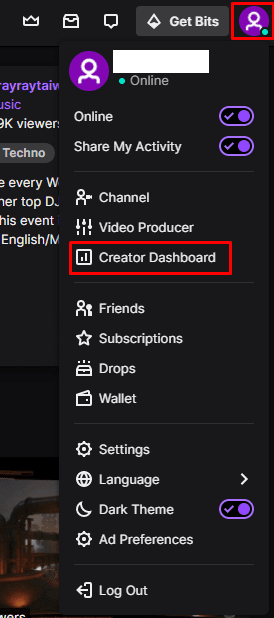
If you want to configure your channel to automatically host your friends’ streams when you’re offline, you can do so through the creator dashboard. To open the dashboard, click on your profile picture in the top-right corner, then click on “Creator Dashboard”.

Click on your profile picture, then “Creator Dashboard” to be able to configure restrictions on who can create clips of your channel content.

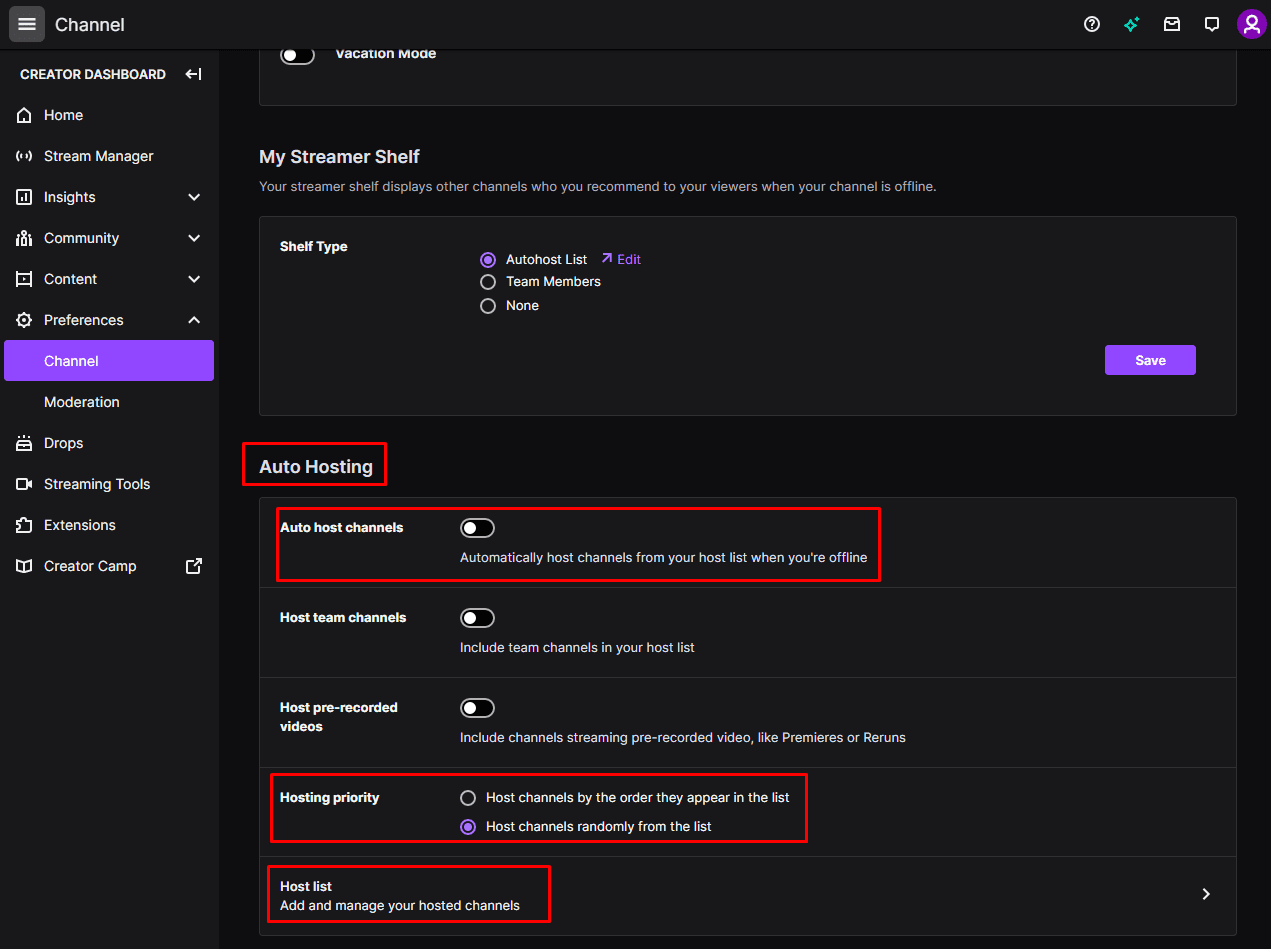
Once in the creator dashboard, expand the “Preferences” category in the left column, then click on “Channel” and scroll all the way to the bottom to the third to last section, titled “Auto Hosting”. To enable auto hosting, click the “Auto host channels” slider to the “On” position. For this to work though you need to add channels you want to host to your “Host list” and choose how you want to prioritise them.

To set your list prioritisation preference, use the “Hosting priority” setting to choose between “Host channels by the order they appear in the list” or “Host channels randomly from the list”. Once you’ve done this, click on “Host list” to manage the list of channels you will automatically host.

In the channel preferences, enable “Auto host channels”, choose your “Hosting priority”, then configure your “Host list”.

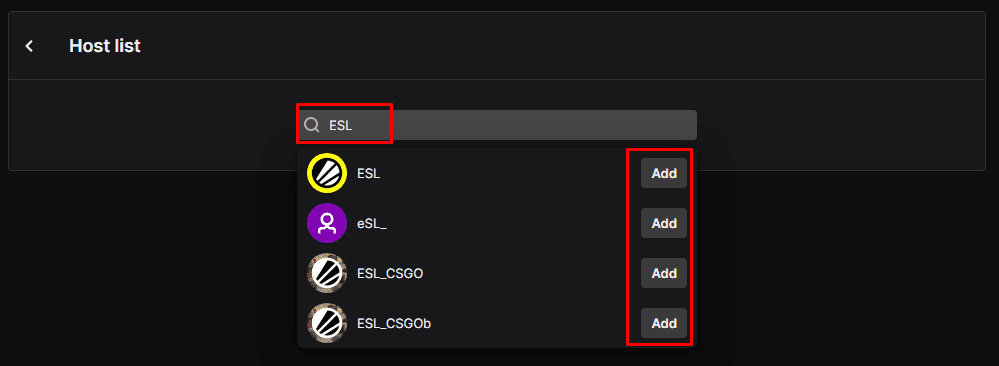
In the host list, search for the username of the channel or channels that you want to auto host, then click “Add” when you find them. If you chose to “Host channels by the order they appear in the list”, you should then click and drag the entries on your list to re-order them to your preference.

Search for the channels you want to auto host, then re-order them if you need to configure their priority.

You Might Also Like

  • Blocking Google From Tracking Your LocationBlocking Google From Tracking Your Location
  • Firefox for Android: How to Enable Tracking ProtectionFirefox for Android: How to Enable Tracking Protection
  • Installing Amazon Price Tracking Tools on macOSInstalling Amazon Price Tracking Tools on macOS
  • How to Use WhatsApp's Click to ChatHow to Use WhatsApp's Click to Chat
  • What to Do When the Left Click Mouse Button Won’t Work in Windows 10What to Do When the Left Click Mouse Button Won’t…
  • Microsoft Office 2010 "Click-2-Run configuration failure" ErrorMicrosoft Office 2010 "Click-2-Run configuration…
  • Linux Mint: How to Configure Left Mouse Button to Perform Right-ClickLinux Mint: How to Configure Left Mouse Button to…
  • Outlook 2019/365: Show BCC FieldOutlook 2019/365: Show BCC Field
  • How to Show Hidden Files in Windows 10How to Show Hidden Files in Windows 10

Filed Under: Internet

Reader Interactions

Did this help? Let us know! Cancel reply

Your email address will not be published. Required fields are marked *

This site uses Akismet to reduce spam. Learn how your comment data is processed.

Primary Sidebar

Recent Posts

  • WhatsApp Self-Destructing Messages: What You Need to Know
  • Spotify: How to Merge Playlists
  • Google Duo on Android: How To Add Automatic Captions To Video and Audio Messages
  • Slack: How To Disable Notifications for Threads You’re Following
  • Slack: How To Configure Your Status
  • Google Duo: How To Prevent Other People From Seeing Your Video Before They Pick up Your Call
  • Slack: How To Configure Notification Keywords
  • How to Tell If Your Phone Is Dual-SIM

Who’s Behind Technipages?

Baby and Daddy My name is Mitch Bartlett. I've been working in technology for over 20 years in a wide range of tech jobs from Tech Support to Software Testing. I started this site as a technical guide for myself and it has grown into what I hope is a useful reference for all.

Follow me on Twitter, or visit my personal blog.

You May Also Like

© Copyright 2021 Technipages · All Rights Reserved · Privacy