
Google Autofill is a framework introduced by Google, which assists users in filling out the required information for online forms. The service also works similarly to password managers, which means Google will remember your usernames and passwords for you and fill in your credentials when needed.
The Google Autofill service for Android OS is still very new, and there aren’t many apps that currently support this feature. But with the rate of technology these days, it probably won’t take long. In no time, apps will start supporting Google Autofill.
Contents
How Safe Is Google Autofill?
The short answer is “secure enough.” The long answer is “not as secure as it could be.” If you’re still on the fence about using Google Autofill, the best way to make up your mind is by checking if your Android OS version allows biometric authentication. Just recently, Google has added this extra level of security to authorize credit card payments and the submission of certain information. You also must be able to remember your three-digit security code for all credit card inputs.
Though this is, in fact, “secure enough” for some users, it doesn’t sell it for everyone. Be careful what you store in Google Autofill is the advice we give you.
How to Enable Google Autofill on Your Android
First, enable Google Autofill for apps. Google Autofill can be activated by taking the following steps:
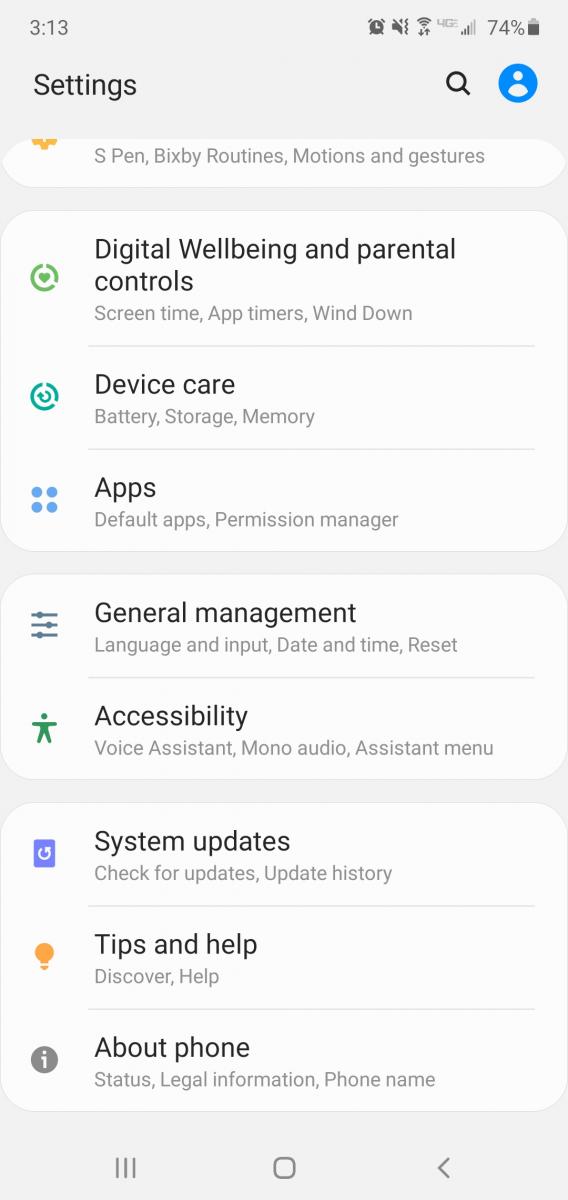
- Open Settings on your Android smartphone.
- Go to System or General Management, depending on your Android OS version.

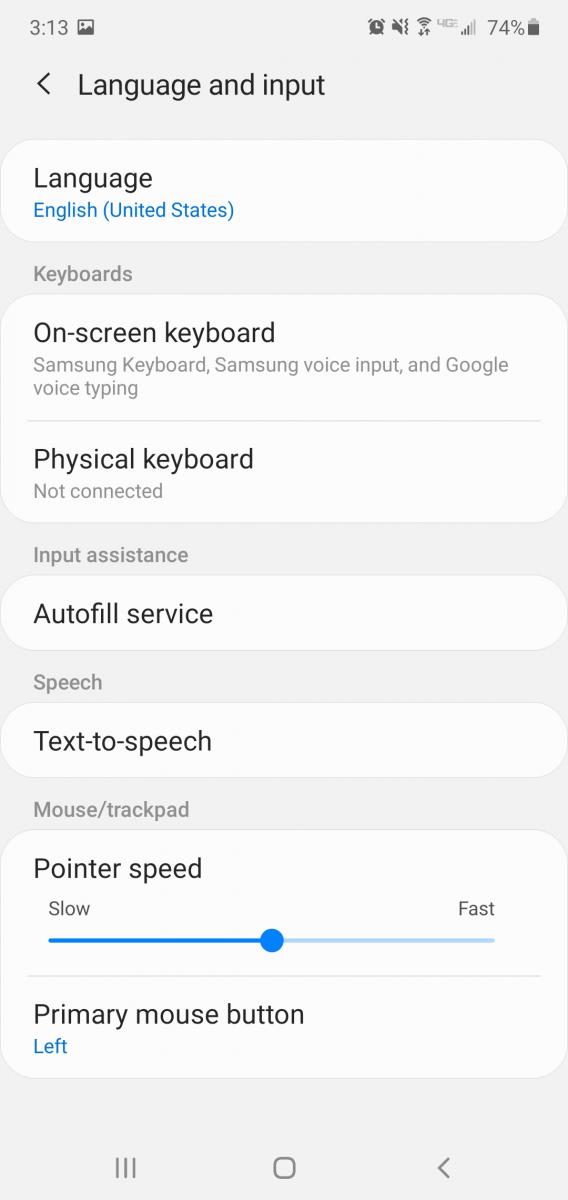
- Tap Language and Input.
- Then select Advanced Settings at the bottom.
- Choose Autofill Service.
- Lastly, select Autofill with Google.
After doing this, whenever you log in to any app for the first time on your phone, you will be prompted to save your login details. The same goes for address and credit card information. You simply have to click on ”save” to enable Google Autofill to keep your data.
The next time you want to login to that app, your details will automatically fill in. Also, whenever you want to fill in your personal information on any website on your Android phone, your data will be automatically filled into the provided spaces.
How to Change Your Autofill Account Information
If you need to change your Autofill information — say you moved or had to change a password — you can easily update it without encountering any difficulty.
- Navigate back to Autofill Services by way of your Android’s settings. Feel free to refer to the steps in “Enable Google Autofill on Your Android.”
- Then tap on Settings next to Google Autofill. Your phone will prompt you to fill in all the required information. This will become your new default info.
- Fill in your Google email, personal information, address, credit card details, and anything else you’d like this feature to remember for you.
Whenever you wish to make changes to any of your information, simply follow the same process. With this, you have the opportunity to change your Google Autofill account settings on your Android phone.
Google will also remember Autofill information from different accounts, as well. Just make sure that you have saved that information when logged into one of your other Google Accounts.
How to Delete Your Autofill Information (Data) on Android
As easy as it is to edit your Autofill information, it is just as easy to delete it. Whether it’s paranoia or a general dislike of Google holding onto your data, wipe it away with a few simple steps.
- Go to Settings > System.
- Tap Language and Input and click on Advanced.
- Select Autofill Service and choose Settings next to Google Autofill.
- Tap on Personal Information.
- On the next screen, choose the pencil icon and delete the information. Tap OK to complete the process.
- You can follow the same steps for Address and Payment Methods as well.
- Under Passwords, select the website you want to make changes to or click on Delete. Then confirm by tapping Delete a second time on the message displayed.
You will now be back in manually entering form information when it is required from you.
Wrapping Up
People have so many usernames and passwords these days. It’s hard to keep track of them all. Not to mention, the pen and paper trick never seems to work — someone always manages to throw it away. But thanks to Google Autofill, there’s no more stress over having to remember every last unique character, case sensitive letter, or underscore! You also don’t have to take out your credit card every time you make an online purchase from your Android smartphone. Just remember, if you think Google Autofill is getting too acquainted with your information, you can always delete it.