• Skip to main content
  • Skip to primary sidebar

Technipages

Tutorials and fixes for smartphone, gadget, and computer problems

  • Topics
    • Android
    • Gaming
    • Hardware
    • Internet
    • iOS
    • MacOS
    • Office
    • Software
    • Windows
    • Definitions
  • Product Reviews
  • Downloads
  • About Technipages
Bitwarden: How to Create a New Folder

Bitwarden: How to Create a New Folder

Posted on May 6, 2021 by Mel Hawthorne Leave a Comment

You can choose to just enter all of your account credentials and card details in your password manager and never sort them beyond their individual names. This is a perfectly legitimate way to use a password manager and can be perfectly functional given the search functions that are generally included.

However, it can be a good idea to sort your entries into some sort of folder structure. This way, you can keep your work accounts and personal accounts separated. You can also use this to keep entries related to each other together, such as all of your social media logins.

How to Create a New Folder in the Bitwarden Browser Extension

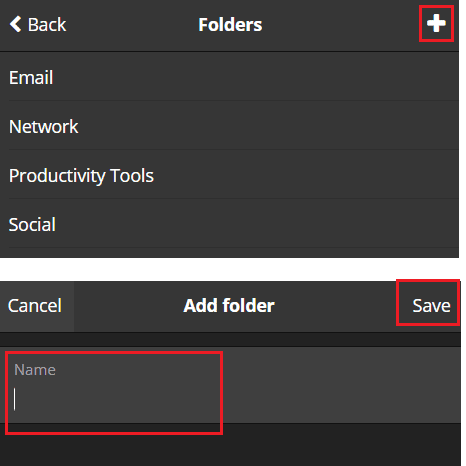
To create a new folder in the Bitwarden browser extension, open the extension pane by clicking on the Bitwarden icon, then switch to the “Settings” tab, and click “Folders.”

Click on “Folders” in the “Settings” tab of the extension pane.

In the top-right corner of the folders list, click the “Add” icon to create a new folder. Then enter the name you want to use and click “Save.”

Click the “Add” icon in the top-right, then type the name you want to give the new folder and click “Save.”

Tip: The folders you create on one platform will be available across all platforms. The change may take a short while to change. However, changes to your vault are not pushed and will instead be automatically synced occasionally.

How to Create a New Folder on the Bitwarden Website

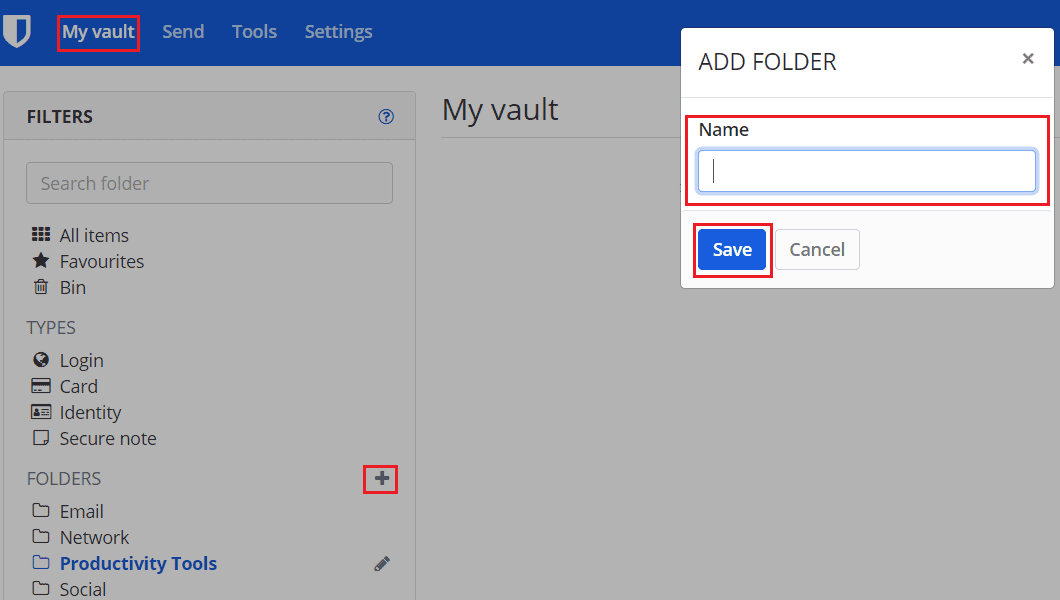
To create a new folder on the website, click on the “Add” icon next to the “Folders.” Then, head into the “Filters” bar on the left of the default “My vault” tab. Next, in the popup, type the name of the folder you want to create, then click “Save.”

Click on the “Add” icon next to “Folders” in the “Filters” list on the “My vault” tab, then enter the name of the folder you want to create and click “Save.”

Creating folders can help you organize your password manager and verify that you don’t have any duplicate entries causing issues. By following the steps in this guide, you can create a new folder in Bitwarden.

You Might Also Like

  • Bitwarden: How to Edit or Delete a Folder
    Bitwarden: How to Edit or Delete a Folder
  • How to Create an Invisible Folder in Windows 10
    How to Create an Invisible Folder in Windows 10
  • Microsoft Teams: Cannot Create New Folder in Files
    Microsoft Teams: Cannot Create New Folder in Files
  • Fix: Can't Create OneDrive Folder in the Selected Location
    Fix: Can't Create OneDrive Folder in the Selected Location
  • Microsoft Outlook: How to Create and Erase a Folder
    Microsoft Outlook: How to Create and Erase a Folder
  • Google Drive: How to Easily Create and Share a Folder
    Google Drive: How to Easily Create and Share a Folder
  • How to Easily Create a Locked Folder in Google Photos
    How to Easily Create a Locked Folder in Google Photos
  • Windows: Create Command Prompt That Opens To Specific Folder Location
    Windows: Create Command Prompt That Opens To Specific Folder…
  • Bitwarden: How to Change Your Name
    Bitwarden: How to Change Your Name

Filed Under: Internet Tagged With: Passwords

Reader Interactions

Did this help? Let us know!

Your email address will not be published. Required fields are marked *

This site uses Akismet to reduce spam. Learn how your comment data is processed.

Primary Sidebar

Recent Posts

  • Windows 11: How to Add Clocks with Different Time Zones
  • Google Assistant: How to Never Miss a Birthday
  • Windows 11: How to Disable Notifications and Ads
  • How to Use Oculus Quest 2 Air Link
  • How to Create an Avatar in the Oculus Quest 2
  • 5 Free and Fun Math Apps for Kids
  • Windows 11: How to Discover What Graphics Card You’re Using
  • How to Change Display Resolution on Windows 10 and 11

Who’s Behind Technipages?

Baby and Daddy My name is Mitch Bartlett. I've been working in technology for over 20 years in a wide range of tech jobs from Tech Support to Software Testing. I started this site as a technical guide for myself and it has grown into what I hope is a useful reference for all.

© Copyright 2022 Technipages · All Rights Reserved · Privacy