Password managers are generally relatively easy to maintain. Just make sure that whenever you create a new account or change a password, that you also update the password manager. This can generally even happen automatically if you use the browser extension that your password manager offers.
It’s not so easy to maintain your vault if you have two password managers, or two accounts with one platform. If you’ve got duplicated entries, then you have to make sure that both will be changed. Even if you’ve only got an entry in one, you have to remember which one has which entries – not exactly convenient. If you have two accounts with the same provider, you may not even be able to be logged into both accounts at the same time.
When you’re in this situation, it’s easier to merge your two password vaults into one. If you choose to close your Bitwarden account, or if both of your accounts are with Bitwarden, you may want to use the export feature. Exporting your vault allows you to download a local copy of your password vault data. You can then upload it to password managers that support this. Exporting and then importing your password vault data can save a lot of time over copying the data manually.
How to export your Bitwarden vault
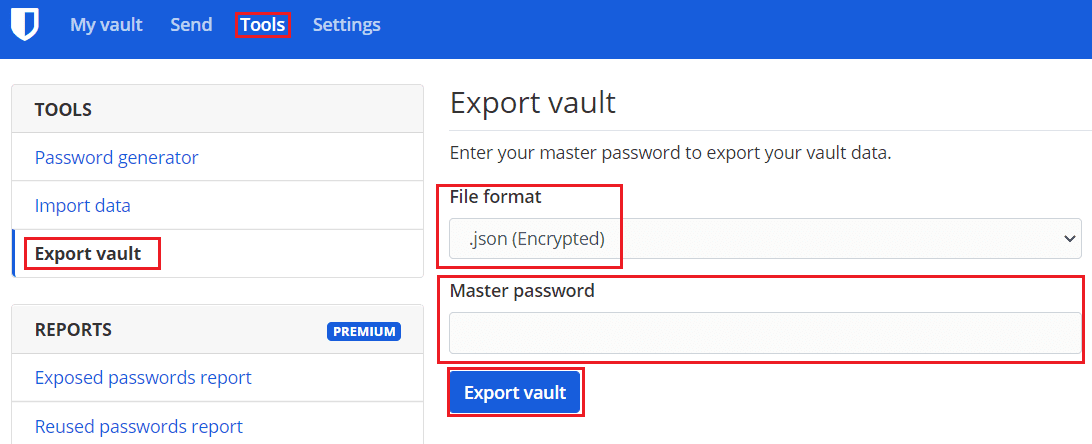
To be able to export the data from your Bitwarden vault, you need to sign into the Bitwarden web vault, which can be found here. Once you’re signed in, switch to the “Tools” tab, then select the “Export vault” tool in the left column.
Before you export your vault, it’s important to know what file formats your new password manager accepts. Bitwarden allows you to export your vault as a CSV, JSON, or encrypted JSON file. If it’s a supported option, we highly recommended that you use the preferred “.json (Encrypted)” format. Using the encrypted version means your data will never be stored in plaintext and will never be vulnerable to hackers. If your new platform doesn’t support this import option, you will have to choose from one of the two unencrypted options.
Tip: We recommend that you keep the unencrypted version of your vault saved on your device for as little time as possible. While it is unencrypted, it is vulnerable to hackers. Import your vault export as soon as you can, and then delete the vault export from your computer.
Once, you’ve chosen an export format, enter your master password to confirm that you are the legitimate account owner, and then click “Export vault”.
Exporting your password vault is an incredibly convenient way to be able to merge two vaults. It’s also useful if you want to switch password managers. By following the steps in this guide, you can export your Bitwarden password vault.