When the time comes to create a resume or update the one you already have, there’s no need to pay for one. Microsoft Word has various templates you can use and for free. With a few clicks here and there, you can choose from a large variety of good-looking templates.
Each resume has its name below it. Some templates are colorful and include images, while others keep it simple. With so many models to choose from, you won’t have a problem finding one that fits your style. Happy job hunting!
Word for Office 365
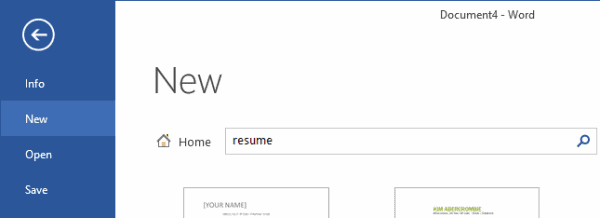
The latest version of Microsoft Word surely has the resume template you’re looking for. The template styles are not in plain sight when you open Word, so you’ll need to click on the New option to the left and then type resume in the search bar.
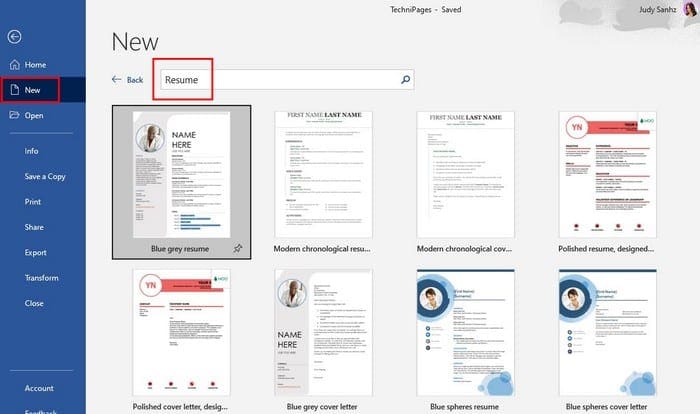
Scroll the many resume templates and click on the one you like. If you see more than you want to keep when you think it’s time to change the style, you can click on the pin icon at the bottom right, and the next time you open Word, it will be at the top for an easy find. After clicking on your preferred model, it won’t open immediately; rather, it will show it to you one more time in preview mode. Click on the Create option, and the template will start to download.
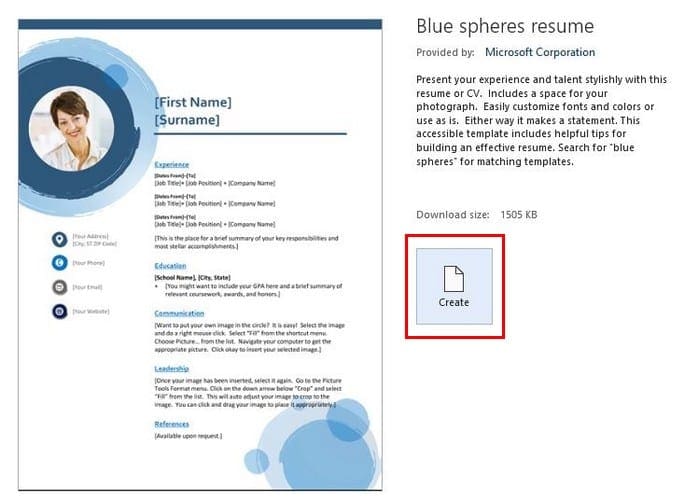
As you can see in the image above, I chose the Blue spheres resume model. Right below the template’s name, Word shows you a brief description of what the template has to offer.
The next step is to fill in the areas the resume has to offer. If the resume template you chose doesn’t have the section names you need, you can easily change it by clicking on the text and typing something new. Don’t worry about accidentally choosing a different font or color. What you type will be in the same color and font displayed in the template.

To the right of the template, you’ll also see a resume assistant. Click on the Get Started button. The assistant will ask you to enter what kind of position and industry you’re interested in and then show you some work experience examples.

Keep scrolling down, and you’ll also see the top skills you need for the position you want. For example, if you’re looking for a job as a secretary, the top skills you’ll need for that position are knowing how to use Microsoft Word, QuickBooks, Microsoft PowerPoint, etc.
Keep scrolling, and you’ll even be show articles that will help you write your resume since there are just things that should not be included. Your future employer might not care that you can eat a pound of gummy bears in 10 minutes. If, after checking all of this out, you want to let recruiters know you’re open for business, you’ll also see a link to go to LinkedIn.
You can also use everything Microsoft Word has to offer to add to your resume if you feel it’s necessary to add something else.
Word 2016
- From the “New” menu (“File” > “New“), type “Resume” or “CV” in the search box, then press “Enter” to search.

- Select a template that fits what you like (or what your potential employer will like).
- Select “Create” to download the template.
- Your resume will be created. From here just fill in the items with brackets with your information.
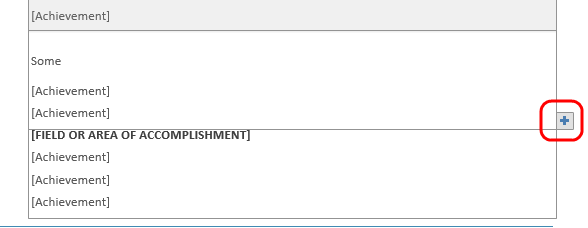
- Some areas may have a plus sign (+) where you can add additional sections.
You’re ready to start editing and creating your new resume.