The winload.efi file is one of the crucial background files that the operating system uses during the bootup process. If the file becomes corrupted, the system can’t start normally and you’ll get a screen similar to the previous “blue screen of death,” which also limits troubleshooting. Here’s what to do if you get the winload.efi file missing error on boot.
Contents
Fix 1: Disable Secure Boot
In most cases, Secure Boot will be enabled by default for newer devices, but Windows 11 technically doesn’t need it and the system may have inadvertently blocked the file during the booting process. Disabling this might resolve the error.
Step 1. Enter BIOS. You can do this by pressing the button that displays on the screen when the system is first booting up (Escape, Delete, or one of the F keys). Alternatively, if you can load into the Windows Recovery environment, you can go to “Troubleshooting,” then to “Advanced settings,” and select “UEFI Firmware Settings.”
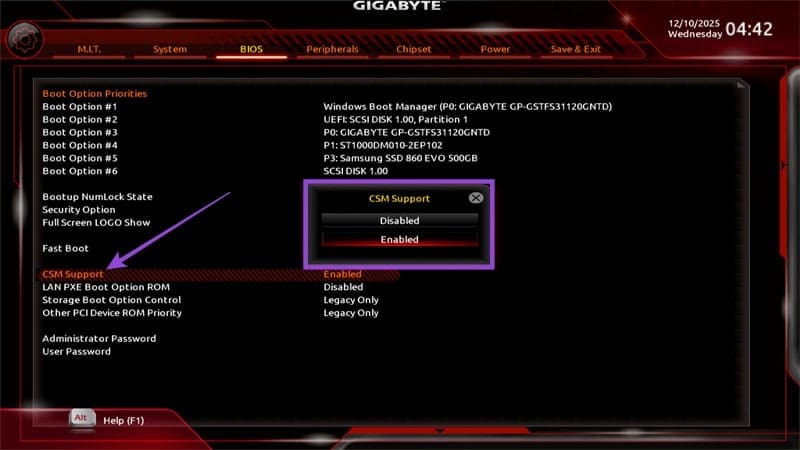
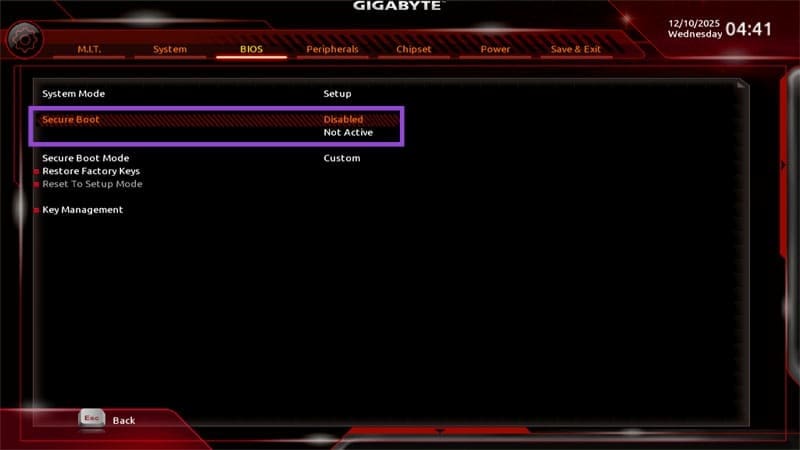
Step 2. In the BIOS, find the option “Secure Boot.” Some motherboards might have the option hidden under “CSM Support,” which might need to be disabled.
Step 3. Disable Secure Boot or something similar. You may need to refer to your motherboard’s FAQ to determine where this is located.
Step 4. Click on “Save and Exit” which will restart the PC.
Fix 2: Rebuild the BCD Store
The BCD system itself is a core part of Windows and is located on the stock Windows installation media. For this to work, you’ll need to create a bootable Windows USB and insert it into the PC, which will act as a Windows recovery system. This can get you the winload.efi BSOD fix by creating new files from the USB’s installation.
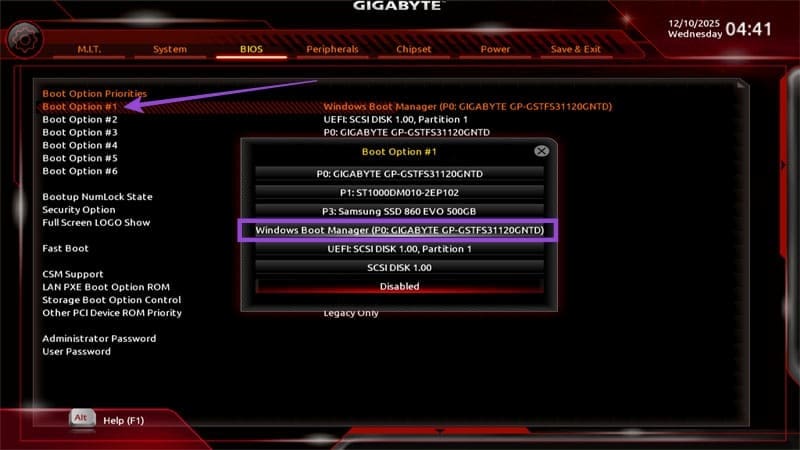
Step 1. Insert your USB. Go into BIOS and make sure that the USB drive or the Windows Boot Manager is the first bootable device.
Step 2. When you start the PC (again) you should get a Windows Installation prompt. Click on “Next” and select “Repair your computer” on the bottom of the installer. This should automatically open the Command Prompt.
Alternatively, you can open the Windows Recovery Environment by repeatedly restarting your PC, which will open the Advanced Startup options. In there, choose “Troubleshoot,” then “Advanced settings,” and select “Command Prompt.”
Step 3. In the Command Prompt, run the following commands one by one:
Bootrec /FixMbr
Bootrec /FixBoot
Bootrec /RebuildBcd
Step 4. If these commands failed, try the following combination:
bcdedit /export C:\BCD_Backup
c:
cd boot
attrib bcd -s -h -r
ren c:\boot\bcd bcd.old
bootrec /RebuildBcd
Step 5. Exit the Command Prompt, then restart Windows. Remove the USB or decline Windows installation if prompted.
Fix 3: Run the Disk Checker (CHKDSK)
If you can’t boot into Windows to use the Disk Checker utility, you can use the same trick as in Fix 2 to start it via the Windows Recovery Environment.
Step 1. Go into the Command Prompt from WindowsRE or Advanced Start.
Step 2. Enter the following commands:
Sfc /Scannow /OFFBOOTDIR=C:\ /OFFWINDIR=C:\Windows
chkdsk C: /f
Notably, you may need to change the Windows directory (in the command listed as “C”) to another one, such as D, depending on how your system is set up.
Fix 4: Use Third-Party Tools
In some cases, you can use third-party boot recovery programs, which usually have self-contained installers and can run from a USB stick (much like in previous fixes).
However, make sure to research these tools a bit and check their ratings and reviews. Some tools might not do anything, but others may be actively harmful.