Windows 10 users rarely use Quick Searches. As a matter of fact, many users would gladly disable this annoying feature. Unfortunately, finding a straightforward method to do that is not easy.
That’s why we created this guide. We’ll show you what steps you need to follow in order to disable Quick Searches on your computer.
The method we’re suggesting involves removing Bing from Search using the Registry Editor.
Steps to Disable Windows 10 Quick Searches
- Go to the Windows search bar and type regedit.
- Double-click on the Registry Editor.
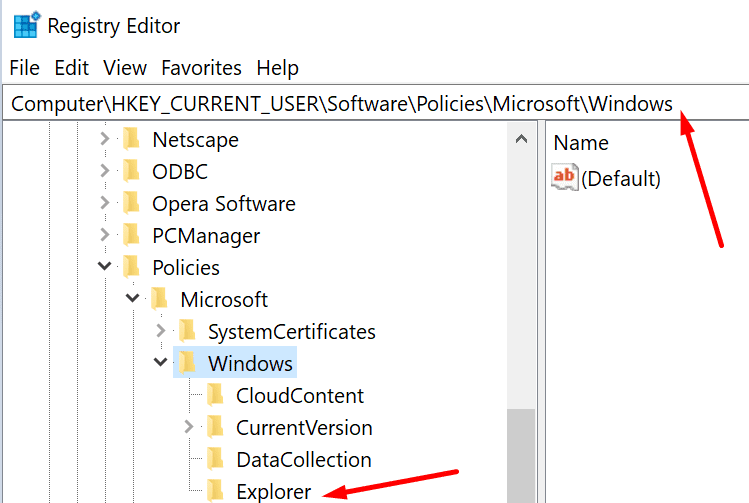
- Then navigate to the following path: Computer\HKEY_CURRENT_USER\SOFTWARE\Policies\Microsoft\Windows\Explorer.
- Right-click in the right pane and select New > DWORD (32-bit) Value.
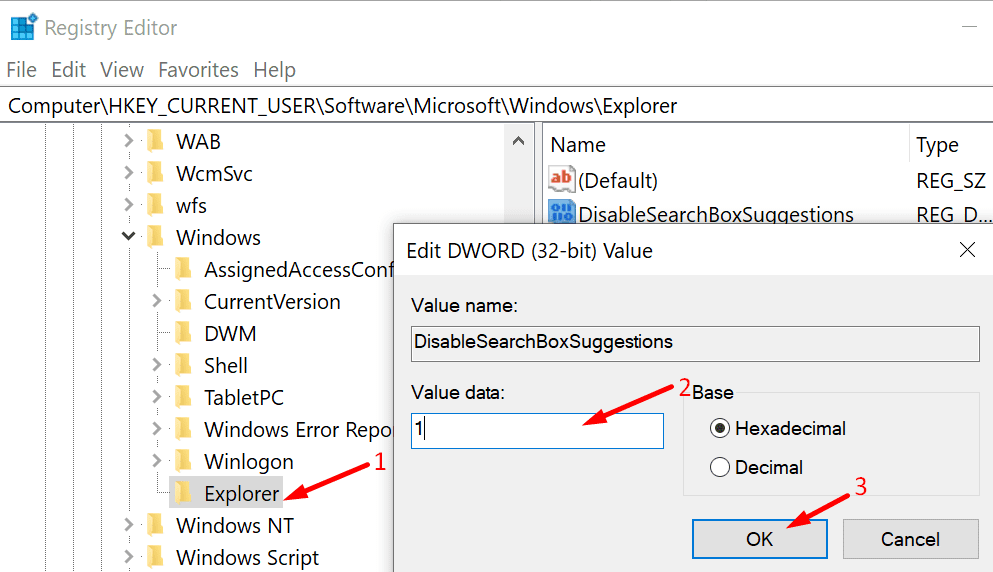
- Name the new value DisableSearchBoxSuggestions.
- After you created it, double-click on it.
- Edit its value data from zero to 1.
- Then restart your computer to apply the changes.
If you can’t find that path on your computer, this indicates you’re running an older Windows 10 version.
Here are the steps to follow for Windows 10 November 2019 update and older:
- Go to the Windows search bar and type regedit.
- Double-click on the Registry Editor.
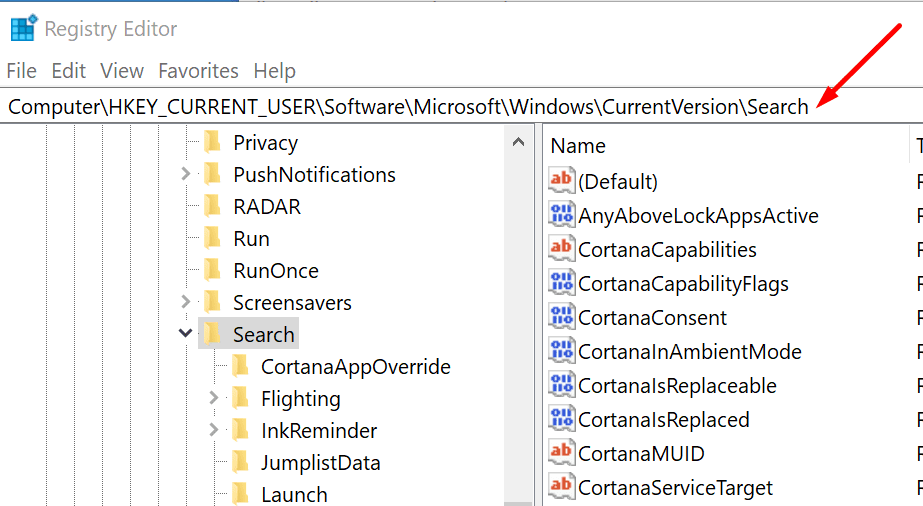
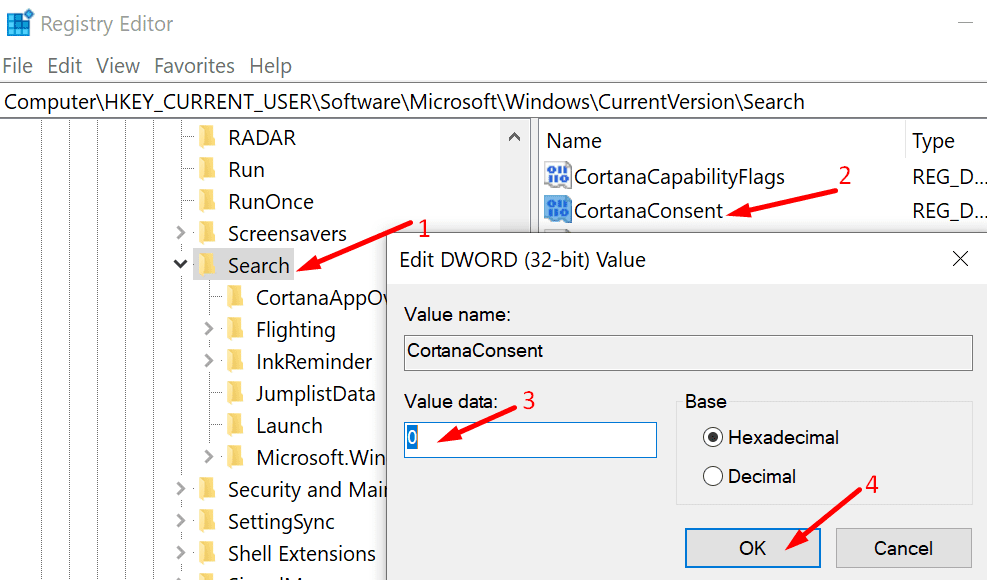
- Now, go to the following path: Computer\HKEY_CURRENT_USER\Software\Microsoft\Windows\CurrentVersion\Search
- Right-click on the Search key.
- Select New > DWORD (32-bit) Value.
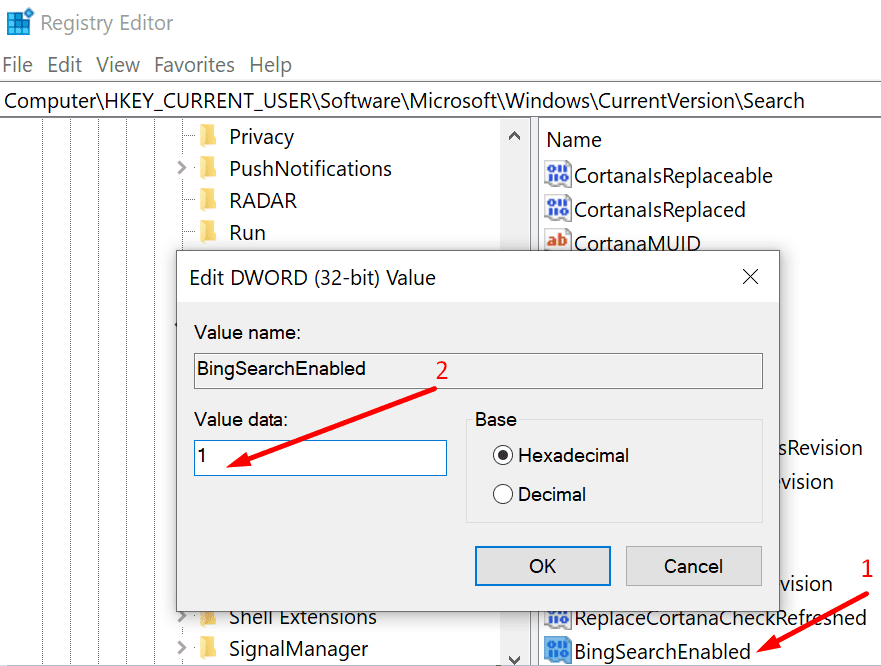
- Next, create a new value and name it BingSearchEnabled.
- Double-click on BingSearchEnabled and edit its value from zero to 1.
- Locat the CortanaConsent key. It should be visible under BingSearchEnabled.
- Double-click on it and edit the value data from 1 to 0 (zero).
- Note: If the CortanaConsent key is not visible, create it yourself. Right-click on BingSearchEnabled and select New > DWORD (32-bit) Value. Then name the new key CortanaConsent and set its value to zero.
Conclusion
Disabling Bing Search should be enough to get rid of Quick Searches. In other words, Windows 10 will no longer annoy you with web results you’re not really interested in.
Let us know if you managed to disable Quick Searches using the method described above. Hit the comments below.
Gayle says
This worked, but I had to modify things a little. I used the second pathway. I created the BingSearchEnabled, but there was no way to create CortanaConsent by right clicking on BingSearchEnabled. The only function that pops up if I right click on BingSearchEnabled is to modify the value.
So I created CortanaConsent by right clicking on Search again, and then made sure that both values were set to zero and the annoying quick searches has vanished! No need to restart.
Thank you!!!!
Lauri Malone says
Also, the BingSearchEnabled Dword is in the search key. It is not the container for CortanaConsent, and so I created it as a DWord at the same level as BingSearchEnabled. . Trying it now.
Lauri Malone says
Nope. Neither specified path exists.
Tom says
Thanks for this! I followed the instructions for the newer version of Windows. The Explorer key mentioned in step 3 didn’t exist, so I just recreated all the settings you did from there and it worked after restarting.
Shannon Richards says
Thank you! After spending several hours of searching and trying a lot of different things, this worked.
None of the other websites said to go to POLICIES before going to Windows nor to go to SOFTWARE. These are crucial steps.
Just WHY can’t Microsoft give us a button/link to click that turns this feature off? I suppose it’s all about power and money and screw the user.
Is there a way to turn off Edge completely?
TorQueMoD says
Doesn’t work as of May 29th 2022.and Windows 19044.1706
wishbone says
method 2 worked but the value for bingsearchenabled needs to be 0 not 1
Chris says
Nope, I just want to remove Coronavirus Trends from quick search nothing else
Les Papp says
I just tried this method, and it still works in the latest build 21H2 of Win10, though the Registry Value for BingSearchEnabled does need to be 0 not 1, (1 is true, enabled, 0 is false, disabled)
Ryan says
Build 19044 – this no does NOT work
yoyomah says
The first poster is correct it should be left “0”. I used the second method and it worked!
Steve Bennett says
The second method works, but there is an error: BingSearchEnabled should be set to 0, not 1. Then it works.
bob davis says
in the first one i have no explorer
using second method just didnt work please help me get rid of this annoying quick searchs
Denny Davis says
Neither one worked for me. In the first one “Explorer” was not there. In the second one there was no CortanaConsent and when I clicked on the BingSeachEnabled I had created it did not give me an option for creating anything new.