• Skip to main content
  • Skip to primary sidebar

Technipages

Smart phone, gadget and computer tutorials

  • Topics
    • Android
    • Gaming
    • Hardware
    • Internet
    • iOS
    • MacOS
    • Office
    • Software
    • Windows
    • Definitions
  • Product Reviews
  • Downloads
  • About
Windows 10: How to Give the Taskbar a Name

Windows 10: How to Give the Taskbar a Name

Posted on December 21, 2020 by Judy Sanhz Leave a Comment

Putting your name on things gives you a sense of power. That item is yours, and you want everyone to know it by putting your name on it. You might not put your name on your computer since it’s given that it’s yours, but if you still want to see your name or any other name on the taskbar, here’s how you can do that.

How to Name Your Windows 10 Toolbar

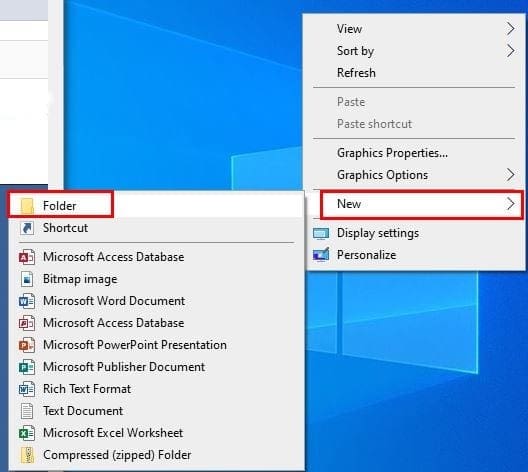
Naming your Windows 10 taskabr won’t give you any special privileges, but naming it makes your computer a little more personalized. To get started, right-click anywhere on your screen and place the cursor on the New option. When the side-menu appears, click on Folder.

When the folder appears, make sure you name it with the name you want to see on the taskbar. Once you’re done with that, right-click on an empty space on the taskbar and place the cursor on Toolbars, followed by New Toolbar.

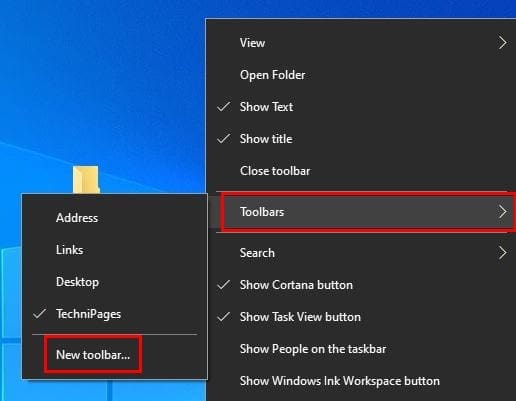
When the window appears, click on Desktop and click on your new folder. If the folder is not selected by double-clicking on it, click on it once, and then click on the Select Folder button at the bottom. The name of the folder will now appear on the taskbar.

How to Move the Taskbar Name’s Position

If you have the taskbar at the bottom, the name will automatically appear at the bottom right. If you don’t want the name to be there, you can change it. By simply clicking on the name and sliding to the left, you can give it a new position.

But, if you want to put it on the other side of the app icons, click on the name, click on it and slide it all the way to the left until the name appears on the left side of the icons. It’s also possible to switch between names if there’s more than one.

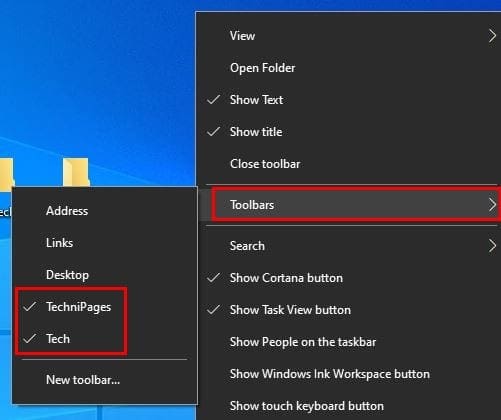
Right-click on an empty space on the taskbar and go to Toolbars, followed by New Toolbars. Click Desktop, and the folders you created will be to your right. Click on the one whose name you want to display and choose the file. The name will appear at the bottom right.

Don’t be surprised if you have two names on your taskbar. To only display one, right-click on the taskbar, go to Toolbars and uncheck the name you want to erase.

Conclusion

If you like personalizing your devices, this is a great way to do it. You can add one or even two names to your taskbar. The process is not permanent, so you don’t have to worry about looking at a name you might not like in the future. What name are you going to give your taskbar? Share your thoughts in the comments below.

You Might Also Like

  • How to Pin to Taskbar on Windows 10
    How to Pin to Taskbar on Windows 10
  • What to Do When the Taskbar Won't Hide in Windows 10
    What to Do When the Taskbar Won't Hide in Windows 10
  • How to Customize Windows 10 Taskbar
    How to Customize Windows 10 Taskbar
  • Windows 10: How to Change the Taskbar Location
    Windows 10: How to Change the Taskbar Location
  • Windows 10: How to Disable Animations in the Taskbar
    Windows 10: How to Disable Animations in the Taskbar
  • Windows 10: How to Make the Taskbar Transparent
    Windows 10: How to Make the Taskbar Transparent
  • Windows 10 Sound Speaker Icon Missing From Taskbar
    Windows 10 Sound Speaker Icon Missing From Taskbar
  • Does Whatsapp Give You a Phone Number?
    Does Whatsapp Give You a Phone Number?
  • WhatsApp: How to Give a Specific Contact a Different Notification Sound
    WhatsApp: How to Give a Specific Contact a Different…

Filed Under: Windows Tagged With: Windows 10

Reader Interactions

Did this help? Let us know! Cancel reply

Your email address will not be published. Required fields are marked *

This site uses Akismet to reduce spam. Learn how your comment data is processed.

Primary Sidebar

Recent Posts

  • Bitwarden: How to Manually Autofill a Login Form
  • Bitwarden: How to Copy the Username and Password of an Entry
  • Bitwarden: How to Open the URL Associated with an Entry
  • How to Increase the Size of Text on Any Website on iPad
  • Chrome: How to Fix Can’t Scroll Using Scrollbars
  • Samsung Galaxy S 21 Plus: How to Check How Much Memory Is Left
  • Google Photos: How to Export Your Albums
  • Bitwarden: How to Deauthorize All Sessions

Who’s Behind Technipages?

Baby and Daddy My name is Mitch Bartlett. I've been working in technology for over 20 years in a wide range of tech jobs from Tech Support to Software Testing. I started this site as a technical guide for myself and it has grown into what I hope is a useful reference for all.

Follow me on Twitter, or visit my personal blog.

You May Also Like

  • Windows 95/98
  • Microsoft Windows NT
  • Microsoft Windows
  • Microsoft Windows 95
  • Windows Media Player (WMP)
  • Top 8 Itunes Alternatives for Windows

© Copyright 2021 Technipages · All Rights Reserved · Privacy