If you’re getting an “unable to create notebook” error in OneNote, you’re not alone. While the error is uncommon, you might see it at vastly different points and for a few reasons, typically due to a failure to connect your account credentials to Microsoft’s servers (regardless of your actual internet connection).
Here are some common fixes when OneNote can’t create notebook files properly.
Contents
Common Troubleshooting Steps
These methods should be relatively quick and easy to test, depending on your internet connection:
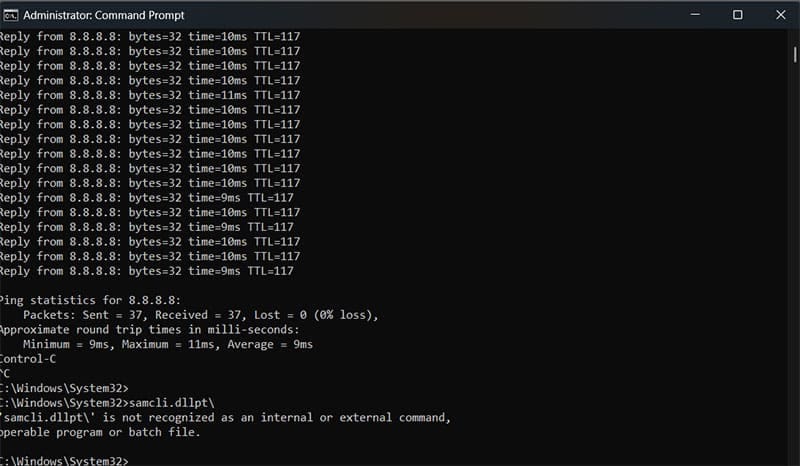
- Make sure your internet connection is stable. You can do this by running an internet speed test or by performing a ping test through the Command Prompt (ping -t 8.8.8.8). You can stop pinging with “Ctrl + C”.
- Log out of your account, then log back in.
- Make sure that OneNote is updated and download the most recent Windows Update if possible.
- Check if you have enough OneDrive storage (you can see this in the OneDrive pop-up on the toolbar by going to the Settings cog wheel).

- Recheck the notebook’s name to ensure it doesn’t contain any special characters or end similarly to a file name, as that might prevent it from being saved.
If none of this works, you may need to look at slightly more complex fixes.
Fix 1 – Clear Cache to Resolve Unable to Create Notebook Error in OneNote
OneNote has its own cache, usually stored in the hidden AppData files. This cache doesn’t hold actual notebooks but login data and logs.
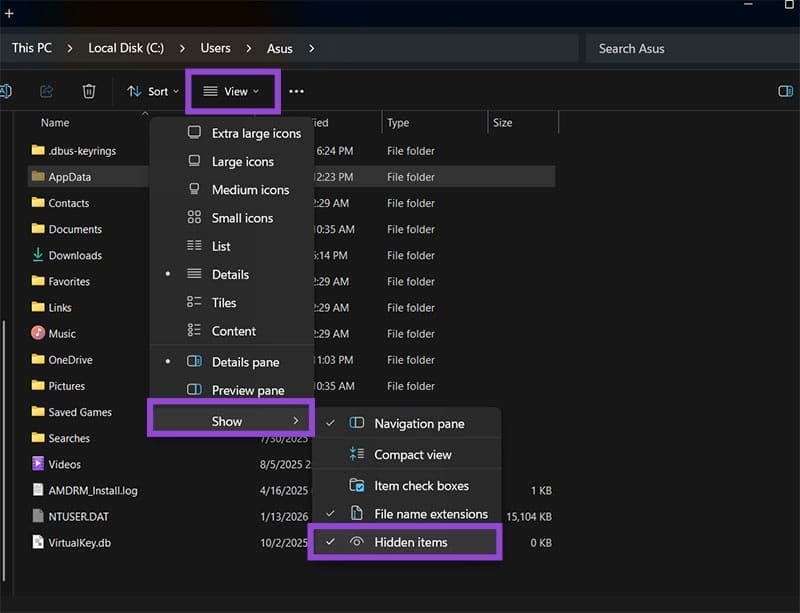
Step 1. Open File Explorer and go to C:\Users.
Step 2. Navigate to “C:\Users\<username>\AppData\Local\Microsoft\OneNote\16.0.” If you can’t see a folder, turn on “Hidden items” in the “View” section of the toolbar.
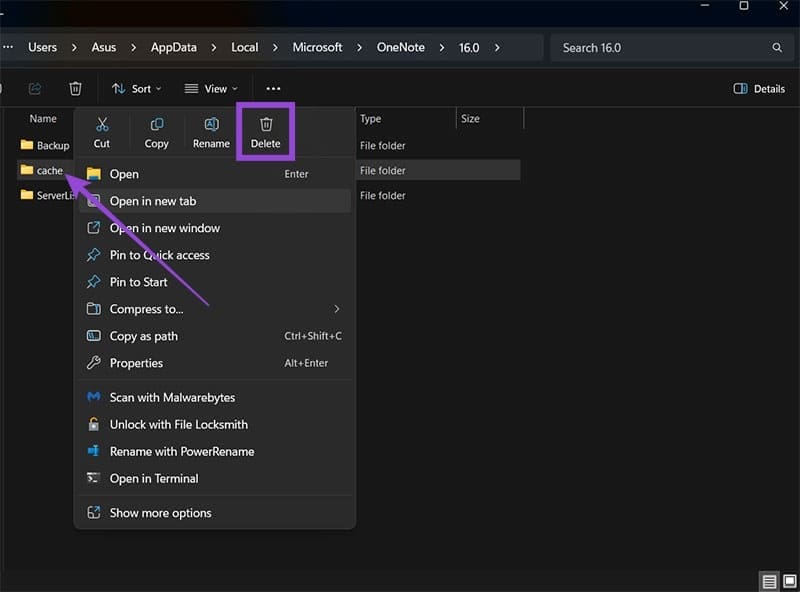
Step 3. Delete the entire “cache” subfolder.
Step 4. Run OneNote again and log back in with your account.
Fix 2 – Repair the Installation if OneNote Can’t Create Notebook
If your OneNote refuses to connect to the internet or your account properly, you might be best off starting from scratch or repairing the installation.
Step 1. Hit “Win + I” to open “Settings,” then choose “Apps” on the left.
Step 2. Select “Installed apps” and search for OneNote in the textbox at the top.
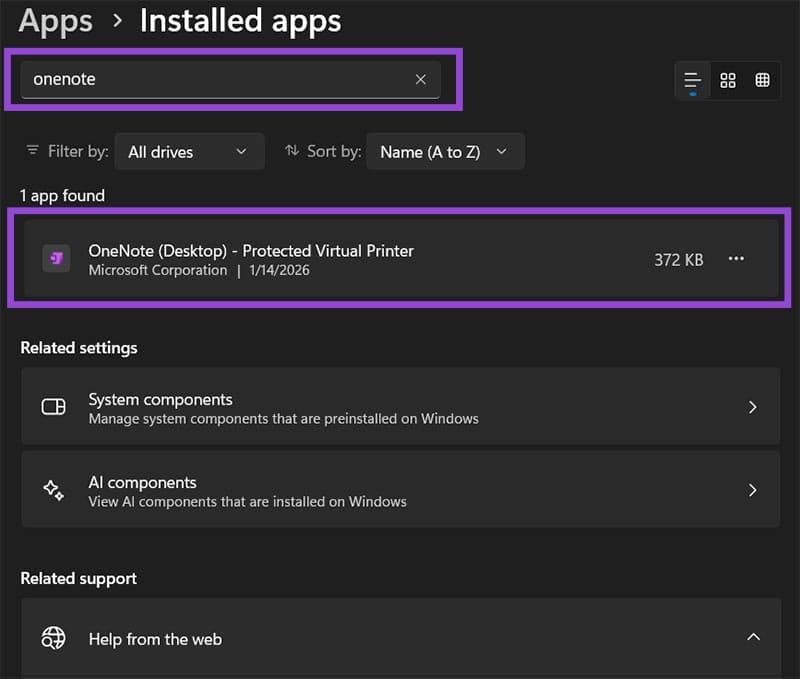
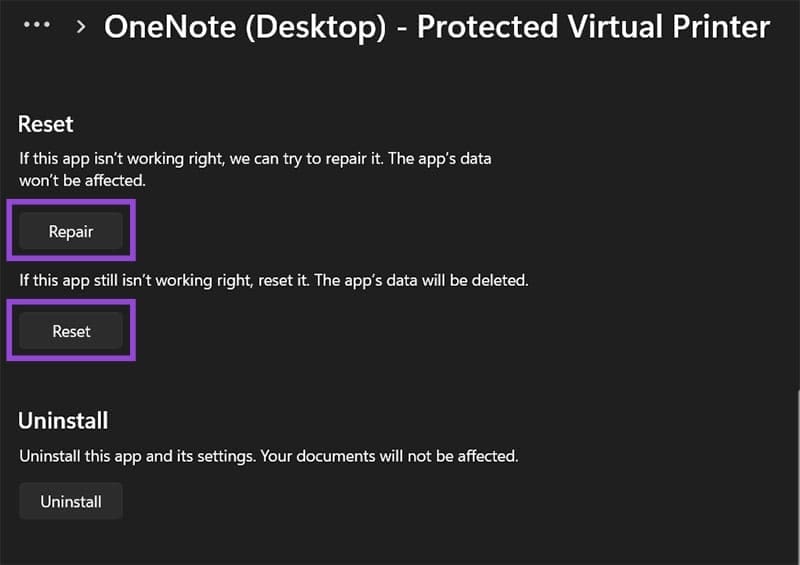
Step 3. Click on the “OneNote (Desktop)” entry and select “Advanced options” from the list.

Step 4. Scroll down and select “Repair,” then follow the instructions. If that doesn’t work, use the “Reset” option.
Fix 3 – Remove OneNote 2016 Credentials
If you’ve previously used OneNote 2016 at any point, Windows may have stored these credentials in a different format than the newer versions. If these credentials are the first ones to be checked, the authentication may fail and lead to the “unable to create notebook” error message in OneNote, so they need to be removed.
Step 1. Search for “Credential Manager” and open the utility.
Step 2. Click on the “Windows Credentials” tab on the right.
Step 3. In the “Generic Credentials” category, find an entry named something like “MicrosoftOffice16_Data***.”
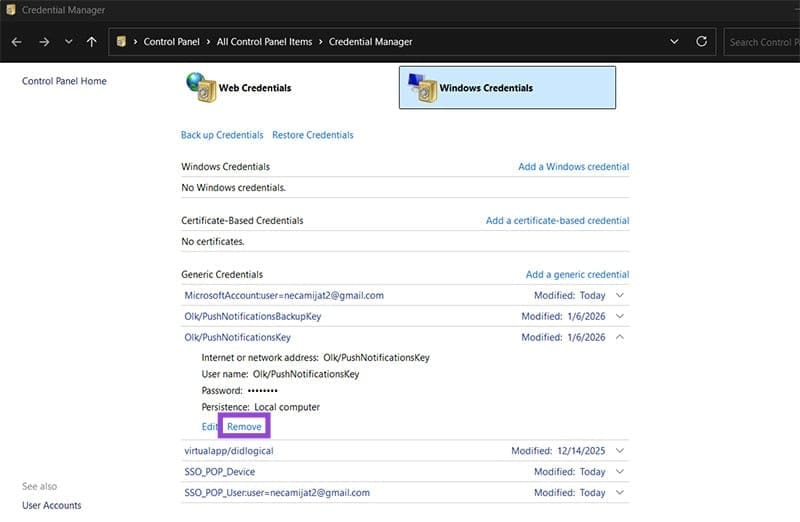
Step 4. Click on the entry and hit “Remove,” then restart OneNote and log in.
Fix 4 – Use OneNote for the Web
If your desktop app refused to make a notebook, you can use the browser version. It has roughly the same user interface, and you can use the same Microsoft account.
Step 1. Go to the OneNote for the Web page and select “Create new notebook.” You may need to log in.

Step 2. Make your notebook.
Step 3. Go back to the desktop app and try to open the notebook from there.