Like it or not, emojis have become a mainstay of modern communication and have permeated even into business settings (just check LinkedIn posts). If you’re crafting emails or social media posts via Word to be inserted somewhere else, or just want to use emoji quickly, here’s a guide for using emojis in Word via keyboard shortcuts.
Contents
Option 1 – Use the Built-In Emoji Keyboard
For Windows:
Windows 10 and Windows 11 have a built-in Emoji Keyboard feature that works across most programs, particularly those with text editors like Word, Excel, PowerPoint, and even Notepad. It’s accessible through a simple shortcut and provides some of the most common emoji out there.
Step 1. With the Word file open, use the keyboard shortcut “Windows + ;” or “Windows + .” (semicolon or period).
Step 2. You’ll get the emoji keyboard on your screen.
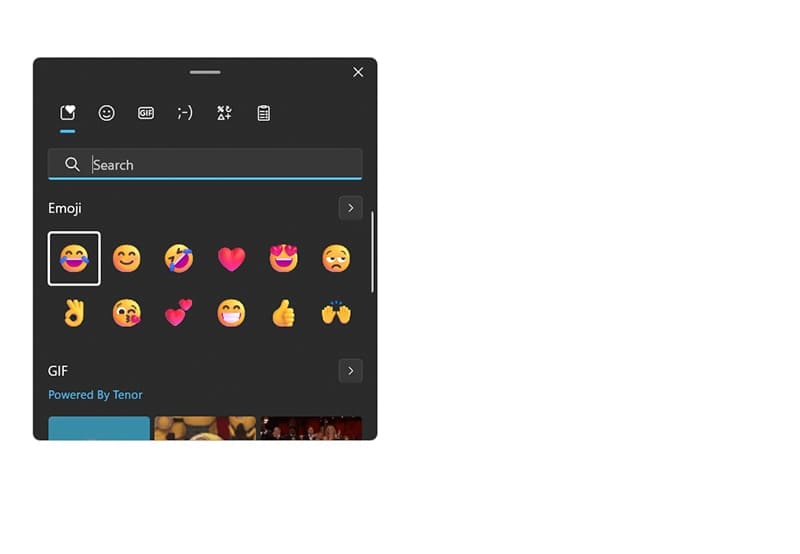
You can click through the tabs for different types of emoji to insert. These are in order: most used, standard emoji, GIFs, ASCII code emoticons (such as the famous table flip (╯°□°)╯︵ ┻━┻), general symbols, and the clipboard. Note that only the emoji and GIF pickers come with a search bar.
Step 3. Clicking on an emoji will paste it to the cursor’s position.
Step 4. Clicking anywhere outside of the emoji picker will close it. You’ll need to repeat the process whenever you need new emojis, or you can chain insert emojis you want to use, then copy-paste them throughout the document as needed.
For Mac:
Mac has a similar built-in keyboard option called the Emoji Picker. It can be accessed via the shortcut “Control + Command + Space.” It behaves pretty much the same as the Windows version, so clicking on an emoji will put it on the cursor’s place.
Unlike with Windows, you can drag the picker out of a program to make it “stick” to the screen and behave like any other app. This allows you to refer to it whenever you need an emoji. Additionally, the Mac Emoji Picker won’t have the other search options such as GIFs or ASCII.
For Android and iOS:
On most mobile operating systems, you can access emoji via the standard mobile keyboard or with third-party options such as SwiftKey.
Option 2 – Word: Make Emoji Keyboard Shortcuts
In newer versions of Word, the program will automatically format a few common text emoticons as emoji. These include:
| : ) | 😊 |
| : ( | ☹️ |
| : | | 😐 |
| ; ) | 😉 |
Note that the representations are inserted with a space between the characters. Typing : and ) without a space will result in 😊.
You can change this option in AutoCorrect settings if you don’t want it.
However, you can also use AutoCorrect to make the shortcuts for emoji.
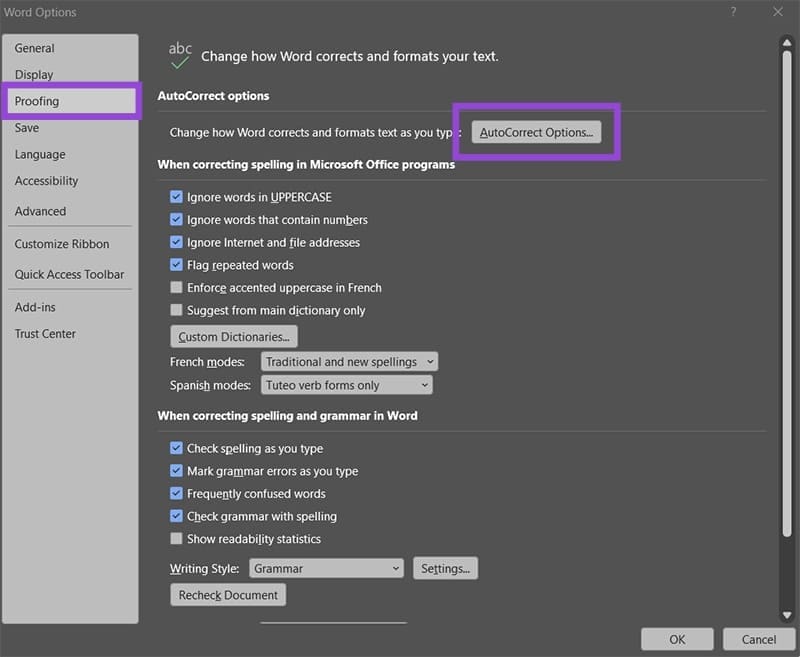
Step 1. Open Word and go to “Options” (it’s in the “File” tab).
Step 2. Go to “Proofing” and click on the “AutoCorrect Options” button.
Step 3. In the “Replace text as you type” textboxes, insert the keyboard combination for the emoji you want on the left, then use the Emoji Keyboard (from Option 1) to place the corresponding emoji on the right. For example, you can put :P to get replaced with 😋. Click on “Add” to add the emoji to the list of shortcut rules.
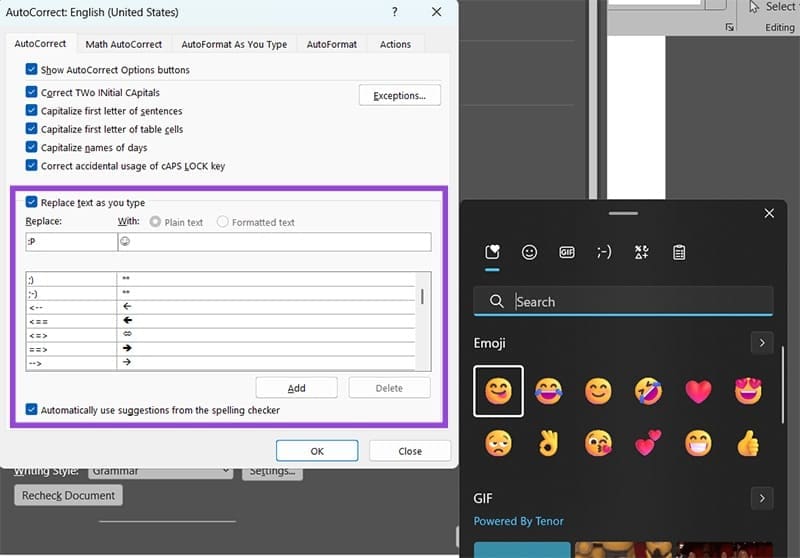
Step 4. Repeat Step 3 for every emoji you want to use. Note that AutoCorrect is case sensitive, so you’ll need to put both lowercase and uppercase letters as separate options if you want to use them (such as :p and :P).
Step 5. When you’re done, press on “OK.”
From then on, as soon as you type the keyboard shortcut, Word will replace it with the emoji if it’s followed by a space or paragraph break (Enter). For our example, :Pr won’t get auto-corrected.
Option 3 – Use Emojis in Word Online
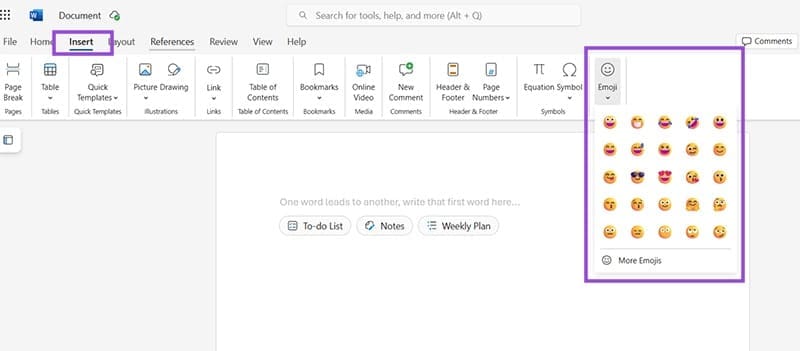
Word for the Web comes with a built-in Emoji option in the “Insert” tab on the toolbar, to the right of the “Symbol” option. You can use it to insert emoji directly.
Option 4 – Use Third-Party Tools
You can also use various Word add-ons or dedicated operating system programs to add toolbars or shortcut features that add an emoji picker to Word (or other apps). These include the Emoji Keyboard Add-in for Word (on the add-in store) or the ASCIImoji add-in for Mac.
Make sure to check third-party tools and their reviews before downloading anything on your device.