The “code 10” error, which usually happens when digging around peripheral properties in the Device Manager, is generally unhelpful since you don’t get much info to go on. However, for most of the time, a few straightforward troubleshooting steps should help you learn how to fix “this device cannot start (code 10)” errors.
Contents
Fix 1: General Fixes
One of the first things you should do to try to get a “code 10” error fix is to restart your PC. This can reset the cache on your device, force the peripheral to retry the connection, or launch the Windows automatic updater to find correct drives.
You can also try to perform a cold reboot. This involves removing the PC from power for 30 seconds, including removing the battery from a laptop.
Alternatively, if the device in question is connected via USB, change the port that it’s using. If this solves the issue, you might also want to look into whether your USB ports are working properly.
Fix 2: This Device Cannot Start Fix with Driver Update
One of the most common reasons for the “code 10” error is missing or outdated drivers. You can try to either update the driver or have the system fetch a completely new one.
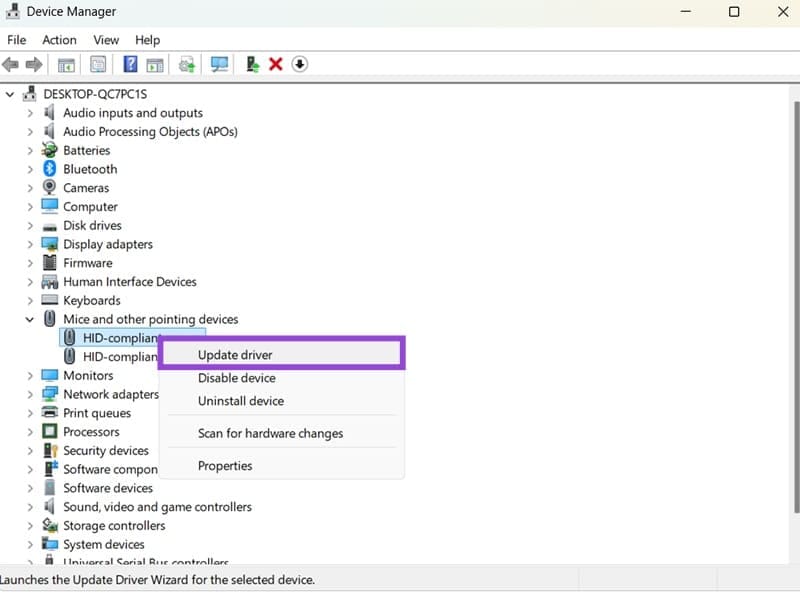
Step 1. Right-click on the Start icon and select “Device Manager.”
Step 2. Right-click on the item that can’t start properly, then select “Update driver.”
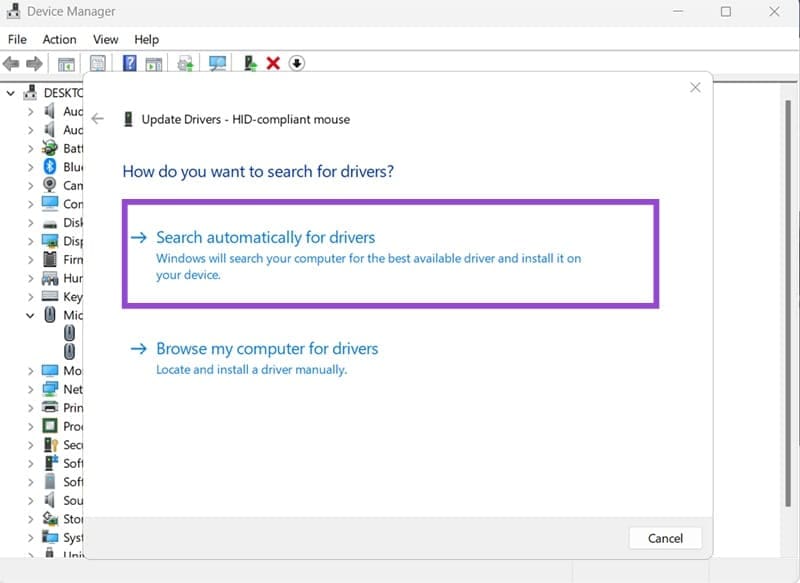
Step 3. Choose “Search automatically for drivers” (unless you’re using a device that comes with a driver CD and have a drive to put it in).
Step 4. Follow the steps in the setup.
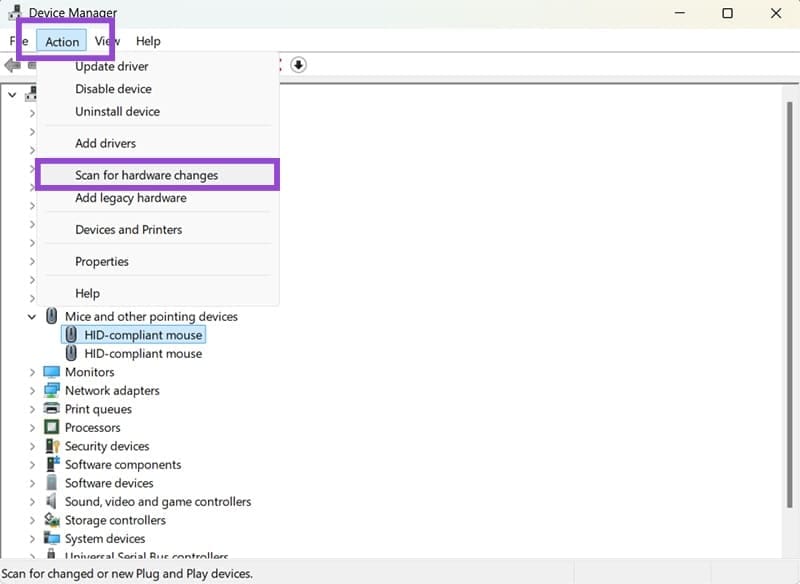
Step 5. If this doesn’t solve the issue, you can select “Uninstall device” instead from the right-click menu in Device Manager. Then, plug in the device again or select “Scan for hardware changes” from the “Action” tab.
Fix 3: Download Drivers Manually
In some cases, Windows might not be able to find drivers automatically, or the version of the drivers is not compatible with another piece of hardware. In that case, you should check your device’s manufacturer information for the website.
Step 1. If you don’t have a label with the device model, go to Device Manager, right-click on the item, and select Properties. This may or may not contain detailed model information.
Step 2. Go to the manufacturer’s website and check it for drivers, making sure to match it with your system and version.
Step 3. You may need to remove previous drivers or update the driver through the Device Manager. This time, you can check “Manually add driver” in the setup.
Step 4. Restart the PC if needed.
Fix 4: Code 10 Error Fix via Registry Changes
The Windows Registry can bypass some driver and version checks to prevent old devices from running into problems with Windows 11.
Step 1. Hit “Win + R” to open the Run dialog, then enter “regedit” and hit “Enter.”
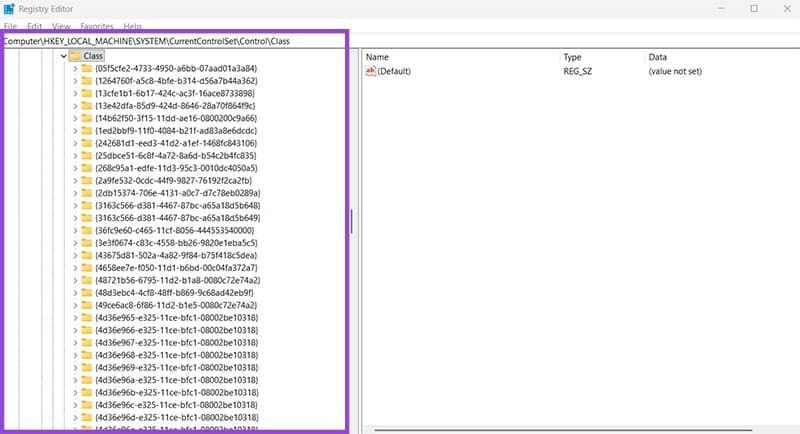
Step 2. In the Registry Editor, navigate to the following address (you can paste it into the address bar on the top, but you’ll have to drag over the previous address entirely):
HKEY_LOCAL_MACHINE\SYSTEM\CurrentControlSet\Control\Class
This will show a bunch of folders with strings that correspond to the ID of all devices on your PC.
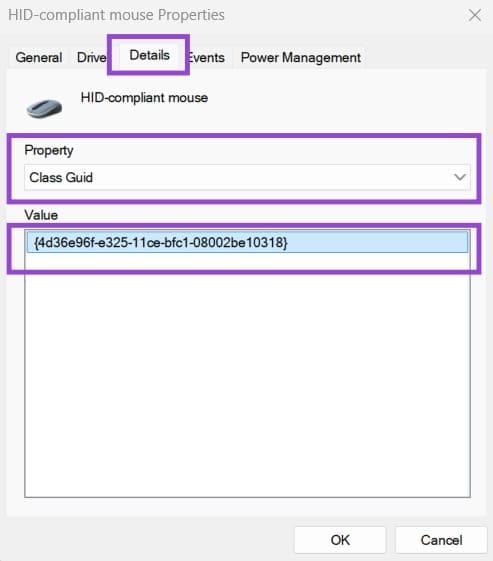
Step 3. Open the Device Manager and go to “Properties” for the device you’re having issues with.
Step 4. In the “Details” tab, choose “Class Guid” from the dropdown, then note the result.
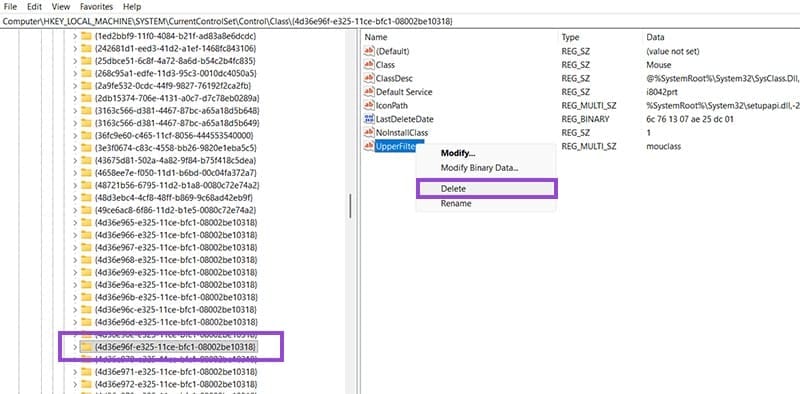
Step 5. Find that entry in the Registry Editor and open the folder.
Step 6. Remove the entries named “UpperFilters” and “LowerFilters.” Most devices will only have one of these (if any). You can right-click on the entry and click on “Delete.”
Step 7. Close the Registry Editor (which automatically saves it), then restart the PC.