Windows 10 reached its official end-of-support date on October 14, 2025, prompting users to either upgrade or purchase the Extended Security Updates (ESU) program. The ESU extends critical security updates and important security patches for Windows 10 for an additional year. However, you might be unable to actually get into the program. Let’s dive into why PC can’t enroll for Windows 10 Extended Security Updates and what to do.
Contents
- 1 Why PC Can’t Enroll for Windows 10 Extended Security Updates
- 2 Fix 1: Install Latest Windows Updates to Fix Extended Security Updates for Windows 10
- 3 Fix 2: Verify You Are Signed In with a Microsoft Account
- 4 Fix 3: Remove Cached Work or School Accounts
- 5 Fix 4: Restart the Windows Update Service
- 6 Fix 5: Run Windows Update Eligibility Check Command
- 7 Fix 6: Contact Microsoft Support
Why PC Can’t Enroll for Windows 10 Extended Security Updates

ESU enrollment can fail due to a few reasons, but most require the same set of fixes to go through them:
- Missing or Outdated Updates – If you have not installed the latest cumulative updates (KB5066791 or newer), the ESU enrollment option will not appear in Windows Update settings.
- Outdated Windows Update Cache – Old, corrupted update files left over from previous update attempts can prevent the enrollment interface from loading properly.
- Not Signed in with Microsoft Account – If you are signed into Windows with a local account instead of a Microsoft account, you will not see the enrollment option at all.
- Child or Family-Linked Account – Microsoft account profiles linked to a parent account or classified as child accounts are blocked from ESU enrollment.
- Previously Connected Work or School Account – If your PC was previously connected to a work Active Directory account and that account is still cached, Microsoft may classify your device as commercial and block consumer ESU enrollment.
- Incompatible Device Classification – Your device may have been incorrectly classified in Microsoft’s system as a commercial device or enterprise machine.
- Corrupted Registry Entries
- Internet Connectivity Issues
Fix 1: Install Latest Windows Updates to Fix Extended Security Updates for Windows 10
The ESU enrollment feature requires specific update packages, so keeping your Windows 10 up to date will give you
Step 1. Press “Win + I” to open Settings.
Step 2. Click on “Update & Security.”
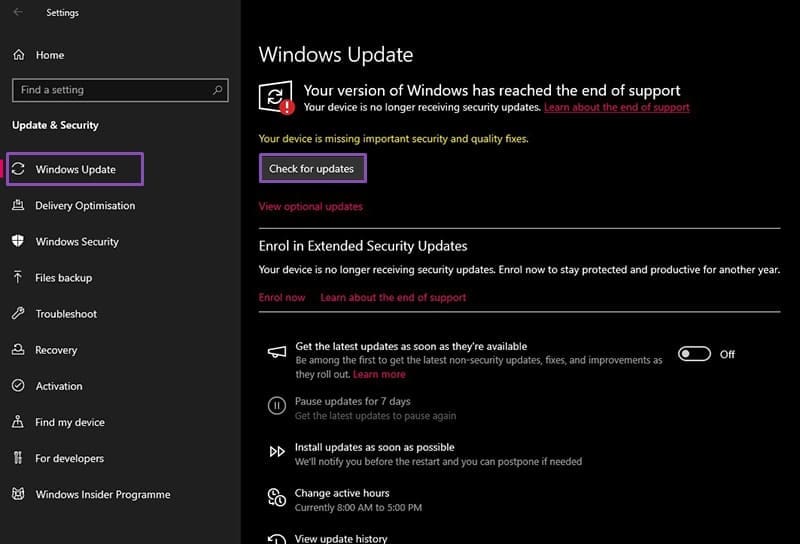
Step 3. Got to “Windows Update” in the left sidebar.
Step 4. Click “Check for updates.” Windows will scan for any available updates.
Step 5. If updates are found, click “Download” and allow them to install. Your computer will restart.
Step 6. Repeat until Windows Update says “You’re up to date.” You may need to check multiple times as updates often install in batches.
Step 7. Verify you have build 19045.6575 or later. To check your build, press Windows key + R, type “winver,” and press Enter. Look for “OS Build” in the System Information window that opens.
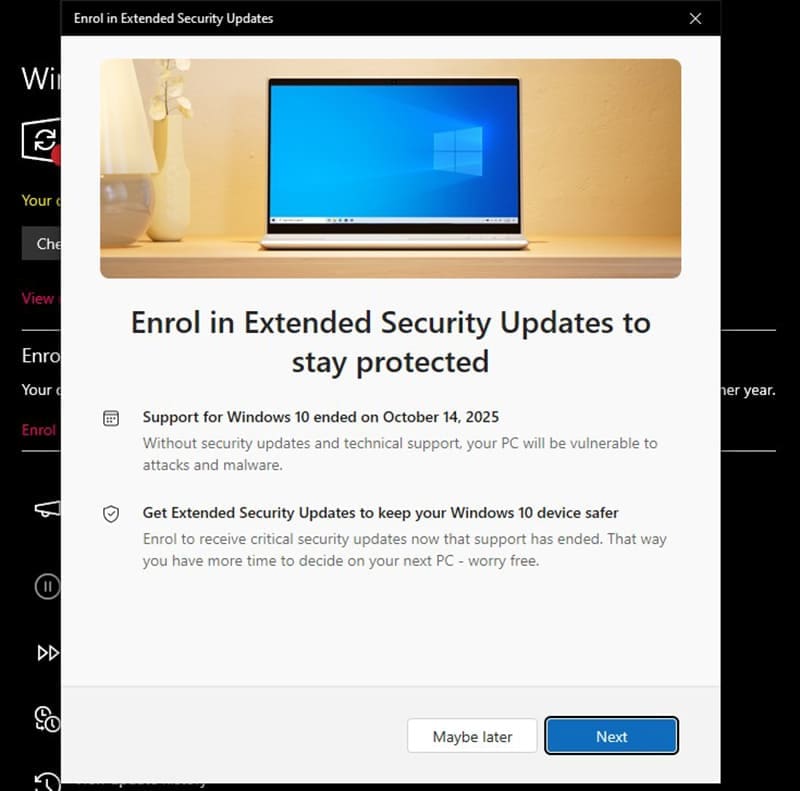
If you now have the latest updates, return to Windows Update settings. You should see an “Enroll Now” link or an “End of Support” notification with enrollment options.
Fix 2: Verify You Are Signed In with a Microsoft Account
Step 1. Open Settings.
Step 2. Click “Accounts” in the left sidebar.
Step 3. Click “Your info.” Look at the top of the page. If it says “Signed in with a Microsoft account,” you are already using the correct account type. If it says “Local account,” you must switch to a Microsoft account.

Step 4. If you need to switch to a Microsoft account, click “Sign in with a Microsoft account instead” (if available) or go to “Email & accounts” and choose “Add a Microsoft account” to create or link your Microsoft account.
Step 5. Follow the prompts to sign in with your Microsoft account email address.
Step 6. Sign out and sign back in so that Windows recognizes the account change.
Step 7. Restart your computer after making this change.
Fix 3: Remove Cached Work or School Accounts
If your PC was previously connected to a work or school account, that account may still be cached on your system even if you have disconnected it.
Step 1. Go to Settings.
Step 2. Click “Accounts” in the left sidebar.
Step 3. Click “Access work or school” in the left menu.
Step 4. Look for any work or school accounts listed. If you see any entries here, click on the account and select “Disconnect.”

Step 5. Click “Yes, disconnect this account” to confirm the removal. This may require you to authenticate with your current Microsoft account.
Step 6. If multiple work accounts are listed, disconnect all of them completely.
Step 7. Restart your computer.
Fix 4: Restart the Windows Update Service
Corrupted Windows Update cache files from previous failed update attempts can prevent the enrollment interface from appearing. Cleaning this cache and restarting the update service often resolves the issue.
Step 1. Press Windows key and type “Disk Cleanup” in the search box.
Step 2. Click on “Disk Cleanup” to open the utility.
Step 3. Select the C: drive (or whichever drive Windows is installed on) and click OK. Windows will calculate how much space can be freed.
Step 4. Click “Clean up system files.” You may need to enter administrator credentials or confirm this action.
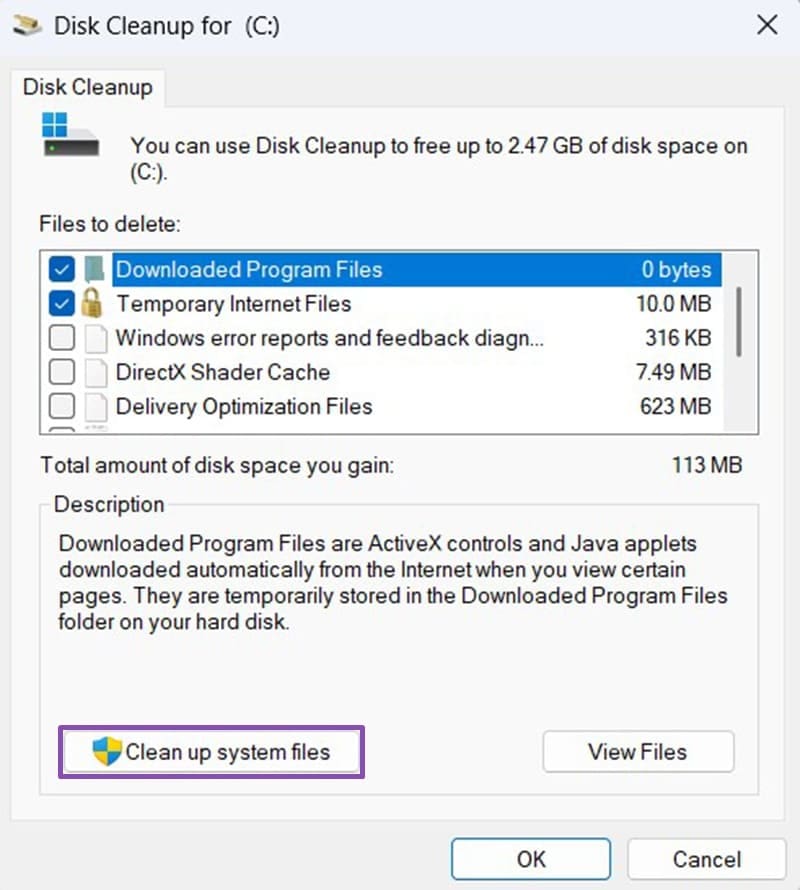
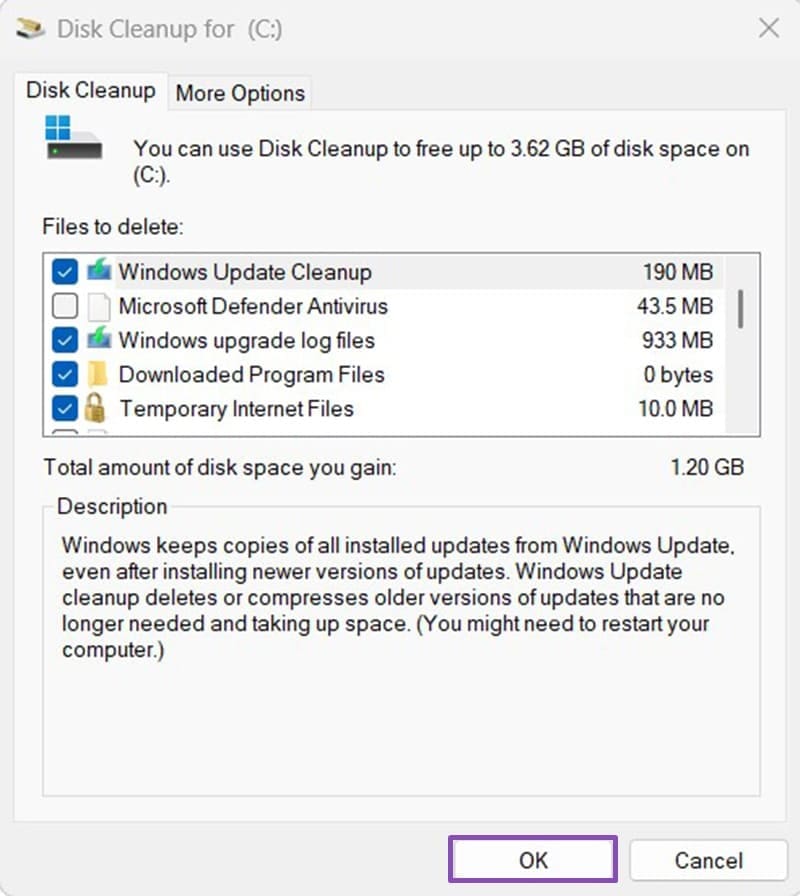
Step 5. Check the box next to “Windows Update Cleanup” to remove old update files. Also check any other safe options like “Temporary files” and “Recycle Bin.”
Step 6. Click OK and confirm the deletion.
Step 7. Restart your computer when the cleanup completes.
After restarting, return to Windows Update settings. The ESU enrollment option should now be visible. If it still does not appear, proceed to Fix 5.
Fix 5: Run Windows Update Eligibility Check Command
This command-line tool can evaluate your system’s ESU eligibility and force the system to re-evaluate whether the enrollment option should be available.
Step 1. Right-click on the Start button and select “Terminal (Admin),” or search for PowerShell and run it as administrator.
Step 2. In the PowerShell window, type the following command and press Enter: cmd /c ClipESUConsumer.exe -evaluateEligibility
Step 3. The command will run and evaluate your device. Wait for it to complete. There may be no visible output, which is normal.
Step 4. Close PowerShell and restart your computer.
Step 5. Return to Windows Update settings and check if the ESU enrollment option now appears.
Fix 6: Contact Microsoft Support
If you have completed all troubleshooting steps and still cannot enroll in ESU, you may have a unique system configuration issue that requires professional assistance. Contact Microsoft Support for personalized help.