

Burp Suite’s primary focus is to act as a web proxy for the purpose of analyzing and modifying web traffic, generally as part of a penetration test. While this is easy enough for plain text HTTP traffic it requires additional set-up to be able to intercept HTTPS traffic without constant certificate errors.
Tip; Penetration testing is the process of testing the cybersecurity of websites, devices, and infrastructure by attempting to hack it.
To intercept HTTPS traffic, Burp creates its own certificate authority on your device. You need to import that certificate to your browser’s trust store so that your browser doesn’t generate certificate errors.
Tip: Using Burp Suite as a proxy is essentially you performing a MitM, or Man in the Middle, attack on yourself. You should be aware that Burp will replace all HTTPS certificates with its own. This makes it a lot harder to notice genuinely malicious MitM attacks as you won’t see any certificate errors – be aware of this if you install and use the Burp Suite!
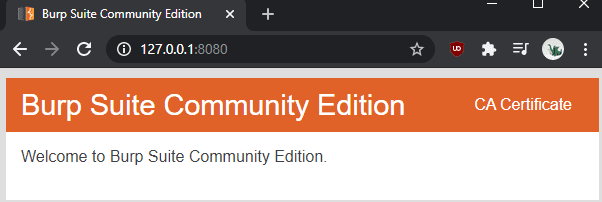
The first step to install Burp’s certificate authority is to download it. To do so, launch Burp, then browse to the proxy listener port, which defaults to “127.0.0.1:8080”. Once on the page, click “CA Certificate” in the top-right corner to download the certificate “cacert.der”.
Tip: You’ll likely be warned that the filetype is unsafe and could harm your computer, you’ll need to accept the warning.
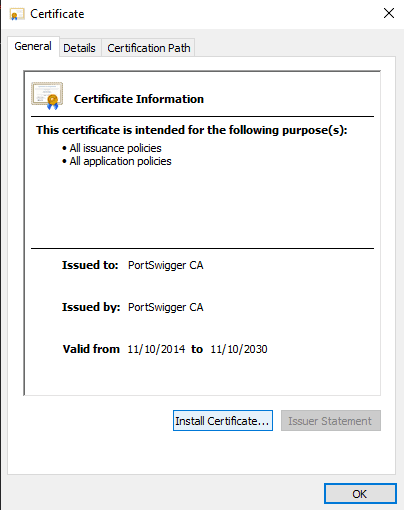
To install the certificate in Windows, double-click on the downloaded file “cacert.der” to run it and accept the security warning. In the certificate viewer, window, click “Install Certificate”.
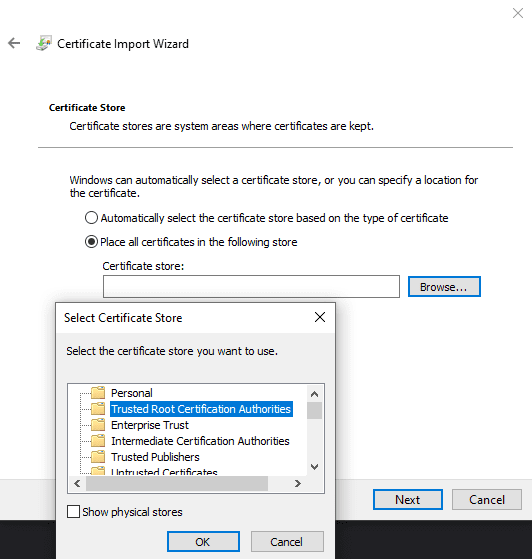
Choose whether you want the certificate to be trusted by your user or by other uses with “Current User” and “Local Machine” respectively. You will need to manually set the certificate to be placed in a specific certificate store, “Trusted Root Certification Authorities”. Once, you’re done click “Finish” to import the certificate.
Tip: For the change to take effect, you will need to restart your browsers. This should affect all browsers on your computer, even Firefox, however, you may need to add the certificate to specific browsers if they use their own trust store.
If you want to intercept network traffic from another device, it will have to import your specific Burp certificate, rather than one it generates itself. Each installation, excluding updates, generates a new certificate. This design makes it much harder for Burp to be abused for mass internet monitoring.


Thanks. I wanted to capture whatever background requests this online game made and I was getting failed authentication errors in the Burp Suite Event Log. This is after I had set the Burp Suite proxy as the system-wide proxy via Internet Options and so I didn’t know I had to install the Burp cert on the system and where exactly. After doing what was described in this article I am now logging several requests to game-associated infrastructure and service domains.
So thank you! :D)