If you’re suddenly being confronted by Error Code 0x80070035, also known as “Network Path Not Found,” you may be wondering what to do next. This indicates a problem with connectivity and access, and can have quite a few causes.
Not to worry, though, this article also has a few answers to the Error Code 0x80070035 fix.
Contents
The Many Issues That Cause Error Code 0x80070035
Error Code 0x80070035 isn’t a new problem with Windows 11 – it has been around for a while. It’s primarily related to connectivity, but let’s look at some of the specific reasons you could be getting this error on your machine:
- Pathing problems – You may have entered the wrong address, or the location of a certain file or folder has changed. Files may also have been deleted.
- Antivirus and firewall block – An overzealous firewall or antivirus program could falsely flag certain files as dangerous or block your access to a network.
- Connectivity issues – Your machine could be disconnected from the internet or local network.
- DNS – A DNS resolution is crucial to translating domain names into IP addresses.
- Deactivated SMB and NetBIOS – These two protocols allow computers on networks to communicate with each other. Should they be turned off, you’ll lose your ability to connect.
- Network settings – Many connection settings might prompt this error, including permissions, restricted access, and disabled network discovery and sharing.
Now that you know what can cause this error, let’s focus on the fixes.
Your Error Code 0x80070035 Fix Guide
It’s a good idea to try all these solutions until the error disappears. Here they are in no particular order:
Check Your Antivirus and Network Security
Every antivirus and firewall behaves differently. Check with your provider to see how best to tackle any network problems.
On the Windows side of things, you can adjust your network security settings. Here’s how:
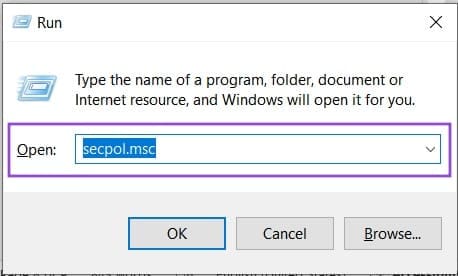
1. Open the “Run” tool (Win + R).
2. Type in “secpol.msc” and hit “OK.”
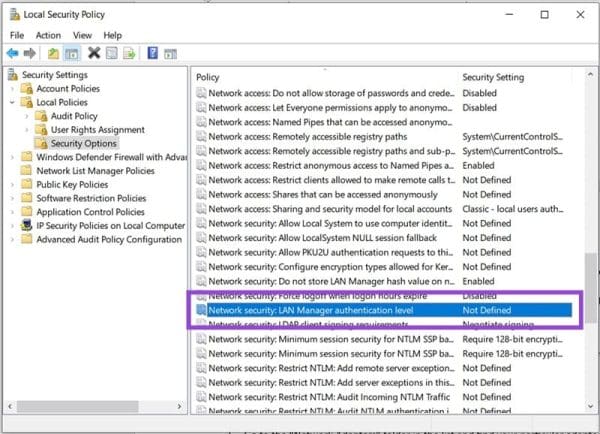
3. From the side menu, select “Local Policies” and then “Security Options.”

4. Navigate down to “Network security: LAN Manager authentication level” and double click.
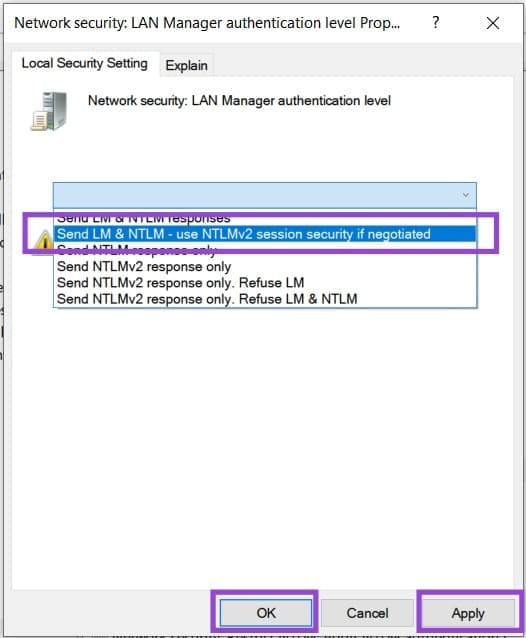
5. From the dropdown menu in the popup, select “Send LM & NTLM-use NTLMv2 session security if negotiated,” then hit “Apply” and “OK.”
Enable Drive Sharing
Drives are shared by default, but can be disabled by accident. To check and re-enable:
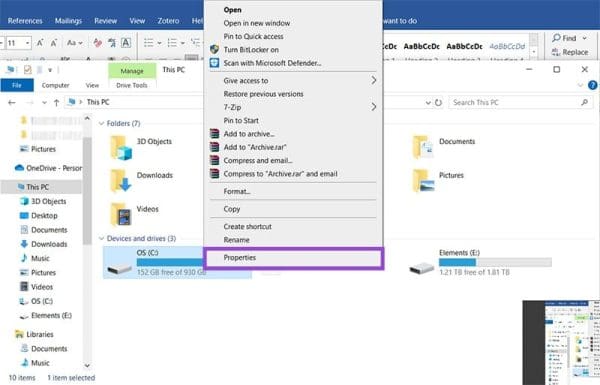
1. Right-click on your main drive’s icon in Windows Explo-r and select “Properties” from the context menu.
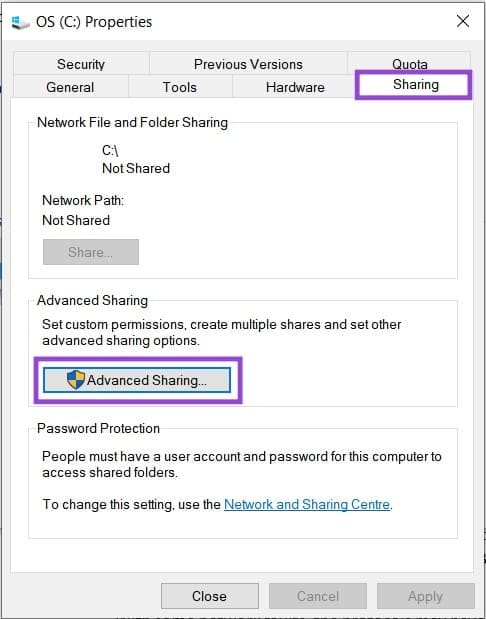
2. Navigate to the “Sharing” tab and click the “Advanced Sharing” button.
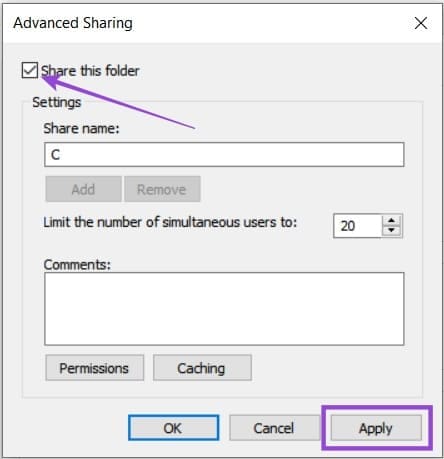
3. Ensure the “Share this folder” box is ticked, then select “Apply.”
Activate or Reset NetBIOS
If you suspect disabled protocols are to blame, you can check the status of your NetBIOS or even reset it. Here’s how to check it:
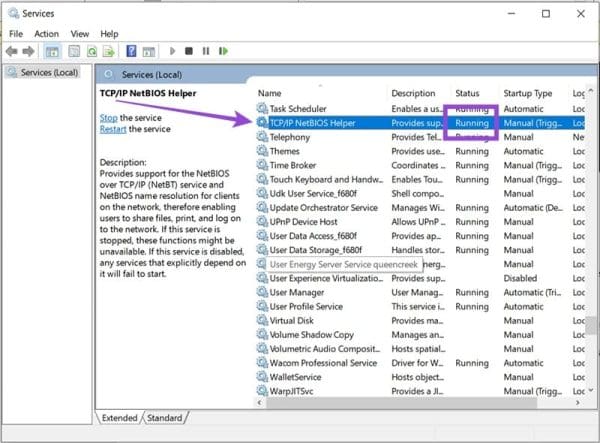
1. Open up “Services” via the Search Bar.
2. Navigate down to “TCPIP/NetBIOS Helper” and determine whether its status is running or not.
3. If the service is off, right-click “TCPIP/NetBIOS Helper” and click “Start.”
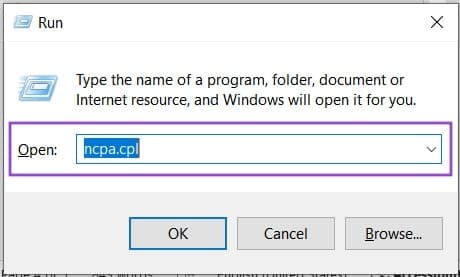
To reset your TCP/IP to NetBIOS for a clean start, here’s what you need to do:
1. Open “Run” (Win + R) and type “ncpa.cpl”. Press (Ctrl + Shift + Enter) rather than the “OK” button to run with Administrator privileges.
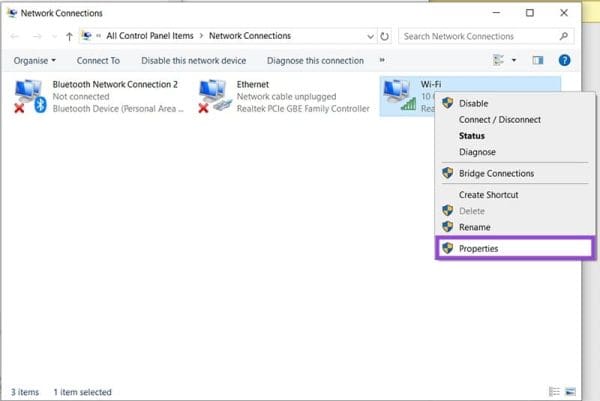
2. Choose your network and right-click to select “Properties.”
3. Navigate down the list to find “Internet Protocol Version 4(TCP/IPv4)” and double-click it.
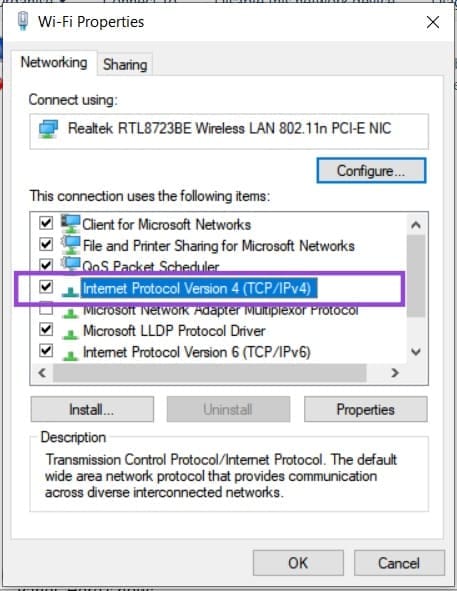
4. Click the “Advanced” button at the bottom of the window.

5. Under the “WINS” tab, manually enable NetBIOS by selecting “Internet Protocol Version 4(TCP/IPv4).”

6. Click “OK” to finalize.
Enable SMB Sharing
Another protocol is the newer Server Message Block (SMB), which you can check and re-enable (if necessary) through the Control Panel:
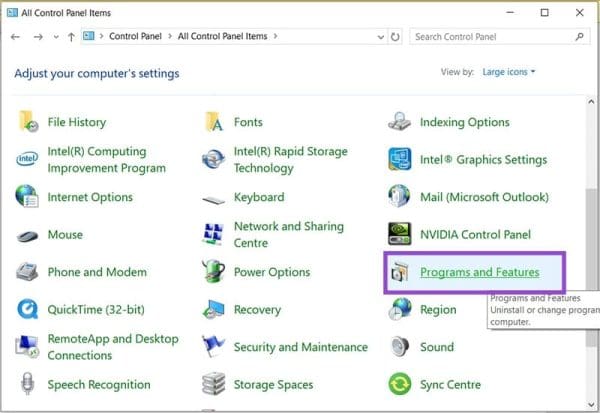
1. Open “Control Panel” via the Search Bar.
2. Select “Programs and features.”
3. From the side panel, click “Turn Windows features on or off.” Confirm your Administrator privileges.

4. In the window, scroll down to “SMB 1.0/CIFS File Sharing Support” and check the parent folder.
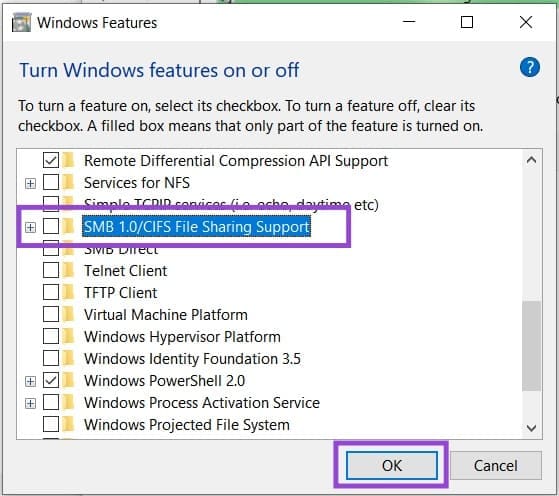
5. Hit “OK.” SMB file sharing should now be enabled.
Reinstall or Update Your Network Adapter
Perhaps your network adapter is the root cause of this error. A re-install might help. Here’s how to do it:
1. Open “Device Manager” via the Search Bar. Remember to have hidden items visible via Windows Explorer (“Layout and view options” > “Show” > “Hidden Items”).
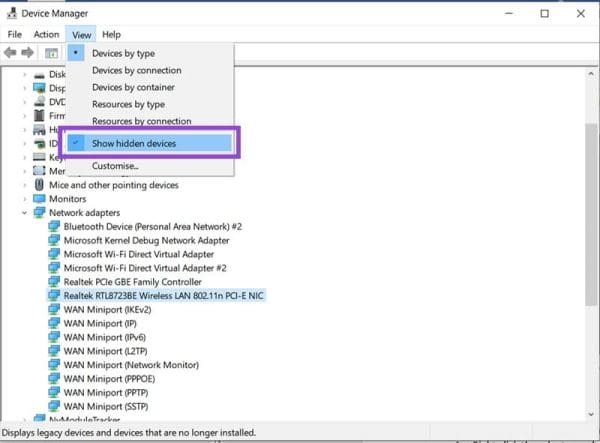
2. Go to the “Network Adapters” folder in the list and find your particular adapter.
3. Right-click the adapter and select either “Update driver” or “Uninstall device” from the pop-up menu.

4. If updating, your machine will search for new drivers. If uninstalling, restart your machine, and the adapter drivers will re-install automatically.