Have you noticed two separate One Drive folders appearing in your Windows File Explorer? This is a relatively common issue, and one that can cause much confusion and frustration for users. Fortunately, there are several easy ways to resolve it.
In this guide, we’ll explore what to do about One Drive folder duplicated in File Explorer.
Contents
Before You Start – Backup Any Important Files
Before we look at any of the possible fixes to try for One Drive folder duplicated in File Explorer, it’s important to note the risks of trying to resolve cloud storage errors like this. You could end up accidentally deleting or losing some of the files stored within your One Drive account.
To avoid that, it’s best to backup any important files before you begin. Go into your One Drive folder, copy any key files, and put them elsewhere, like on one of your device’s hard drives or an external storage solution, then proceed with the fixes.
Fix 1. Unlink and Relink
A quick and easy way to fix this issue is to unlink your One Drive account and then relink it, which only takes a matter of minutes. Here’s how it’s done:
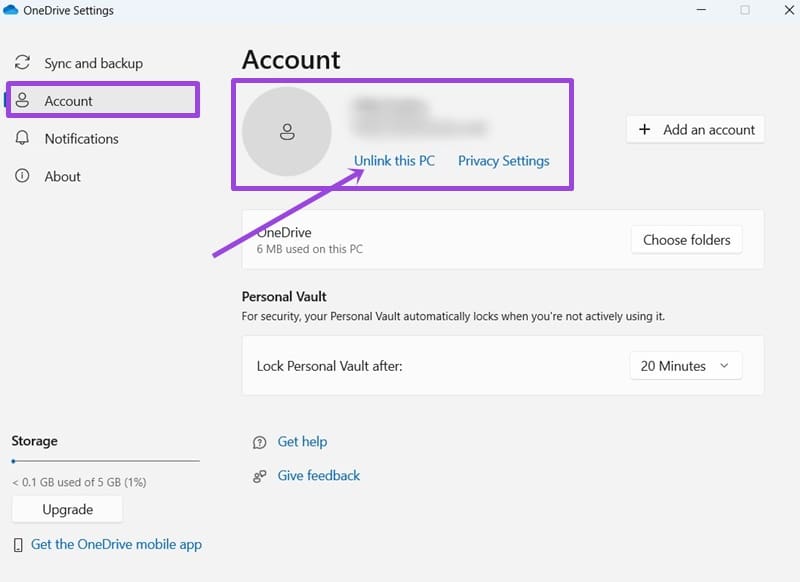
Step 1. Right-click the One Drive icon in your taskbar, and select “Settings.”
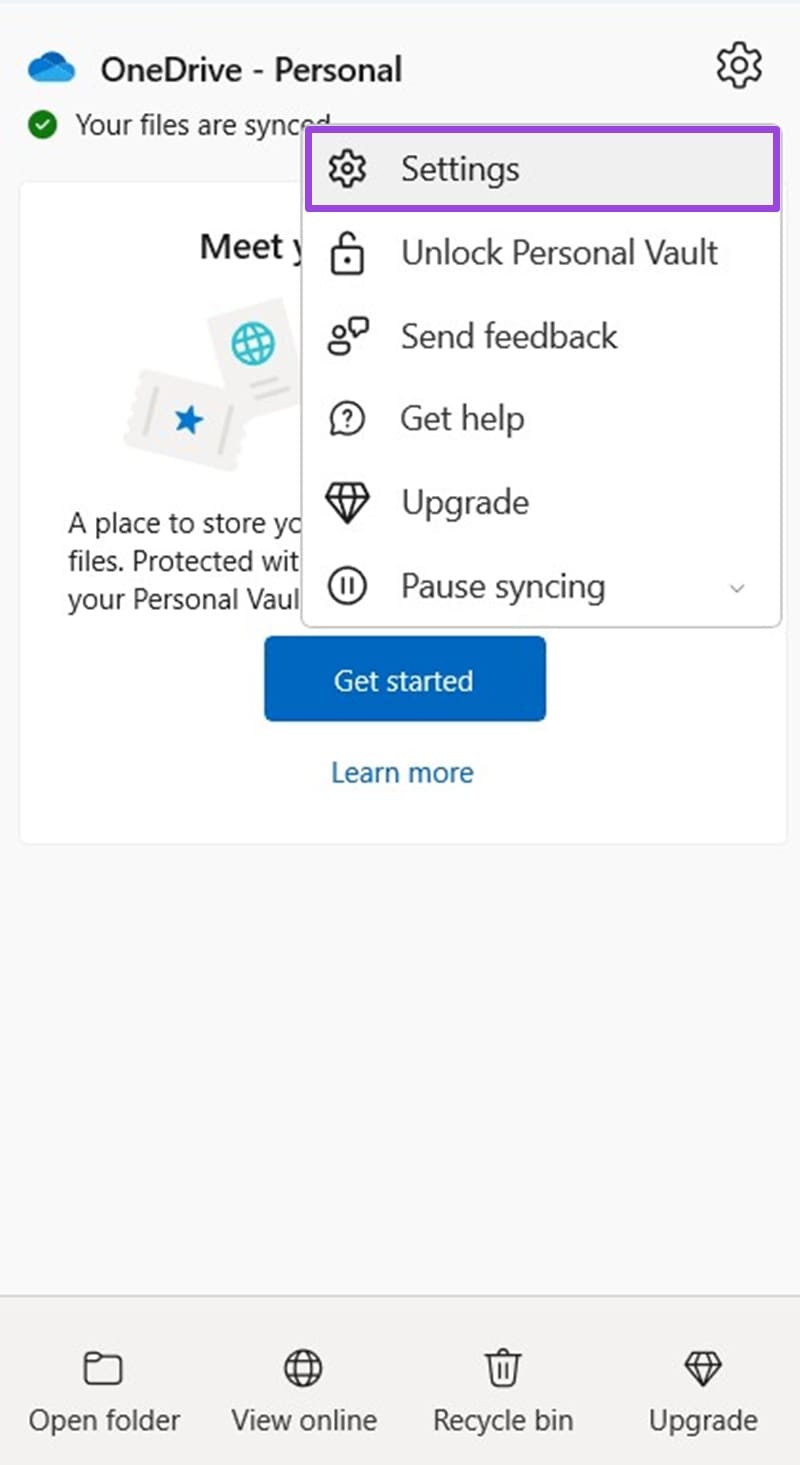
Step 2. Go to the “Account” tab and select “Unlink this PC.”
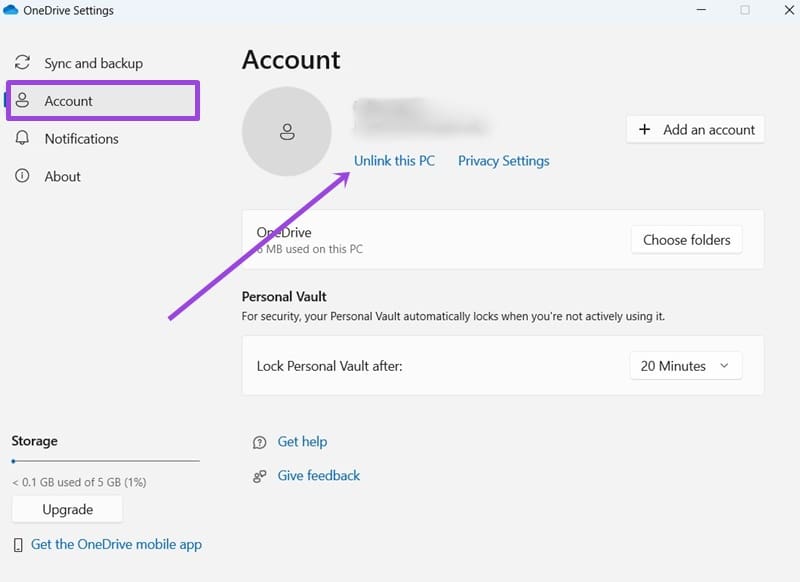
Step 3. Follow the on-screen instructions, then restart your PC. Once it’s back on, open One Drive and set up your account again by logging in. Check to see if the issue has resolved.
Fix 2. Unlink Accounts You Don’t Need or Use
Another common reason why the duplicate One Drive folder might appear in File Explorer is if you have multiple One Drive accounts on the same machine. One Drive might be trying to sync several profiles at once and therefore creates a second folder to do this. You can fix it by unlinking accounts you don’t use or need.
Step 1. Click the One Drive icon in your taskbar and go to its “Settings” menu.

Step 2. Click on “Account” and look at the list of connected accounts. Select “Unlink my PC” next to those you don’t need.
Fix 3. Reset the App
Sometimes, it might just be a bug with One Drive that’s causing multiple folders to appear. Resetting the app via the Run tool might fix it.
Step 1. Press the “Windows” and “R” keys together to open the Run utility.
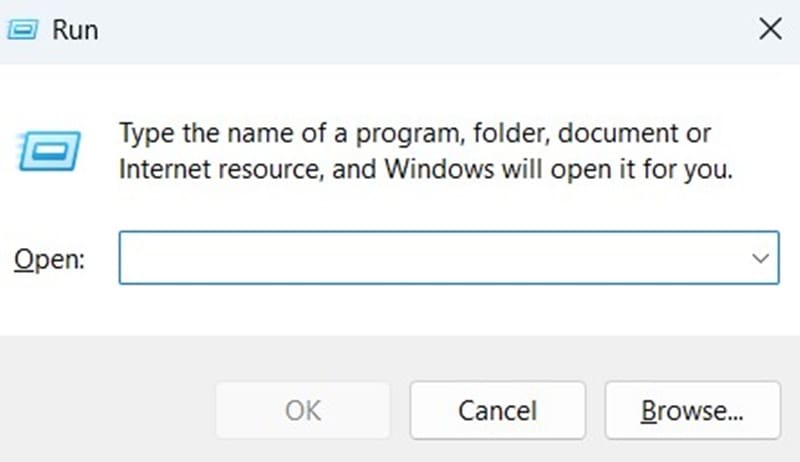
Step 2. Enter this command: %localappdata%\Microsoft\OneDrive\onedrive.exe /reset

Step 3. You may see the One Drive icon disappear then reappear at this stage. You might also want to restart your machine, then check if the duplicate folder has gone.
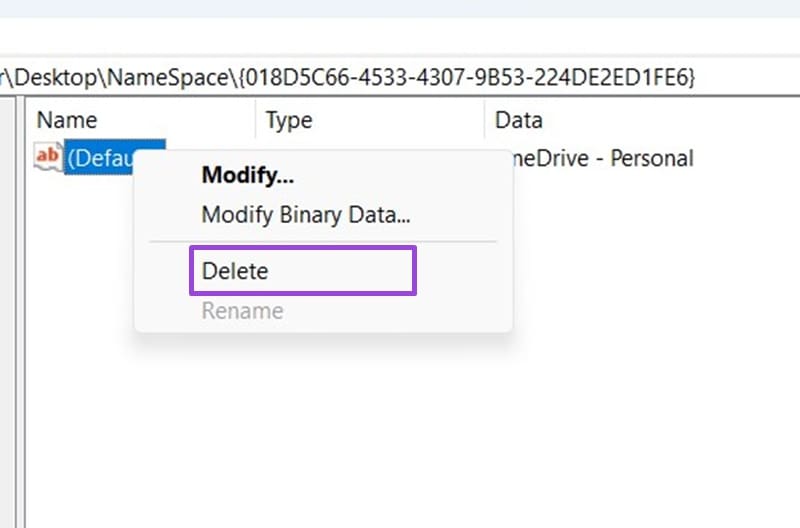
Fix 4. Try the Registry Editor
Another useful but slightly more complicated fix is to adjust some settings in the Registry Editor.
Step 1. Open the Registry Editor. You can find it by typing “regedit” into your search bar.

Step 2. Enter this into the address bar and hit the “Enter” key: Computer\HKEY_CURRENT_USER\SOFTWARE\Microsoft\Windows\CurrentVersion\Explorer\Desktop\NameSpace
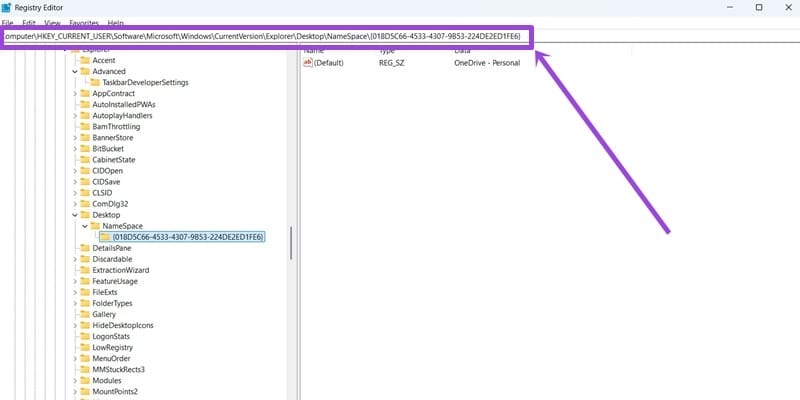
Step 3. You should see a folder there with a OneDrive entry. Right-click and select “Delete.” Then close the Registry Editor and restart your PC.