You do so much with your Android phone that it’s almost impossible to try and remember everything. What’s even more inconceivable would be trying to remember the name of the sites you visited a few days ago and want to revisit.
You go through so many apps and sites in one day that you may not even remember if you used one that appears in your Activity. To register everything that you do on your Android device, it’s a good idea to enable your Google Activity.
Contents
How to Enable Google Activity
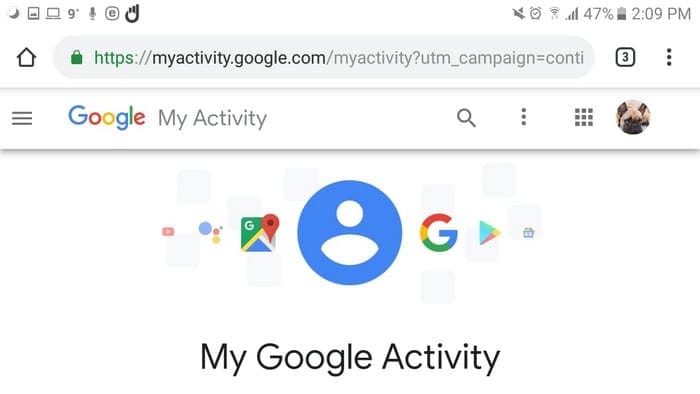
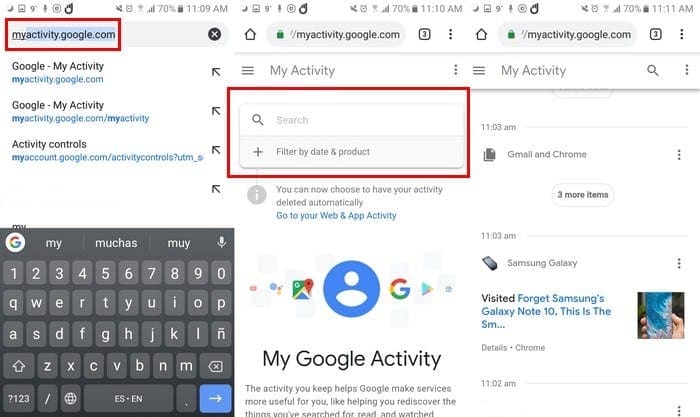
To see what you’ve been looking at on your Android device, go to myactivity.google.com and sign into the account you want to check. When you first sign in, you will see the following image with what you accessed today.
To see your Activity the past couple of days, swipe down, and you will see your Activity for today, yesterday, the day before and so on.
How to View and Manage My Google Activity
Now that you’ve accessed your Google activity, you’ll want to see how you can view and manage it. The activity list will even include an image of the content you saw to help you remember what you were viewing.
In your activity list, you will see what you viewed and at what time. The information will not show you how long you used a particular app. If you select the Details option, you can see information such as the date, time, OS, and the model of the device.

Your Activity will even show you what you asked your Google Assistant and there will also be a play button to the right if you want to hear it. Your Google Activity will not only show you the title of the article you read, but it will also provide a link back to it.
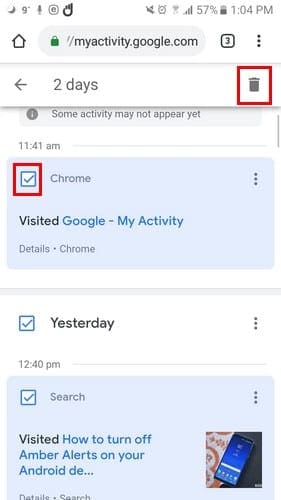
Erasing something you looked at from your list is easy. Tap/click on the three dots to the right of the option and choose the delete option. It’s possible to erase your Google Activity by date or by topic or product.
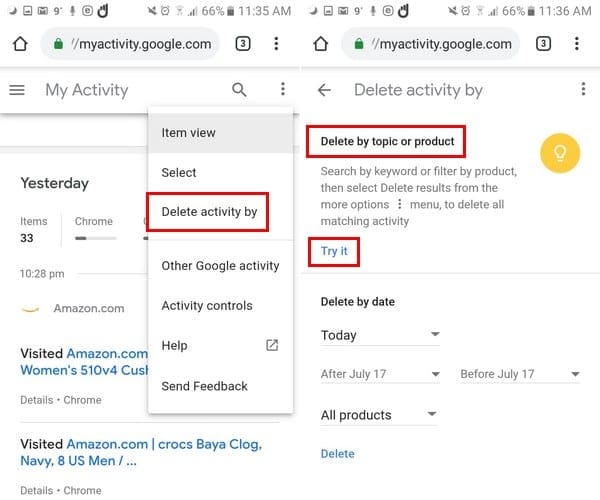
To erase by topic, tap on the three dots at the top right and select delete activity by option. The option to erase by subject will be at the top, tap on the blue try it words. In the search bar, type the keyword you want Google to find.
The results you will see will all have to do with the word you entered; in my case, I entered the word Android. To erase your Activity, tap on the three dots once more and tap on delete results.
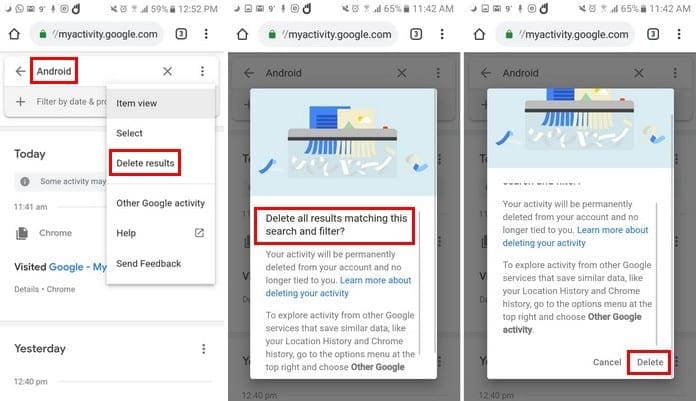
By going with this option, you are going to delete everything that has to do with your keyword, but if you only want to erase specific results, choose the select option and not the delete results.
After selecting the option, your Google Activity will have a box on each one of them. Select the ones you want to erase, and they will turn blue, so you know they are selected. Once you’ve chosen the ones you want to delete, tap on the trash icon.
How to Search Through Your Google Activity
Searching through your Google Activity can be very useful when you need to remember the name of a site, but can only recall the one you visited it a few days ago. To view your Google activity, click on the search bar at the top of the page to search by keywords.
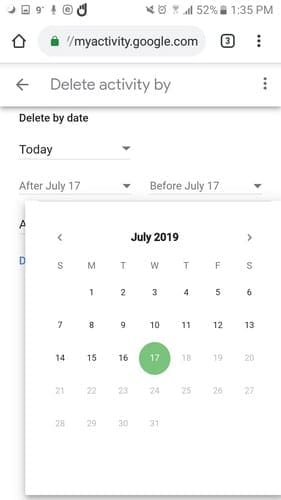
Below the search bar, you have the option of filtering by date. You can search by today, yesterday, last seven days, last 30 days, all time, and custom. By selecting the option that says After/Before followed by today’s date, a calendar will appear where you need to tap on the time of interest.
There will also be an option to filter by Google product. To search through all of them, check the box that says All products if not, check the box for the services you want to include in your search.
How to Disable Your Google Activity
If the idea of Google registering everything you do is just a tad bit too scary, there is a way you can disable your Google Activity. Click on the three dots at the top right and go to Activity Controls.
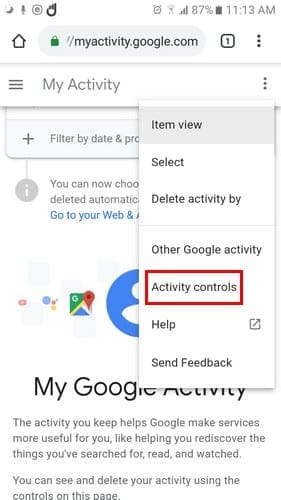
In the new window, you will see all the options you can disable, such as Web & App Activity, location history, device information, and more.
To the right of each option, you will see the option to turn the ones you want off. Each option also has an option to manage them individually. Unfortunately, there is no option to turn them all off at once.
Conclusion
It’s so secret that Google may know more about us than we do, but at least you have options as to how you can manage your info. Do you want to be able to see all of your Google activity? Share your thoughts in the comments.