The Photos app in Windows 10 can be used to both view and manage your photo library. You can select which folders the Photos app imports pictures from. If you decide in your management process that you don’t need or want a specific album, or even an imported source folder anymore, you can remove them. This guide will walk you through the process of removing an Album from the Photos app in Windows 10.
Delete a photo album
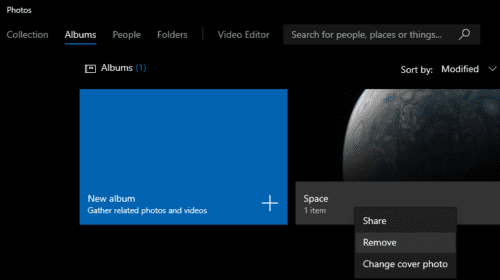
To delete an album, you first need to open the Photos app. To do so, press the Windows key, type “Photos” and hit enter. Next, you’ll want to click on the albums tab. right-click on the album you want to delete then select “Remove” from the context menu.
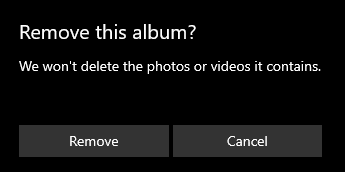
You’ll get a confirmation window asking to confirm that you want to delete the album. The confirmation will also remind you that removing the album doesn’t delete any of the images or videos it contains. Click “Remove” to delete the album.
Remove a source folder and its contents
To remove a source folder that Photos imports pictures from, you’ll need to open the settings. To do so, click the ellipsis icon in the top-right corner, then click “Settings” from the dropdown menu.

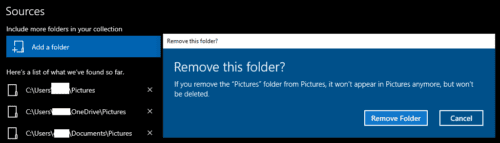
Directly under the “Add a folder” button is the list of source folders that are currently used to import pictures into the Photos app. Click the “X” icon to the right of the source folder that you want to remove.

A confirmation window will appear to confirm that you want to remove the source folder. It will also remind you that removing a source folder will remove the images from Photos but won’t delete them from your hard drive. Click “Remove Folder” to remove the source folder from Photos.