You always make sure that your computer always has the latest updates. That way, you get fixes to bugs you’re experiencing, and those important security fixes are also a must. But, the problem when those updates come is that the update can take up more bandwidth than you’d like. The good news is that there are some changes you can make to control the bandwidth during updates.
Contents
How to Control the Bandwidth During Updates
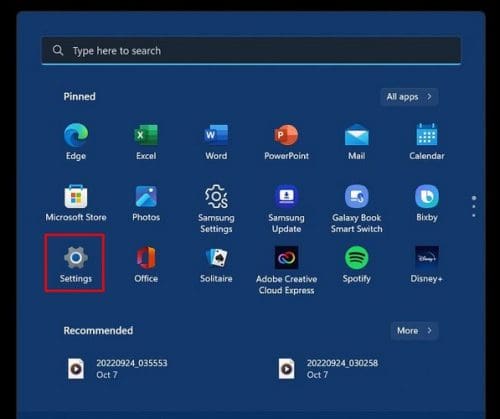
To have your computer only use the bandwidth you want it to use, you’ll need to go to Settings. Click on the Windows Start menu and click on Settings.
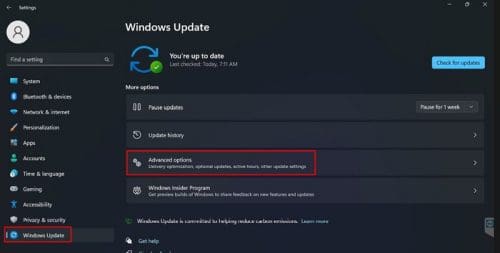
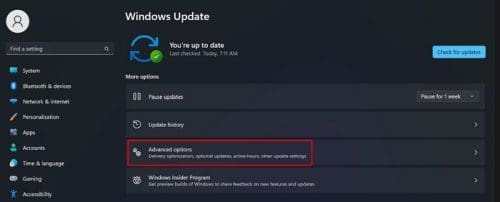
Once you’re in Settings, click on the Windows Update option at the bottom left. Click on Advanced options under the More options section.
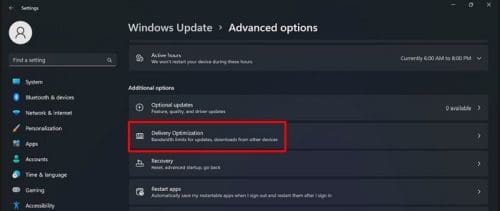
In Advanced Options, go to Additional options and click on Delivery Optimization.

Once you’re in Delivery Optimization, make sure to click on the option for Devices on the Internet and my local network. Enabling the Allow downloads from other PCs option is also a good idea. This is for the upload settings to function properly. Ensure that the options are chosen and click on the Advanced options setting.
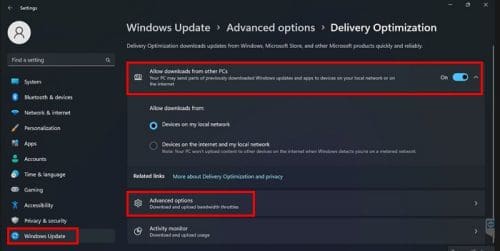
Look for the Download settings section and chose the option that says Absolute bandwidth. By checking the option called Limit how much bandwidth is used for downloading updates, you can use the slider below to restrict the bandwidth as much as you want. You can also do the same by selecting the option for Limit how much bandwidth is used for downloading updates in the foreground.
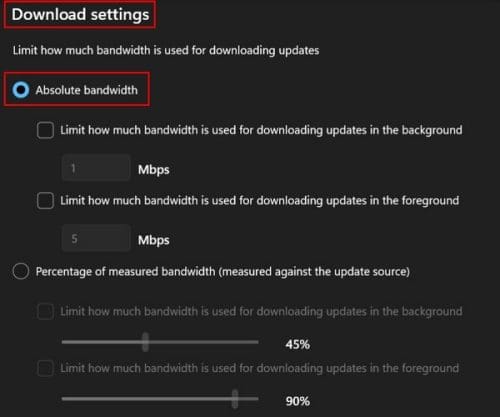
You can also make changes in the Upload settings by checking the Limit how much bandwidth is used for uploading updates to other PCs on the Internet option. It’s also possible to do the same for the Monthly upload limit option.

That’s all there is to it. Once you make these changes, you’ll have the bandwidth under control. If you ever change your mind and want to make any changes, you can do so at any time.
View the Upload and Download Statistics for Windows 11
Here’s how you can view the upload and download statistics. Click on the Windows Start menu, followed by the Settings option. Click on Windows update at the bottom left and then choose Advanced options.
Look for the Additional options section, and that’s where you should find the Delivery optimization option.
Scroll towards the bottom and click on the Activity monitor option. In this last option, you can review the available statistics.
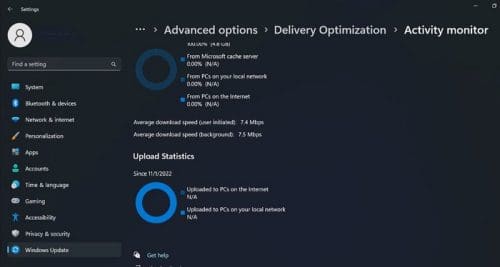
In this section, you’ll get all sorts of information from sources such as computers in the local network, Microsoft, and others.
Conclusion
As you can see, finding and reviewing this information is easy to find. If at any time you want to adjust any of the changes you made, simply follow the same steps. You’ll have access to all types of info on your bandwidth. Did you find the info you needed? Share your thoughts in the comments below, and don’t forget to share the article with others on social media.

