Microsoft Outlook is a versatile email client that also serves as a contact manager. However, there are times when users encounter the frustrating issue of the Outlook contact list not showing up on their Windows 11 or Windows 10 computers. In this article, we’ll explore the common reasons behind this problem and provide solutions to fix it.

Before we delve into the solutions, let’s understand why Outlook is not populating email addresses correctly. Perhaps the contact list was removed from the navigation pane during customizations, the data file got corrupted, the Outlook app is old and needs an update, or there’s a synchronization error.
Regardless of what the problem may be, the fixes listed below ensure that you can effectively manage your contacts within Outlook.
1. Enable the Auto-Complete Feature in Outlook Options
The most common reason Outlook may not suggest contacts while composing a message is if the Auto-Complete feature is disabled in Outlook Options. Hence, this is the first thing you should check.
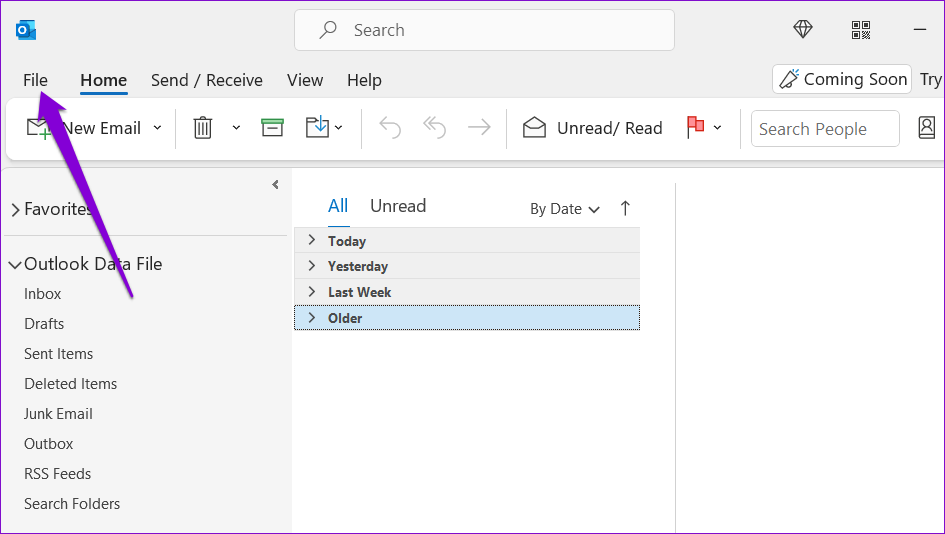
Step 1: Open the Outlook app and click the File menu in the top left corner.
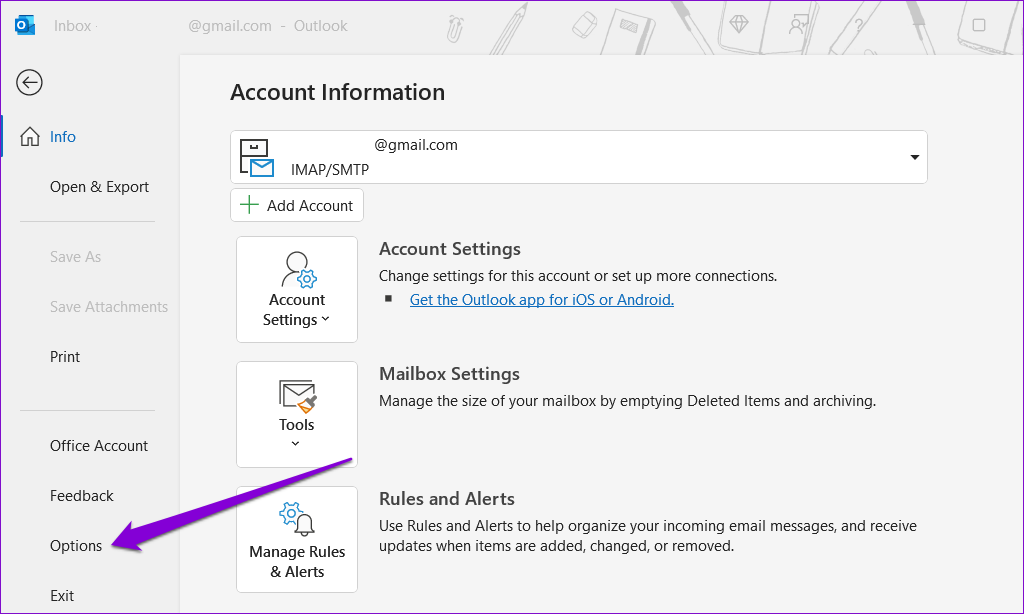
Step 2: Select Options from the left sidebar.
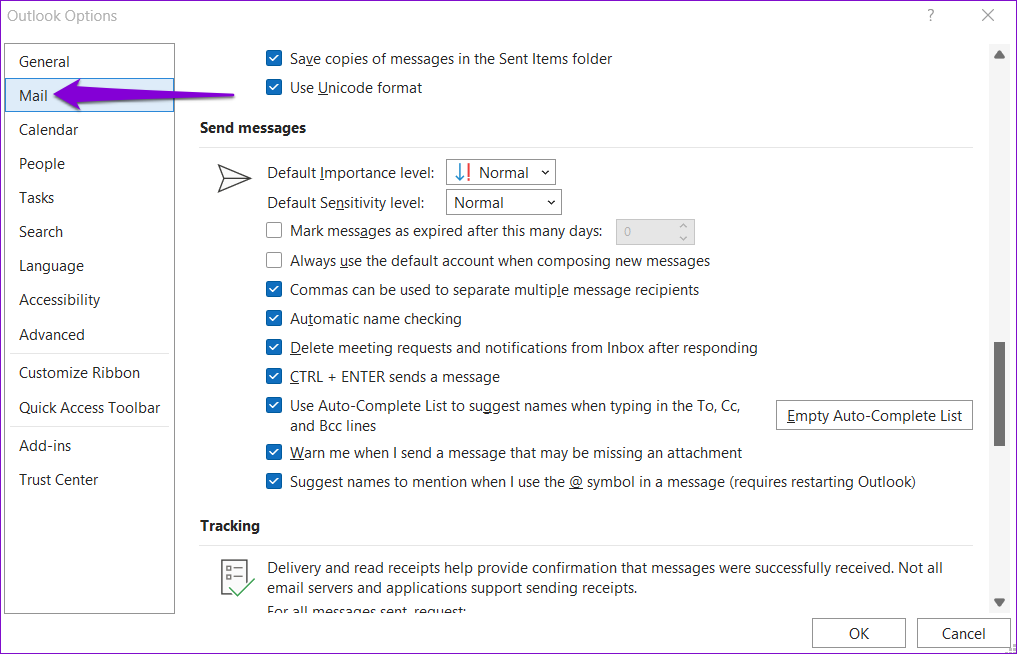
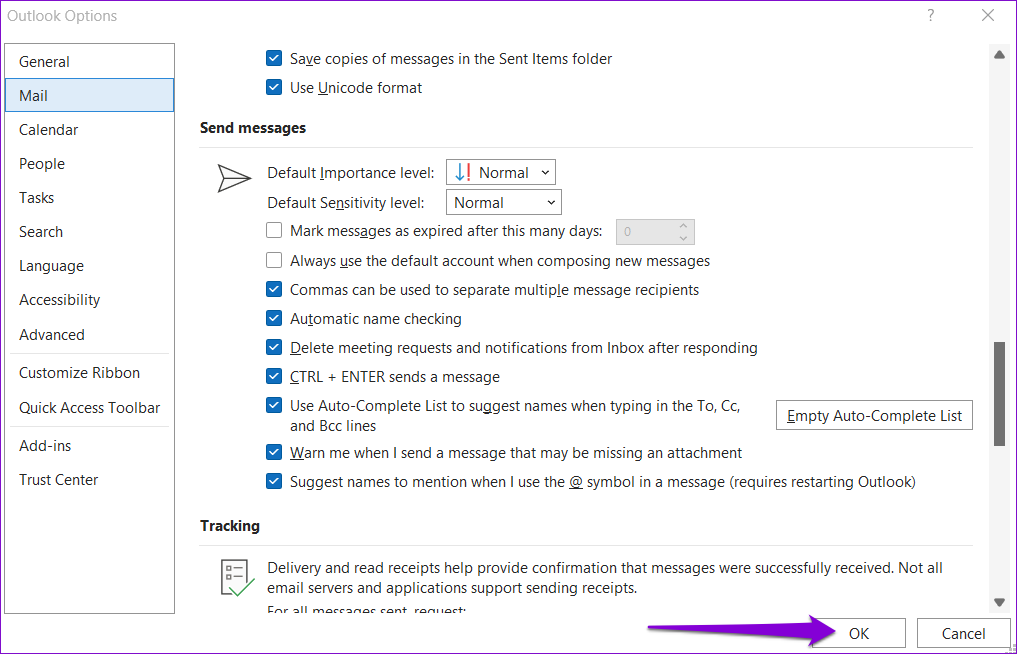
Step 3: In the Outlook Options window that opens, switch to the Mail tab.
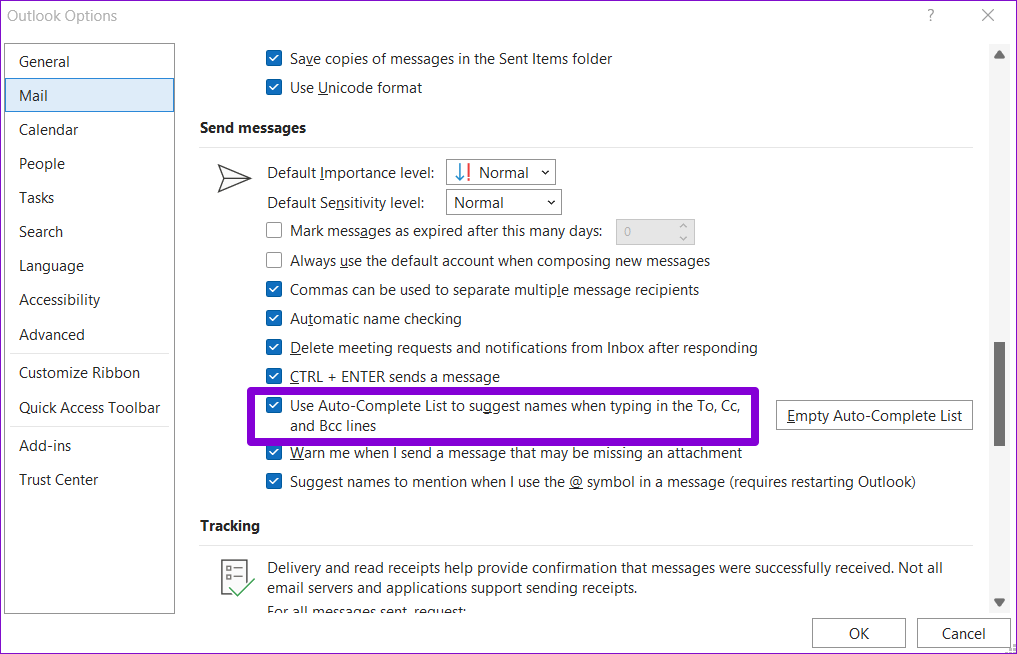
Step 4: Scroll down to the Send messages section and tick the box that reads ‘Use Auto-Complete List to suggest names when typing in the To, Cc, and Bcc lines.’
Step 5: Click OK to save the changes.
2. Configure the Contacts Folder to Appear in Outlook Address Book
Outlook lets you create contact folders to organize your contacts into different groups. If Outlook isn’t displaying contacts from one of these folders, it may not be set up to appear in your address book. Here’s how you can change that.
Step 1: In the Outlook app, expand Contacts from the left pane.
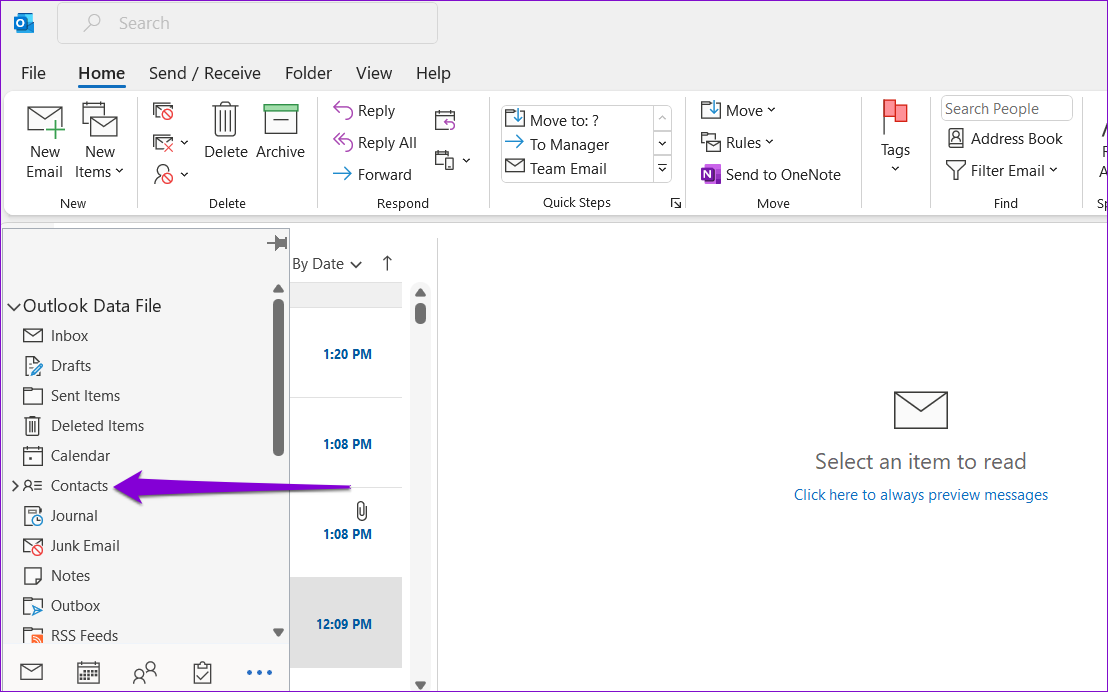
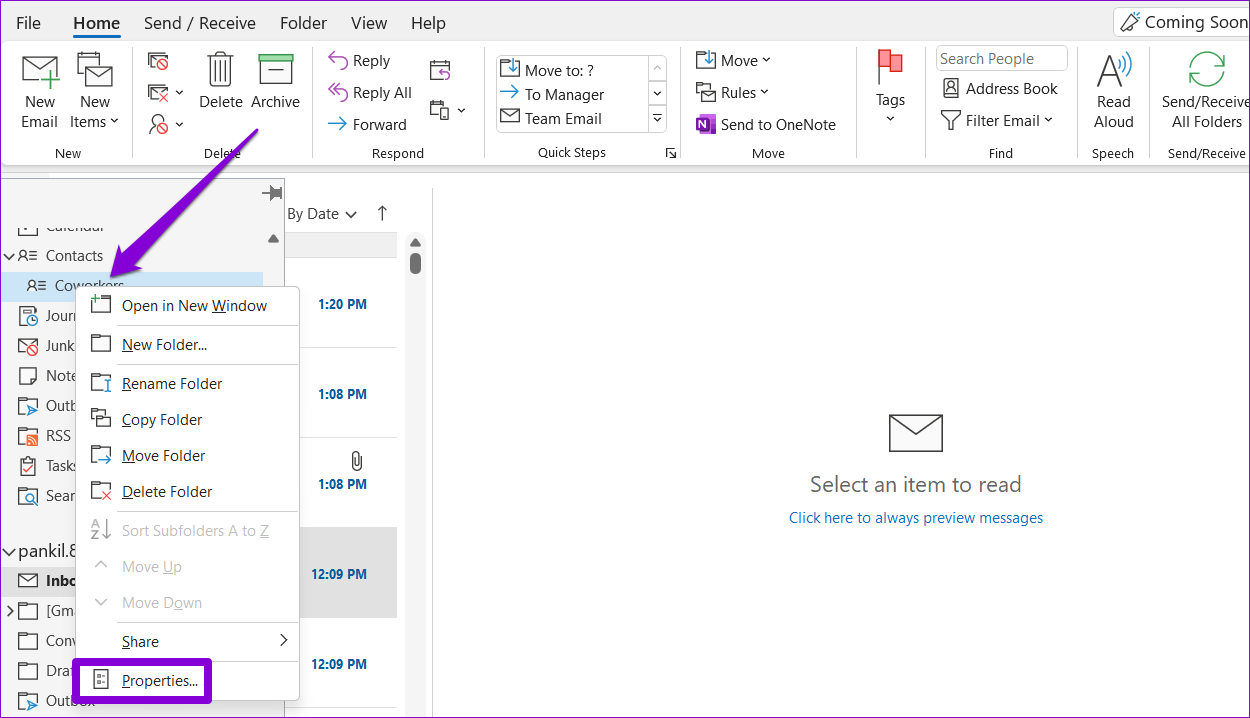
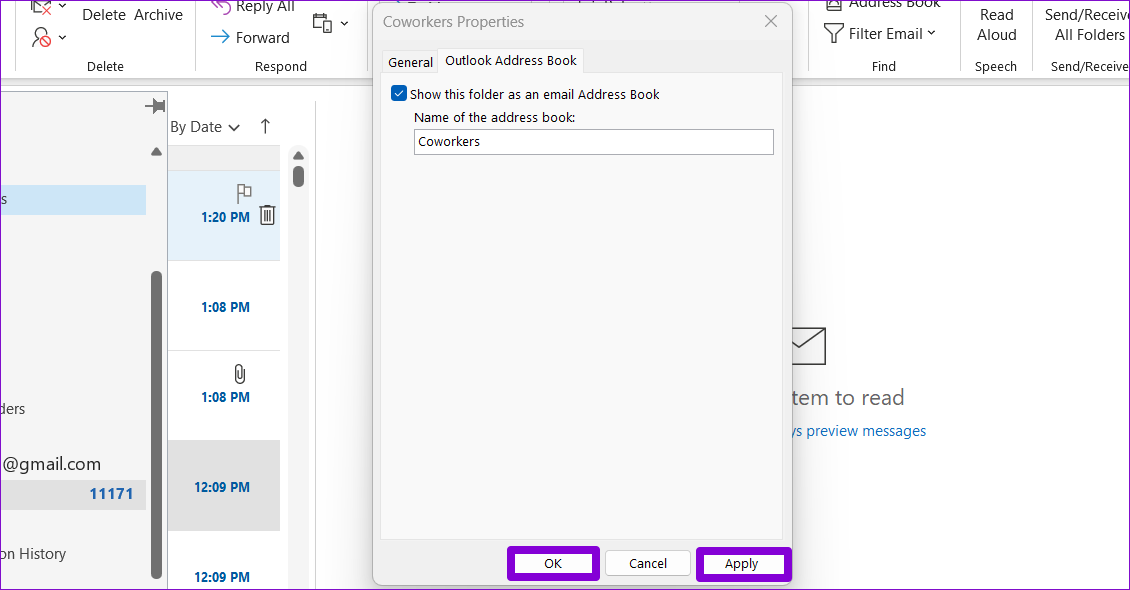
Step 2: Right-click on the problematic contact folder and select Properties.
Step 3: In the Properties window, switch to the Outlook Address Book tab and tick the ‘Show this folder as an email Address Book’ option.
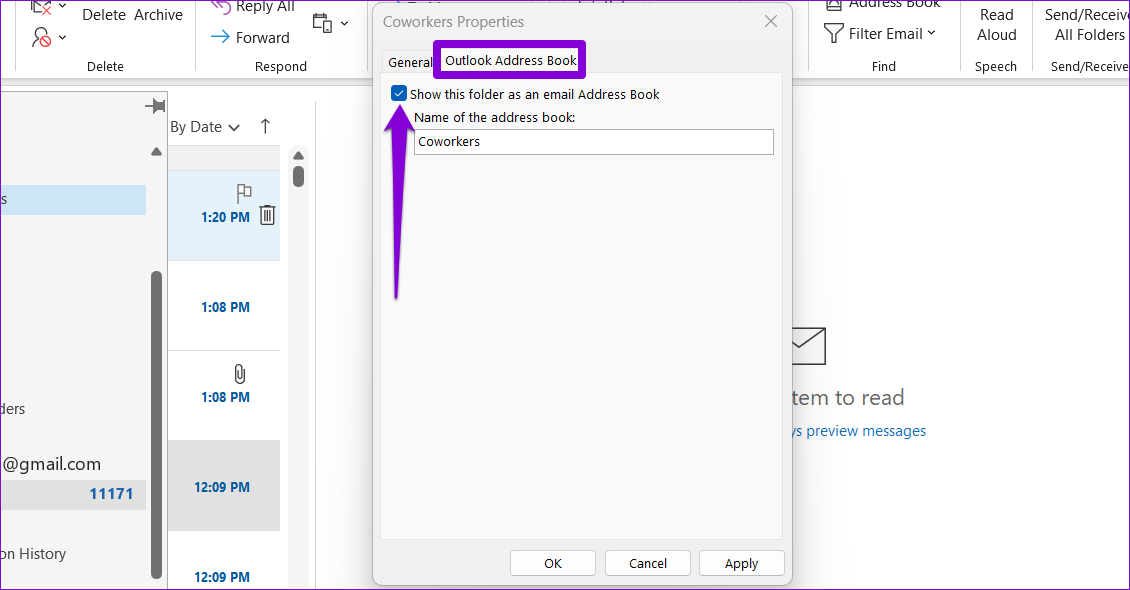
Step 4: Hit Apply, followed by OK, to save changes.
3. Rename the RoamCache Folder
If one of the files in your RoamCache folder is corrupted, autocomplete will not work properly. You can rename the RoamCache folder to reset the autocomplete feature in Outlook completely. Let’s begin with the steps.
On Home Email Accounts
We assume that you are already running Outlook on your Windows 11/10 machine. Follow the below steps.
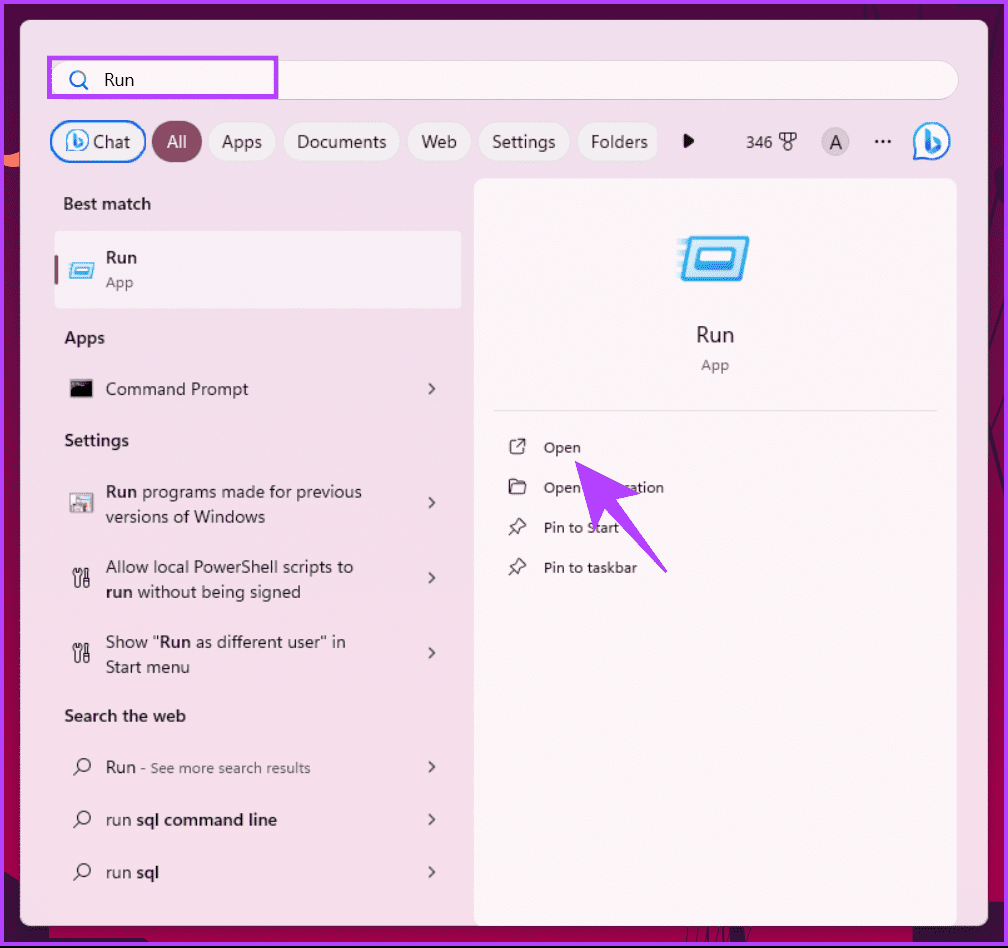
Step 1: Press the Windows key on your keyboard, type Run, and click Open.
Note: Alternatively, you can press ‘Windows key + R’ to open the Run command box.
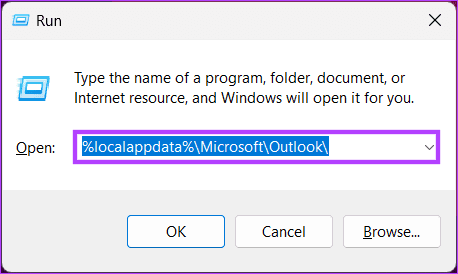
Step 2: Type the below command in the text box and hit Enter.
%localappdata%\Microsoft\Outlook
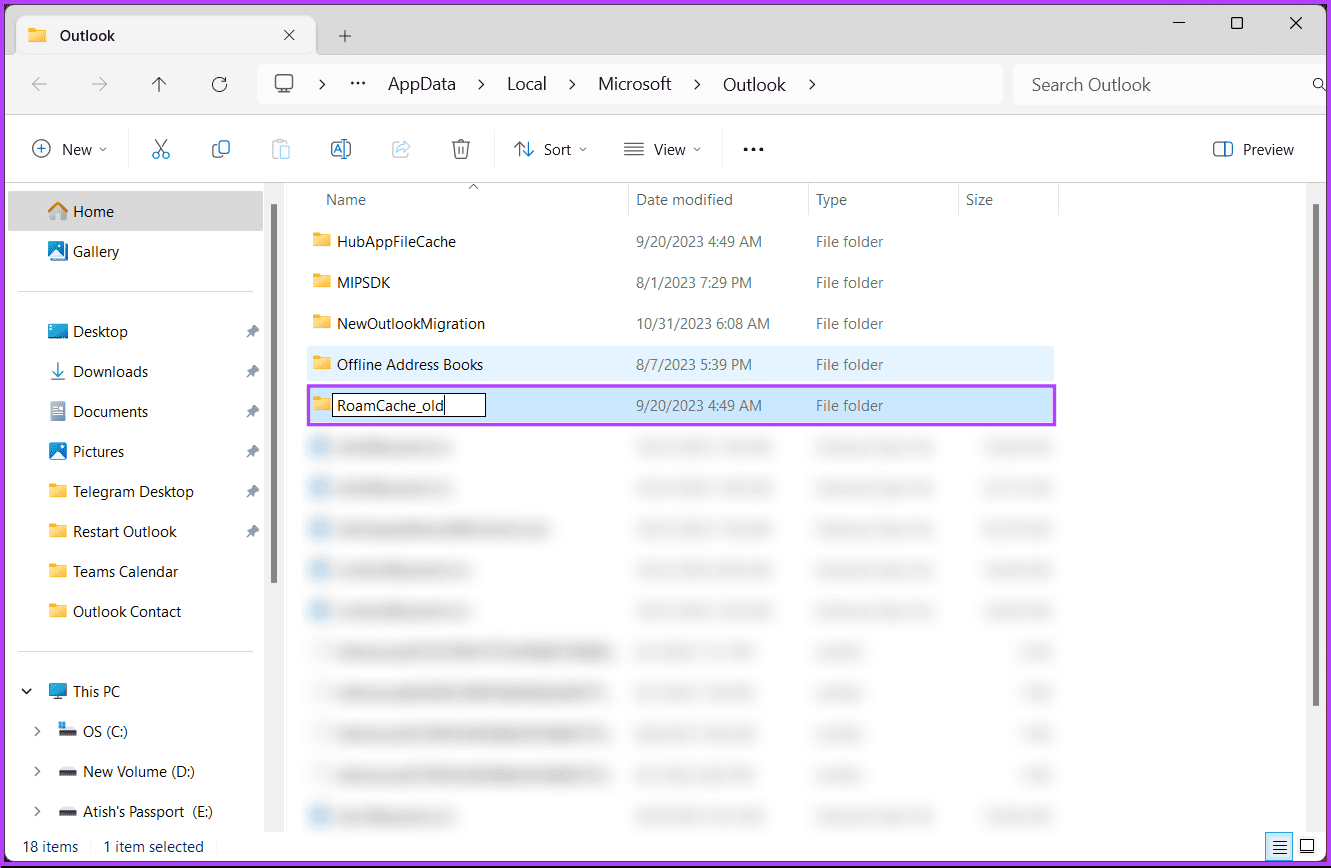
Step 3: Now, right-click on the RoamCache folder.

Step 4: From the context menu, click Rename.
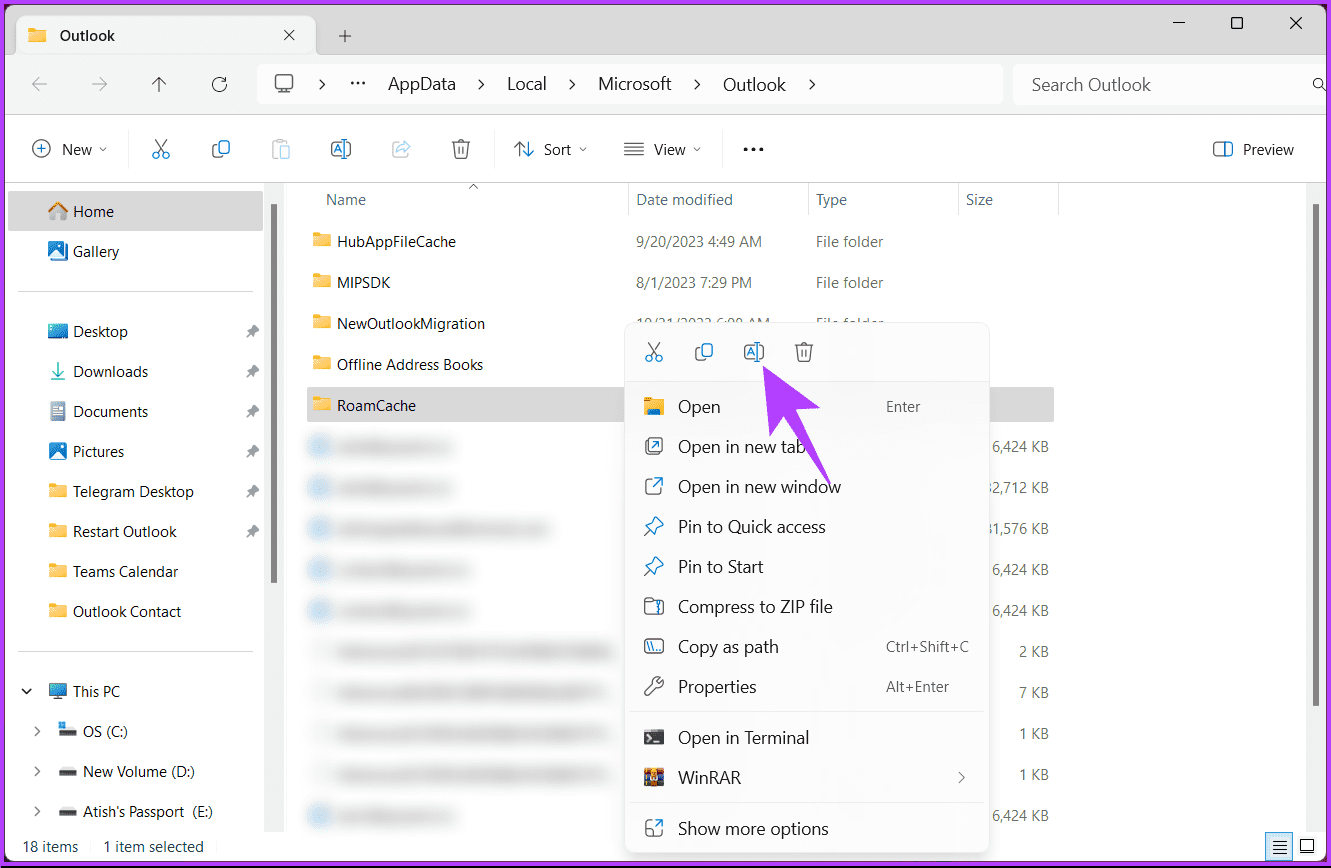
Step 5: Change the folder name from RoamCache to RoamCache_old.
The RoamCache folder has now been renamed on your Windows computer. Now that you have successfully renamed the home email accounts, let’s take a look at the RoamCache folder on your Exchange account.
On Exchange Accounts
There are multiple steps involved in this method. Firstly, we will be disabling ‘Use Cached Exchange Mode’ and renaming the already-generated RoamCache folder. After that, we will enable the ‘Use Cached Exchange Mode’ on Outlook.
Let’s begin with disabling ‘Use Cached Exchange Mode’ and renaming the Outlook cache folder.
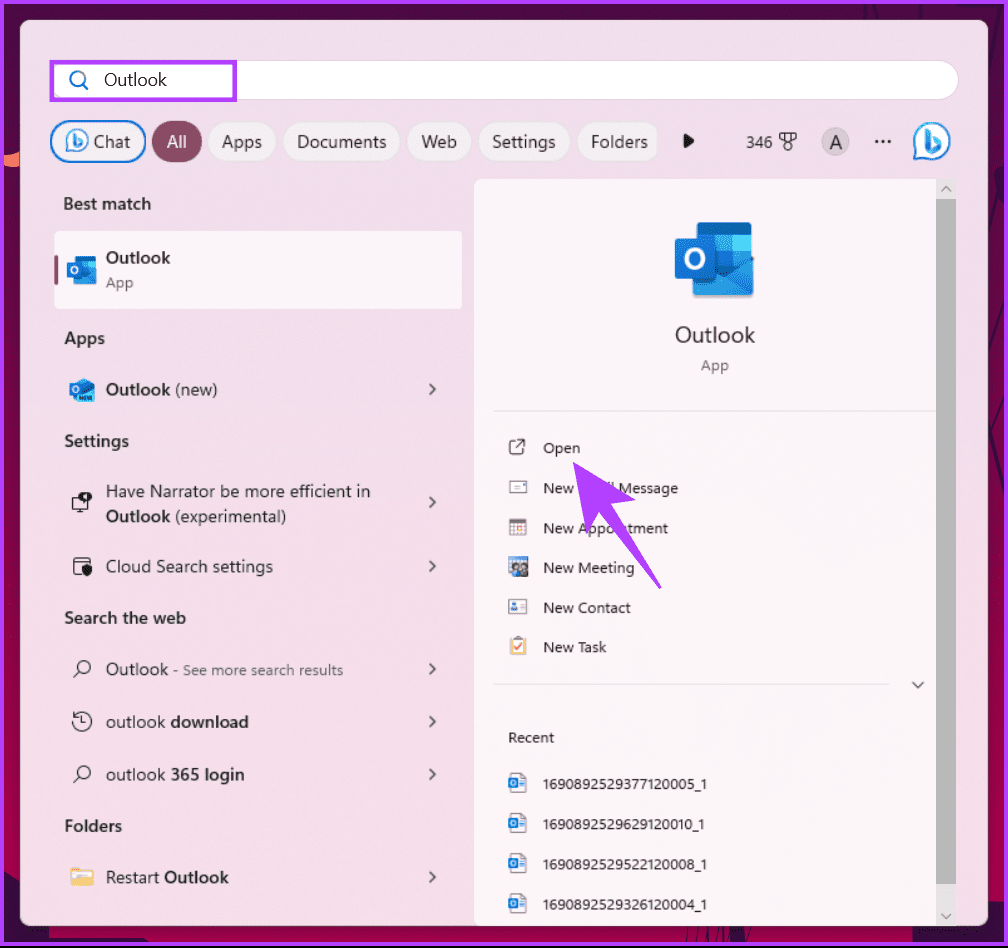
Step 1: Press the Windows key on your keyboard, type Outlook, and click Open.
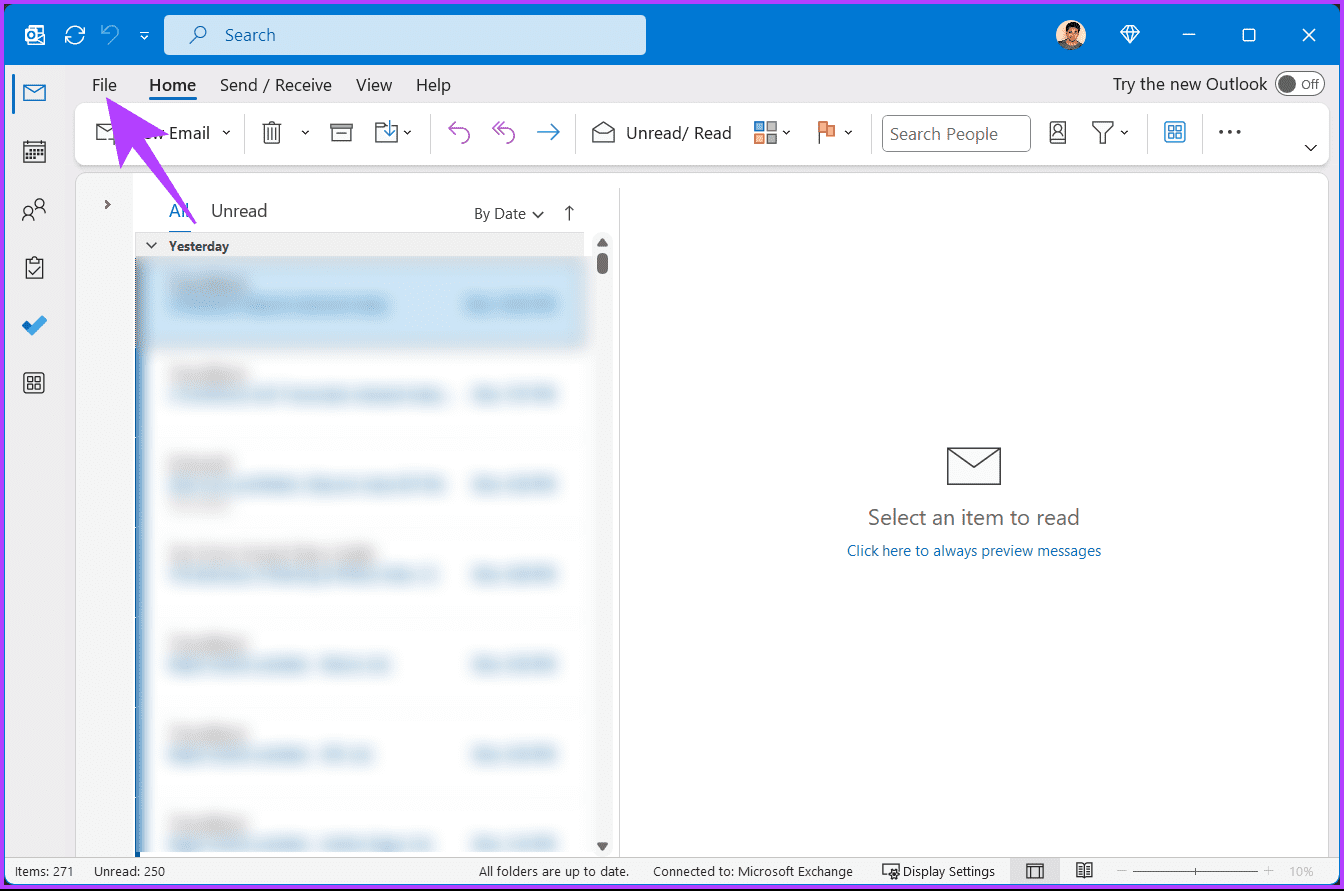
Step 2: From the Outlook app, go to the File menu in the toolbar.
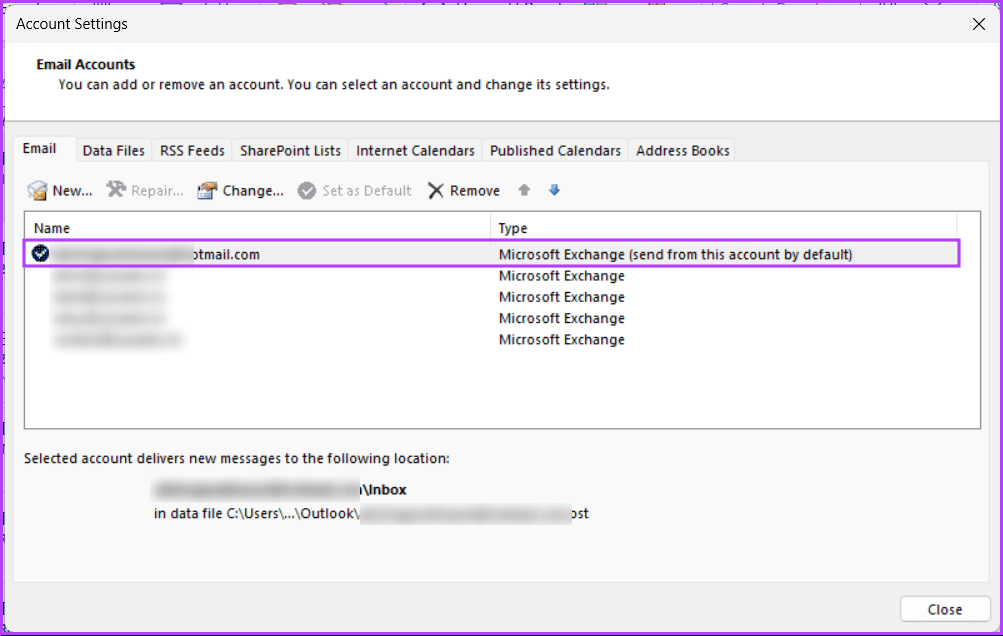
Step 3: Now, click on the chevron (arrow) icon, and from the drop-down, choose Account Settings.
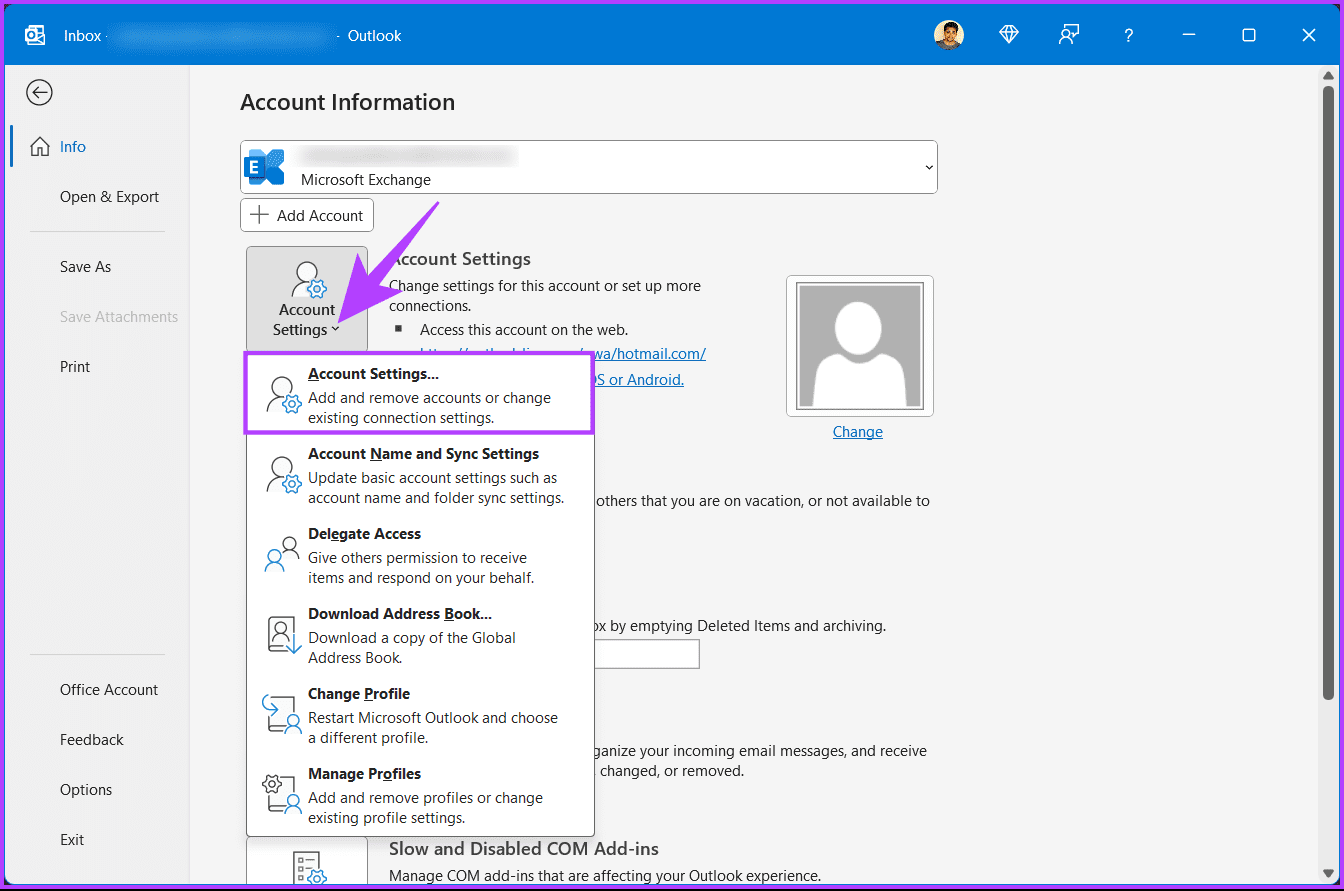
Step 4: In the Account Settings pop-up window, double-click on the account you want to change the RoamCache folder for.
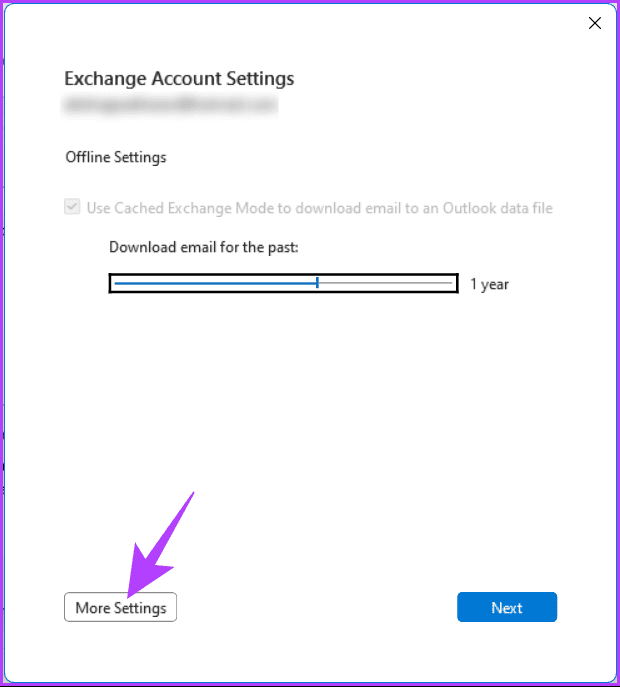
Step 5: Click on More Settings in the Exchange Account Settings pop-up.
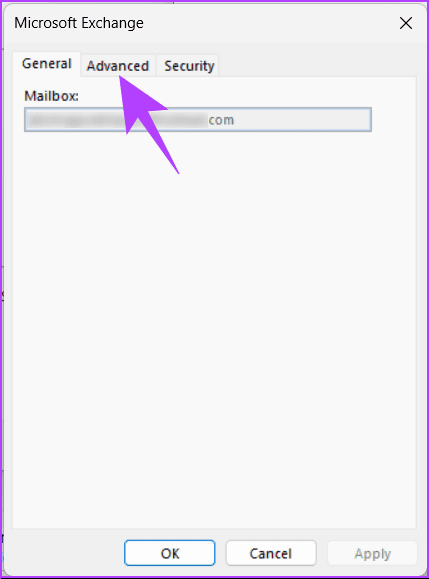
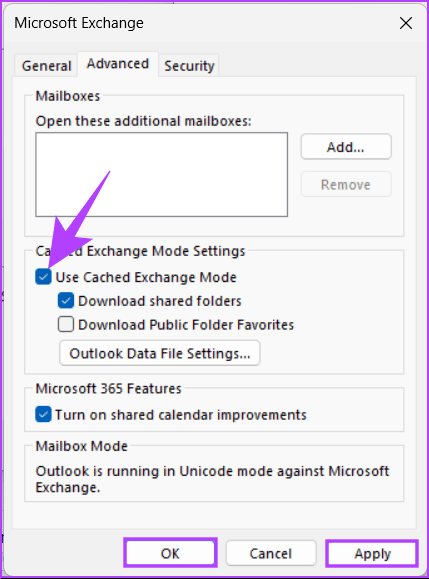
Step 6: In Microsoft Exchange, navigate to Advanced.
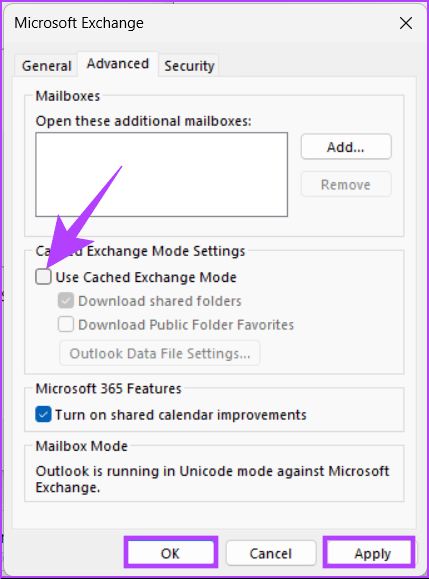
Step 7: Under Cached Exchange Mode Settings, uncheck ‘Use Cached Exchange Mode.’
Step 8: Finally, click Apply and OK.
Step 9: Now, press the Windows key on your keyboard, type Run, and click Open.
Note: Alternatively, you can press ‘Windows key + R’ to open the Run command box.
Step 10: Type the below command in the text box and click OK.
%localappdata%\Microsoft\Outlook
Step 11: Now, right-click on the RoamCache folder.
Step 12: From the context menu, click Rename.
Step 13: Change the folder name from RoamCache to RoamCache_old.
Once the folder is renamed, restart Outlook to create a new RoamCache folder and continue with the below steps.
Enable Use Cached Exchange Mode
Step 14: Press the Windows key on your keyboard, type Outlook, and click Open.
Step 15: From the Outlook app, go to the File menu in the toolbar.
Step 16: Now, click on the chevron (arrow) icon, and from the drop-down, choose Account Settings.
Step 17: In the Account Settings pop-up window, double-click on the account you want to change the RoamCache folder for.
Step 18: Click on More Settings in the Exchange Account Settings pop-up.
Step 19: In Microsoft Exchange, navigate to Advanced.
Step 20: Under Cached Exchange Mode Settings, check ‘Use Cached Exchange Mode.’
Step 21: Finally, click Apply and OK to save the changes.
You can now go ahead and delete the RoamCache_old folder from your machine. Outlook should now be able to populate the contacts when composing new mail. If this didn’t resolve the issue, check out the next method.
4. Use Outlook in Safe Mode
Using third-party add-ins is an excellent way to extend Outlook’s functionality. However, these add-ins can sometimes conflict with the Outlook app and prevent it from working correctly. To see if this is the case, you can launch Outlook in safe mode.
When you run Outlook in safe mode, it runs without your add-ins. This way, you can tell if one of the add-ins is preventing Outlook from displaying your contact list.
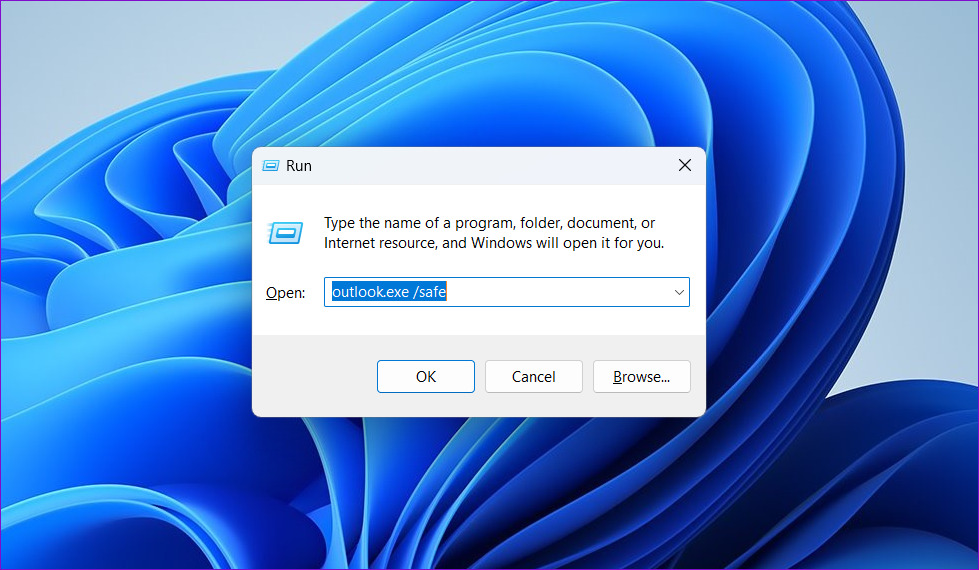
To open Outlook in safe mode, press the ‘Windows key + R’ to open the Run dialog. Type outlook.exe/safe and press Enter.
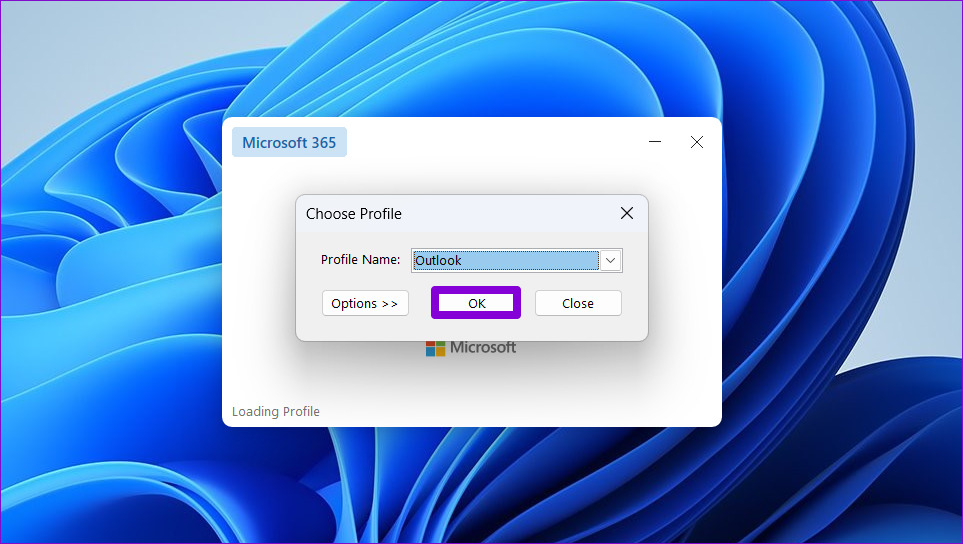
Select your Outlook profile and hit OK.
If Outlook displays your contacts in safe mode, the add-in causing the problem was disabled. To find it, you need to disable all your add-ins and re-enable them one by one.
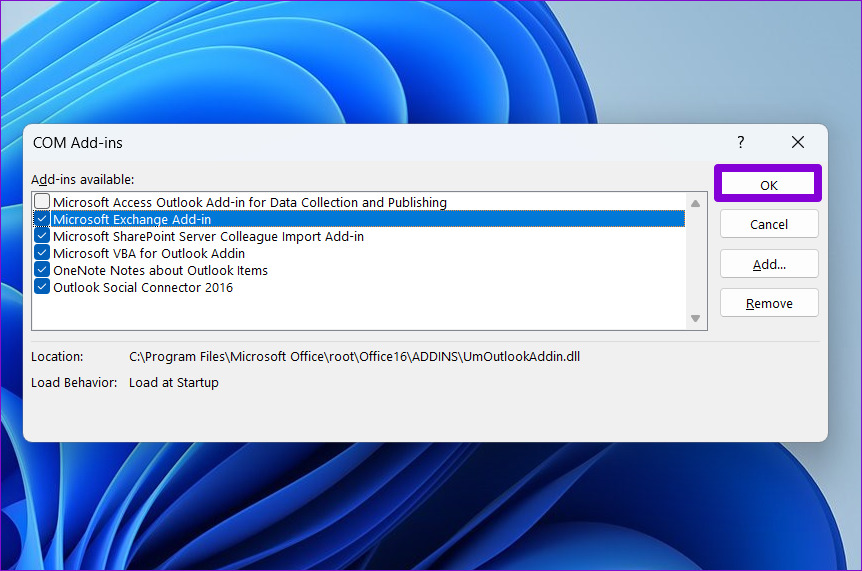
To disable add-ins in Outlook:
Step 1: Open the Outlook app in normal mode and click on the File menu in the top-left corner.
Step 2: Click on Options.
Step 3: In the Outlook Options window, navigate to the Add-ins tab. Use the drop-down menu next to Manage and select COM Add-ins. Then click on the Go button next to it.
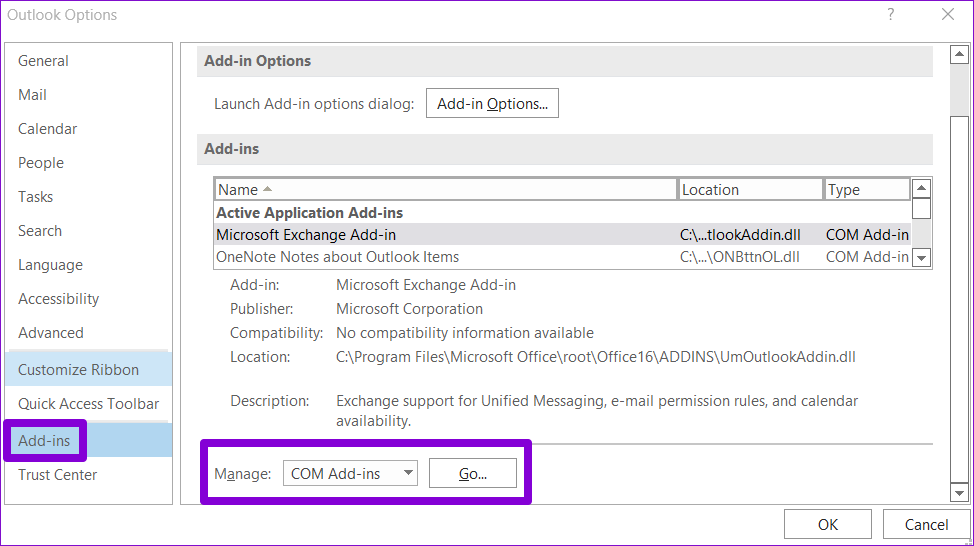
Step 4: Uncheck the boxes to disable add-ins and click OK.
Enable all your add-ins one at a time until the issue occurs again. Once you find the problematic add-in, consider updating or removing it to resolve the issue for good. If this didn’t fix the Outlook not populating email addresses issue, maybe the next method will. Continue reading.
Also Read: Best ways to fix Outlook receiving late emails on Windows 11
5. Clear Outlook Cache
The more you use Outlook, the more cache data it accumulates. While that’s a good thing, Outlook cache data can also cause problems once it becomes old or corrupted. You can try clearing the Outlook cache to see if that restores its ability to display contacts.
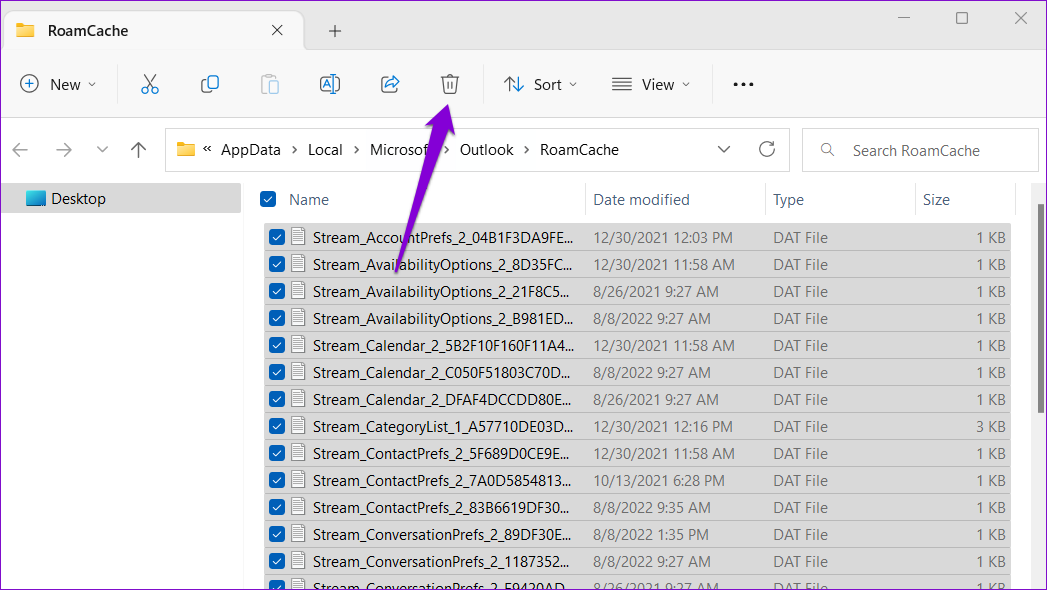
Step 1: Right-click on the Start icon and select Run.

Step 2: Type the following path in the Open field and press Enter.
%localappdata%\Microsoft\Outlook\RoamCache

Step 3: In the File Explorer window that opens, select all files and click the trash icon at the top to delete them.
Restart the Outlook app and check if it shows your contacts. If this didn’t fix Outlook contacts not showing when composing new messages, check out the next method.
6. Update Outlook
Sometimes, autocomplete fails to find contact information due to some bugs or glitches, and Microsoft is quick at fixing things, especially with their Office products. All you have to do is update Outlook. Here’s how to do it.
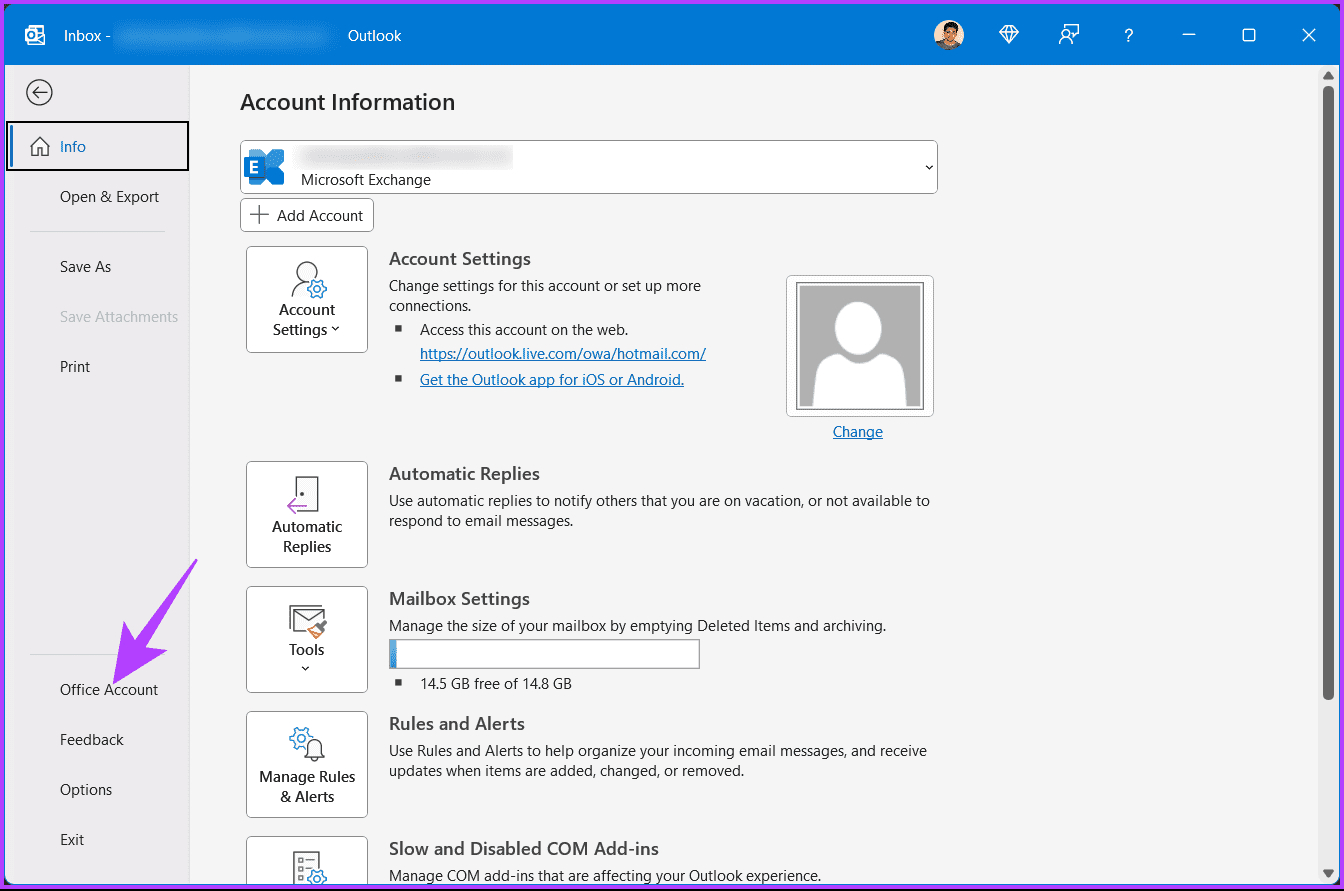
Step 1: Press the Windows key on your keyboard, type Outlook, and click Open.
Step 2: Click on File from the toolbar menu.
Step 3: Now, navigate to the Office Account.
Step 4: Click on Update Options beside ‘Microsoft 365 and Office Updates.’ From the drop-down, select Update Now.
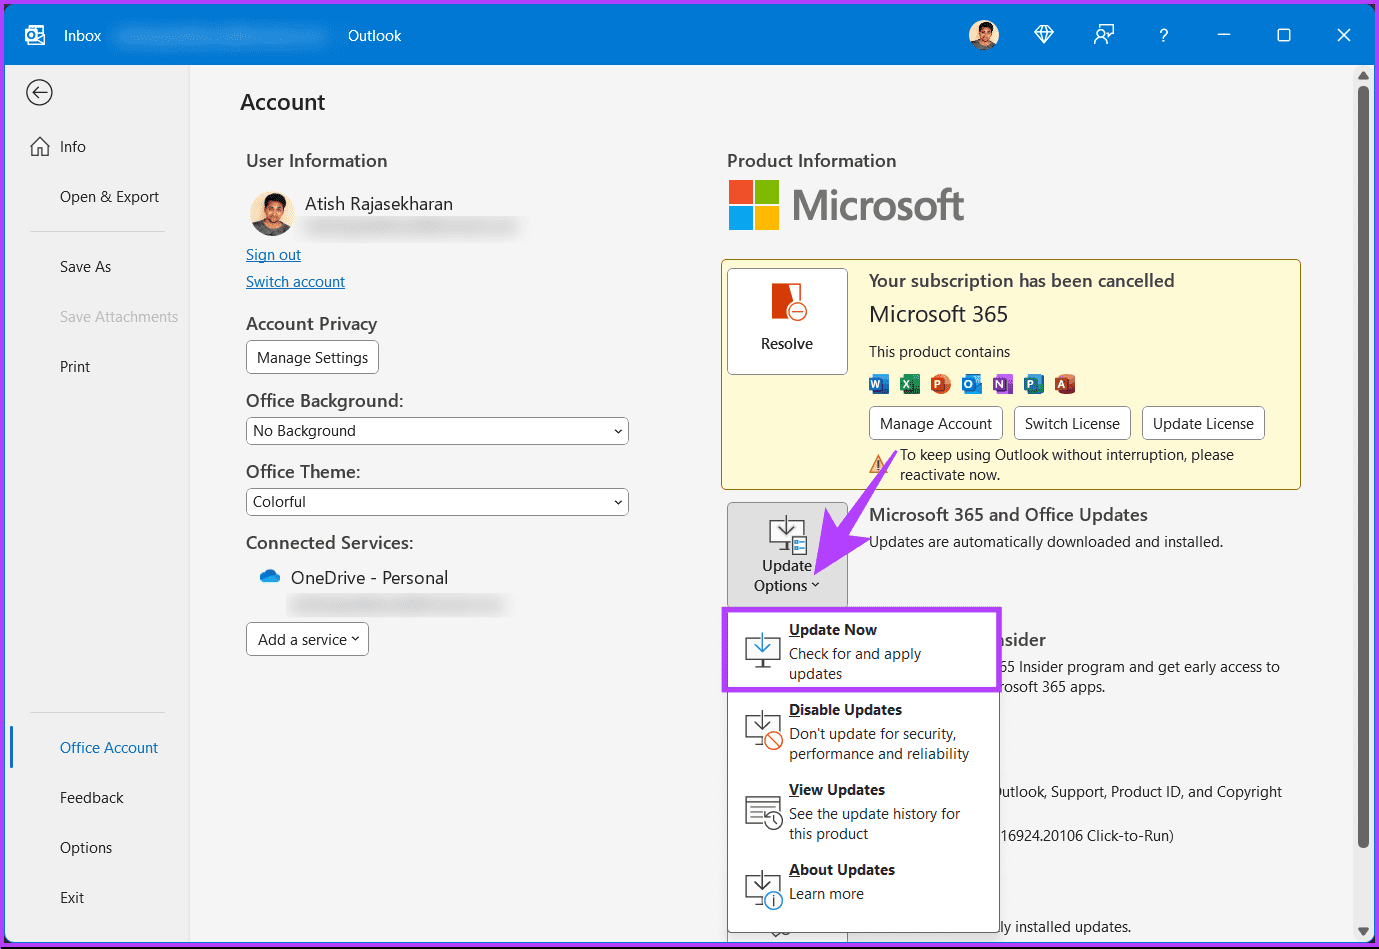
You will see a pop-up that will check for updates and apply them. It may take some time for it to process and complete the process. When the update is complete, ensure the autocomplete is functioning properly.
If Outlook is not populating email addresses after updating, move on to the next and final fix.
7. Run the Office Repair Tool to Fix Outlook
Microsoft provides a handy repair tool for the Office suite. It can automatically resolve issues with all your Office apps, including Outlook. You can run this tool to fix any issues that may have been preventing Outlook from showing contacts on Windows.
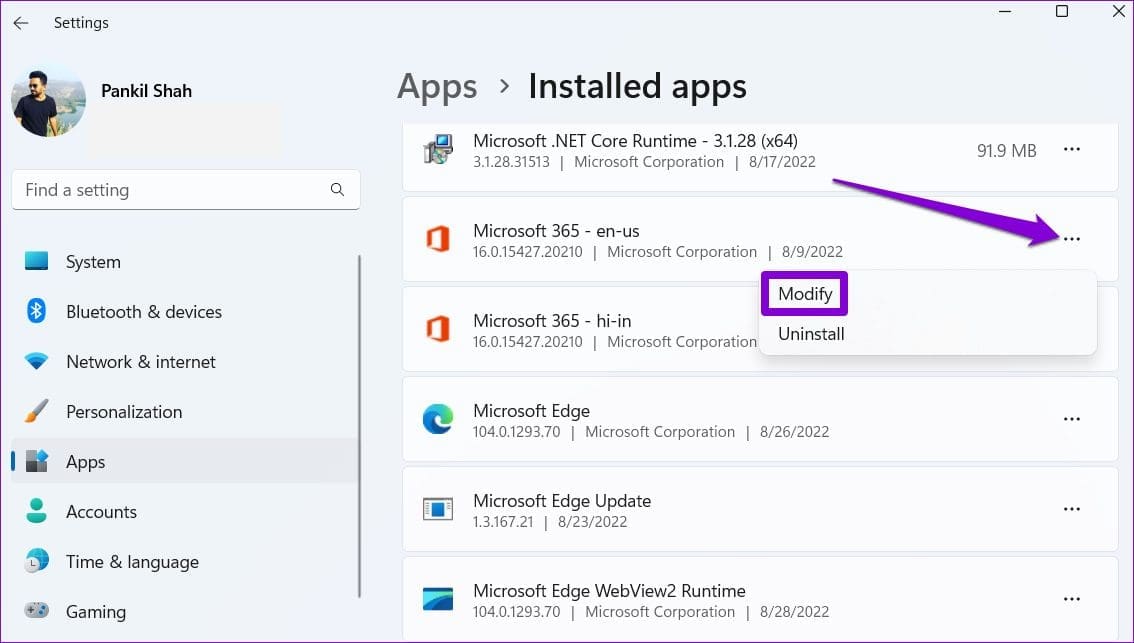
Step 1: Right-click on the Start icon and select Installed apps from the list.

Step 2: Scroll down to locate the Microsoft Office product on the list. Click the three-dot menu icon next to it and select Modify.
Step 3: Select Online Repair and click on Repair.
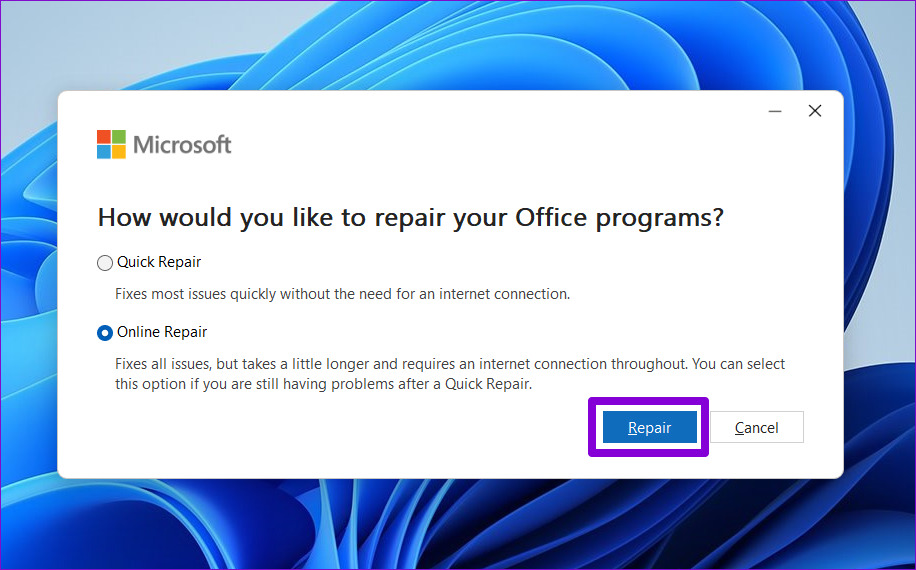
The repair process might take a while, so be patient. Following that, Outlook should display your contacts and function normally on your Windows computer.
If you have any queries we missed addressing in the article, check out the FAQ section below.
FAQs on Fixing Outlook Autocomplete Not Working
Autocomplete is available in many versions of Outlook, but the exact behavior and location of autocomplete data files may vary. For example, in Outlook 2016 and later, the autocomplete list is stored in your mailbox, while in older versions, it may be saved in “.nk2” files.
Yes, you can edit or remove Autocomplete entries. When you see an incorrect or outdated suggestion, use the arrow keys to highlight it and then press the Delete key to remove it. Outlook will learn from your actions and update its suggestions.
Get Back Your Contacts
We’ve explored the common reasons behind the ‘Outlook contact list not showing up’ issue and provided solutions to fix it on Windows 11 and 10. These solutions can help you regain access to your contact list within Outlook. You may also want to read ways to fix Microsoft Teams meeting add-in that won’t appear in Outlook.
Was this helpful?
Last updated on 01 November, 2023
Read Next
 8 Ways to Fix Whatsapp Not Showing Contact Names
WhatsApp is one of the most popular messaging platforms with various features.
8 Ways to Fix Whatsapp Not Showing Contact Names
WhatsApp is one of the most popular messaging platforms with various features.
 5 Ways to Fix Outlook Signature Not Showing on Windows
Fix 1: Configure Outlook to Compose Messages in HTML Format Are you using images in your Outlook signature?
5 Ways to Fix Outlook Signature Not Showing on Windows
Fix 1: Configure Outlook to Compose Messages in HTML Format Are you using images in your Outlook signature?
 Top 7 Ways to Fix Microsoft Outlook Not Showing Email Content on Windows
Are you having trouble viewing the email content in Microsoft Outlook for Windows?
Top 7 Ways to Fix Microsoft Outlook Not Showing Email Content on Windows
Are you having trouble viewing the email content in Microsoft Outlook for Windows?
 Top 3 Ways to Add a Contact in Microsoft Outlook
It's a good idea to add contacts you frequently interact with to the Outlook address book.
4 Ways to Fix Unable to Contact Your DHCP Server Error on Windows 11
Fix 1: Restart Your DHCP Client service The DHCP Client service registers and updates the PC's IP address and DNS record.
Top 3 Ways to Add a Contact in Microsoft Outlook
It's a good idea to add contacts you frequently interact with to the Outlook address book.
4 Ways to Fix Unable to Contact Your DHCP Server Error on Windows 11
Fix 1: Restart Your DHCP Client service The DHCP Client service registers and updates the PC's IP address and DNS record.
 Top 4 Ways to Change New Outlook Back to Old (Classic View) Outlook on Windows and Mac
The new Outlook app for desktop boasts a modern and simplified design, aligning it more closely with the web version of Microsoft Outlook.
Top 4 Ways to Change New Outlook Back to Old (Classic View) Outlook on Windows and Mac
The new Outlook app for desktop boasts a modern and simplified design, aligning it more closely with the web version of Microsoft Outlook.
 8 Best Fixes for Google Messages App Not Showing Contact Names on Android
The Google Messages app can help you send text messages and react to them as well.
8 Best Fixes for Google Messages App Not Showing Contact Names on Android
The Google Messages app can help you send text messages and react to them as well.
 Top 6 Fixes for iPhone Not Showing Contact Names for Incoming Calls
Is your iPhone failing to show contact names during incoming calls?
Top 6 Fixes for iPhone Not Showing Contact Names for Incoming Calls
Is your iPhone failing to show contact names during incoming calls?
The article above may contain affiliate links which help support Guiding Tech. The content remains unbiased and authentic and will never affect our editorial integrity.