Setting your PC to an accurate date and time is vital if you want to avoid any issues while browsing or using apps on Windows 11. Usually, Windows uses the Network Time Protocol (NTP) to connect your PC with an internet time server to sync its clock. But when it fails, you can use the troubleshooting tips mentioned below.

1. Check Date & Time Settings
You can start by verifying the date and time settings on Windows to ensure they’re set to be updated automatically. Here’s how.
Step 1: Press Windows key + I to launch the Settings app. Navigate to Time & language tab and open Date & time settings.

Step 2: Enable the switches next to ‘Set time automatically’ and ‘Set time zone automatically.’
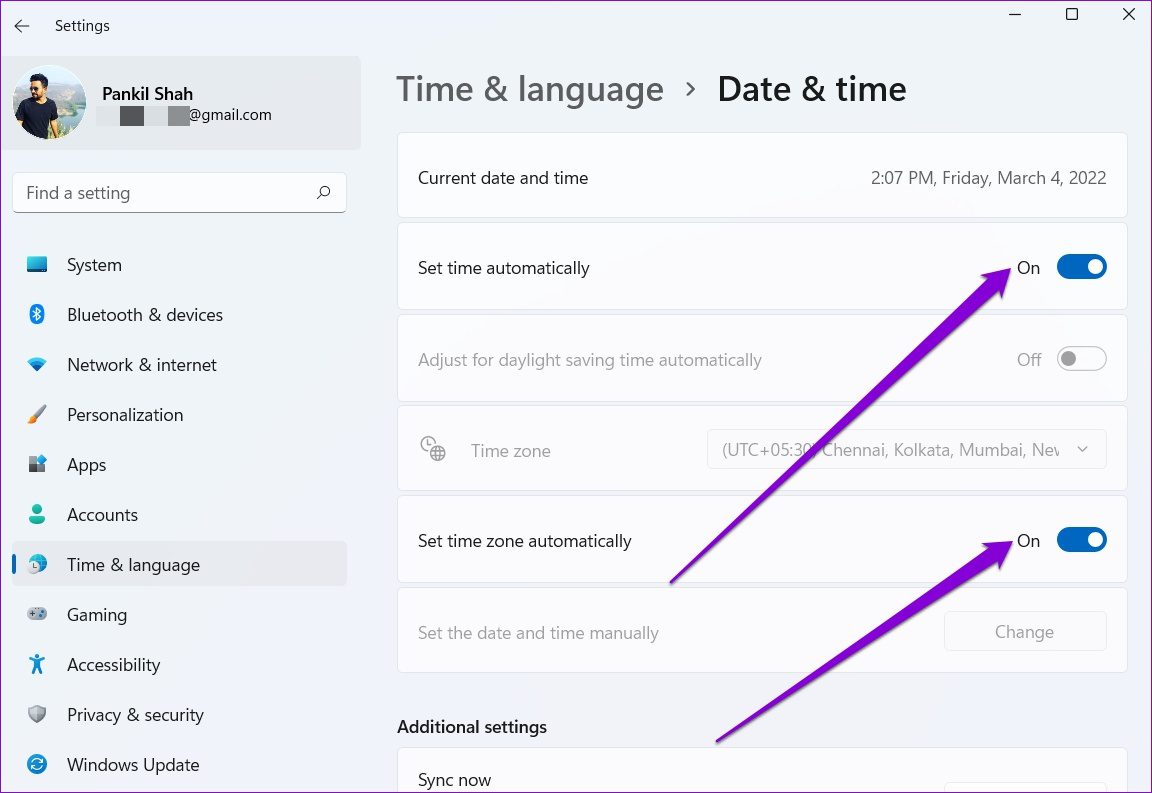
Step 3: Go to Additional settings and hit Sync now.

2. Restart Windows Time Service
Windows Time service is a small program that needs to run in the background for time synchronization. Ideally, this service should run automatically as your PC boots. But if the service has run into an error while starting, then restarting it might help.
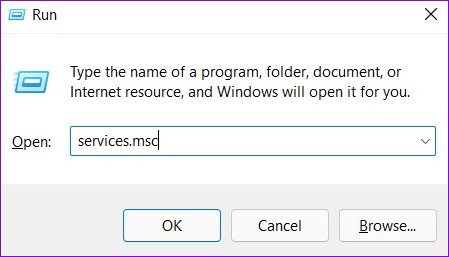
Step 1: Press Windows key + R to launch the Run command, type in services.msc, and press Enter.
Step 2: In the Services window, locate Windows Time service. Right-click on it select Restart from the menu. If the service is not running, hit Start.
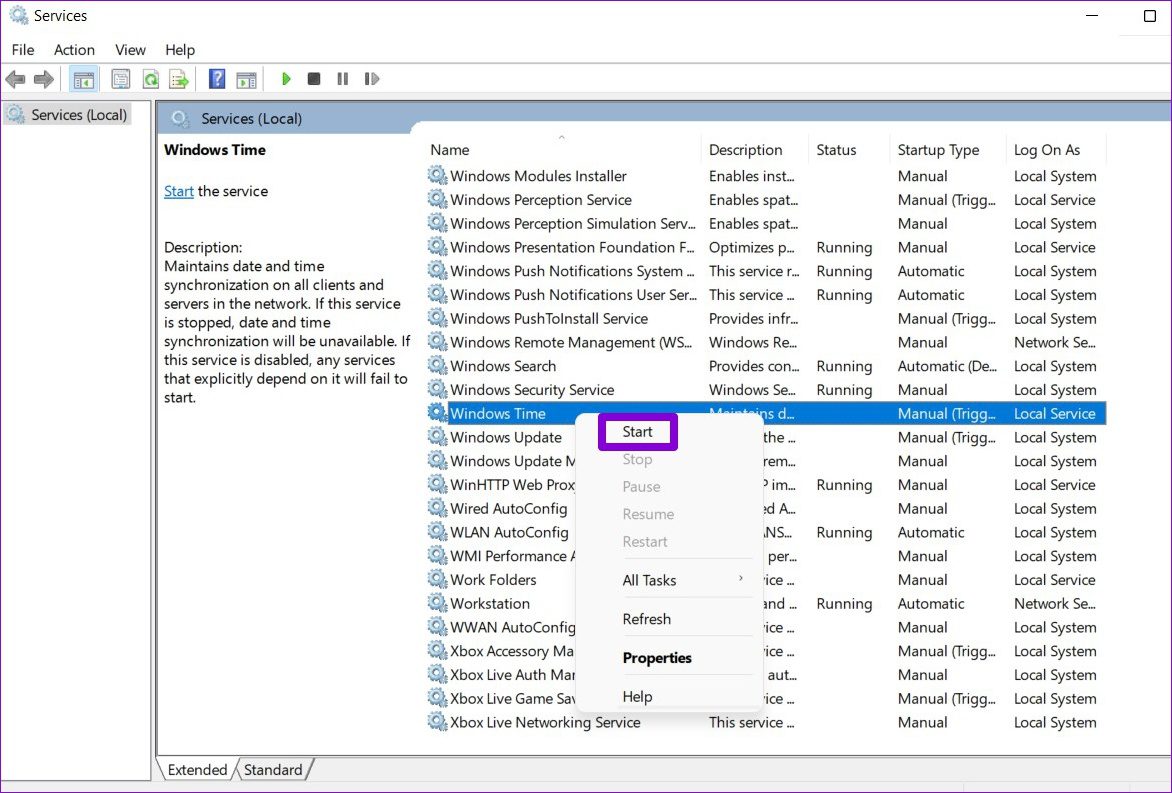
Additionally, you can also configure the Windows Time service to run automatically at startup by modifying its Properties.

3. Change Time Server
If the problem persists, then you can consider switching to a different time server to fix the time sync error. Note that you’ll need to be logged in with an administrative account privileges to make it work.
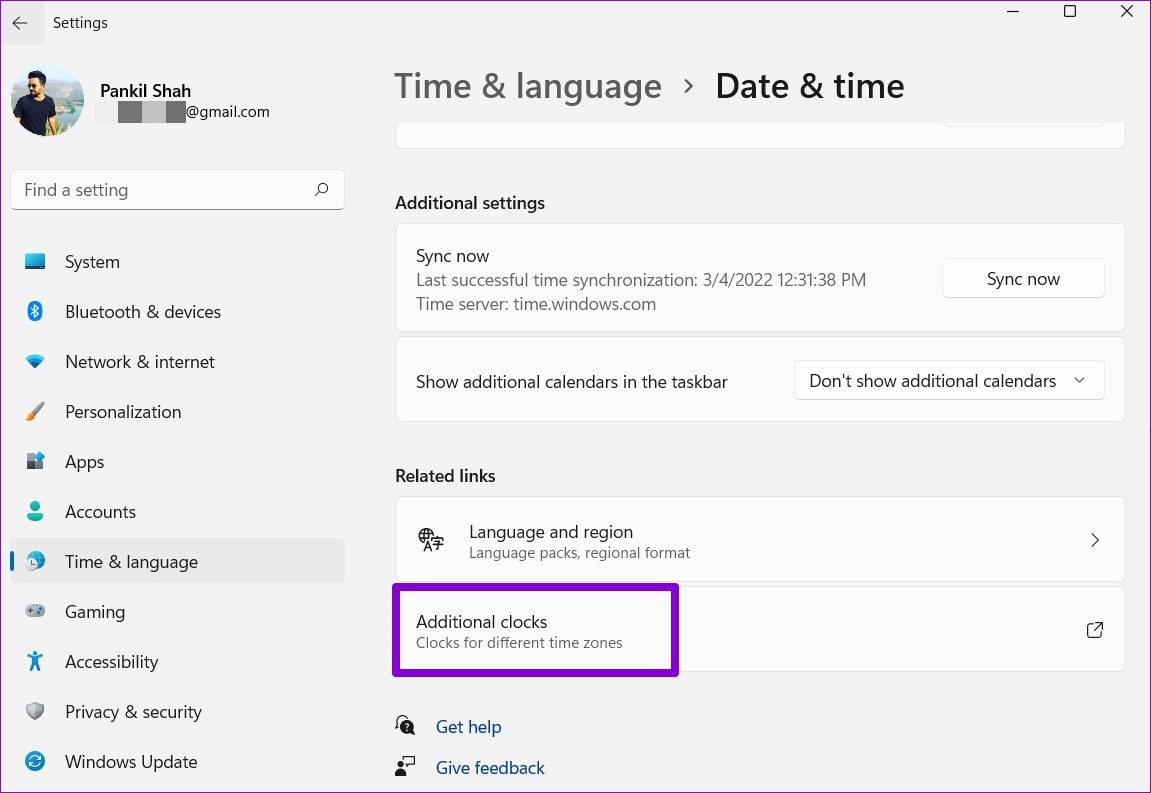
Step 1: Press Windows key + S to open Windows Search. Type date & time settings in the search box, and press Enter.

Step 2: Scroll down to Related settings and click on Additional clocks.
Step 3: The Date and Time menu window will open. Under the Internet Time tab and click on Change settings.
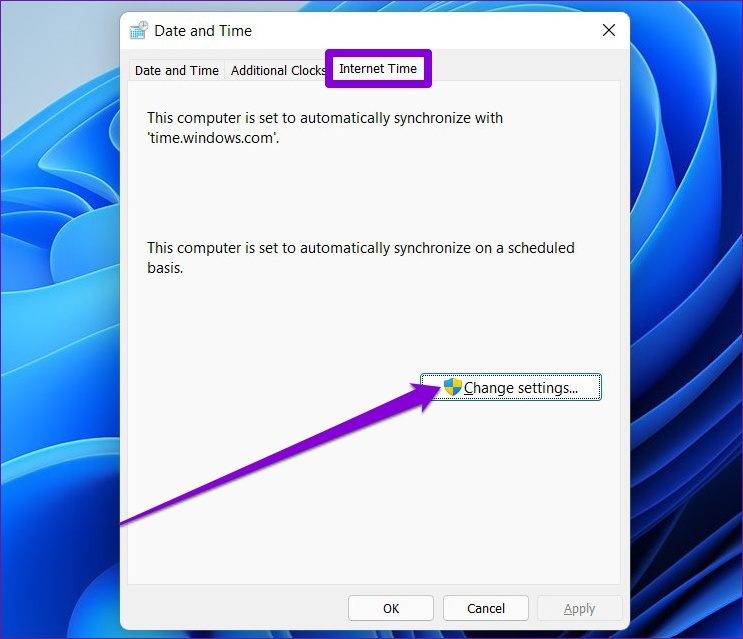
Step 4: Use the drop-down menu next to Server to select a different server and hit Update now.

Check to see if the time sync error is resolved now.
4. Force Time Sync with Command Prompt
If switching to a different server doesn’t help, you can use the command prompt to reset the Windows Time service configurations and force Windows to sync time. Here’s how.
Step 1: Press Windows key + X and select the Windows Terminal (admin) option from the list.

Step 2: Run the following commands one by one.
net stop w32time

w32tm /unregister

w32tm /register

net start w32time

w32tm /resync
After running these commands, Windows should be able to sync time.
5. SFC Scan
If Windows is missing any important system files, then such issues may arise. In such cases, running a SFC (or System File Checker) scan will help restore those missing or corrupted system files with their cached versions.
Step 1: Open the Start menu, type in cmd, and click on ‘Run as administrator’ option to open the Command prompt with admin rights.

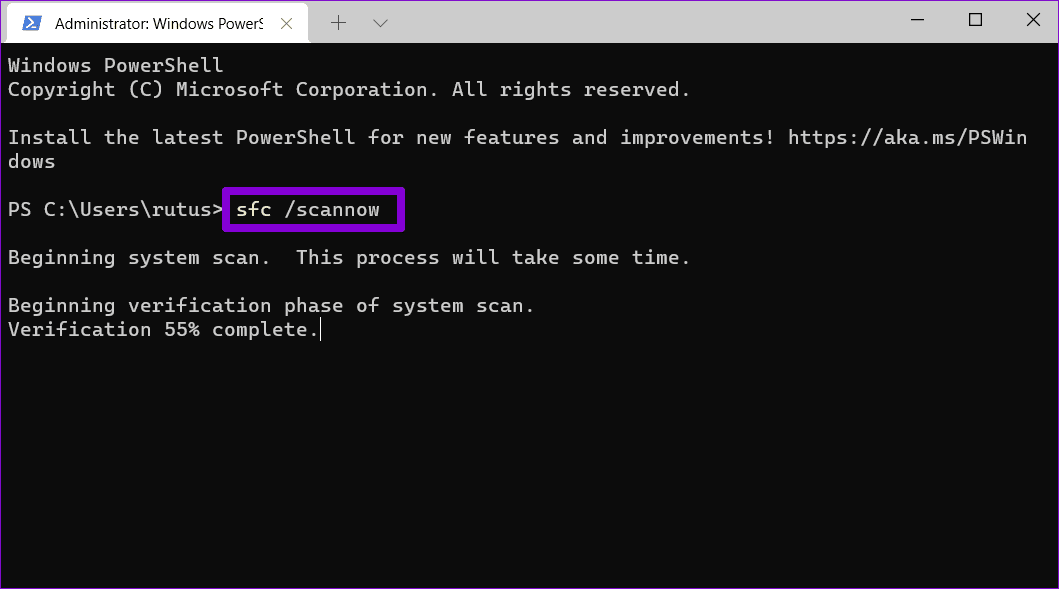
Step 2: Paste the command mentioned below and press Enter.
SFC /scannow
6. Tweak Registry
Several users could fix the time sync issue by modifying the update interval on Windows. To do the same on your PC, you’ll need to apply a tweak using the Registry Editor .
Since Registry Editor carries important settings for Windows and its system apps, you should only use this method if the above ones don’t work. Also, take a back up your registry files before making any changes.
Step 1: Press Windows key + R to launch the Run dialog. Type in regedit and press Enter.

Step 2: In the Registry Editor window, use the address bar at the top to navigate to the following key.
HKEY_LOCAL_MACHINE\SYSTEM\CurrentControlSet\Services\W32Time\TimeProviders\NtpClient

Step 3: Double-click on the SpecialPollInterval key and change its value to 86400. Hit OK to save changes.

Restart your PC for changes to take effect and see if that did resolve the issue.
7. Add More Time Servers
Lastly, if the above solutions don’t work out, there might be an issue with one of the servers you’re using to sync time. You can add more time servers to Windows and try connecting to them to fix this. Read on to learn how.
Step 1: Open Window Search, type in registry editor, and press Enter.

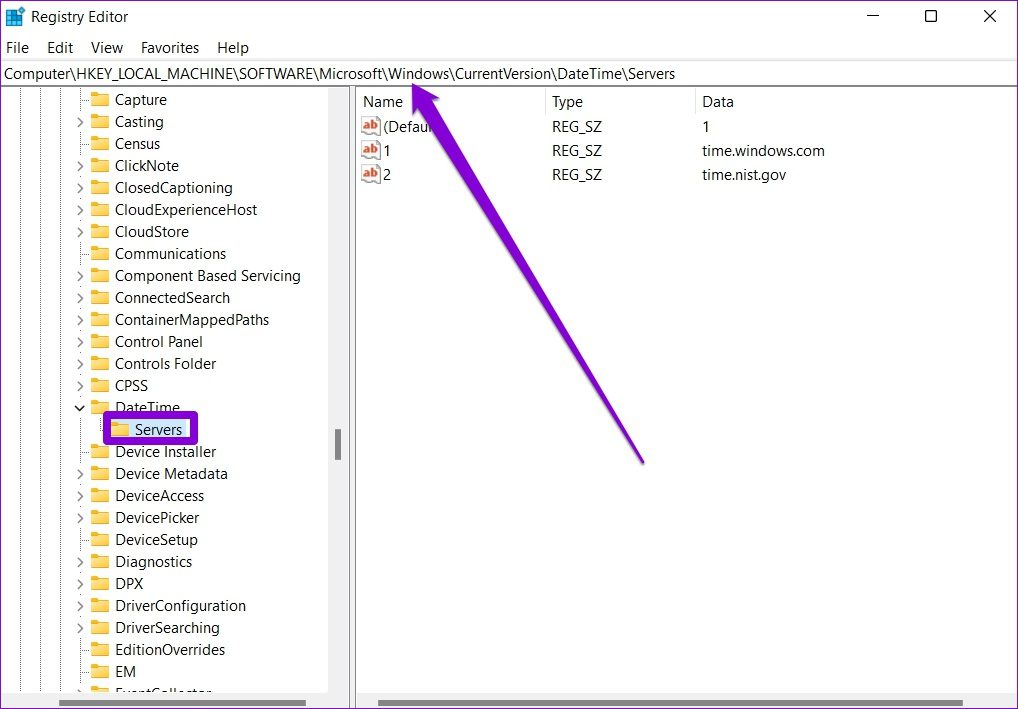
Step 2: Use the left pane or the address bar to navigate to the following key. You’ll find the existing time servers on your right.
HKEY_LOCAL_MACHINE\SOFTWARE\Microsoft\Windows\CurrentVersion\DateTime\Servers
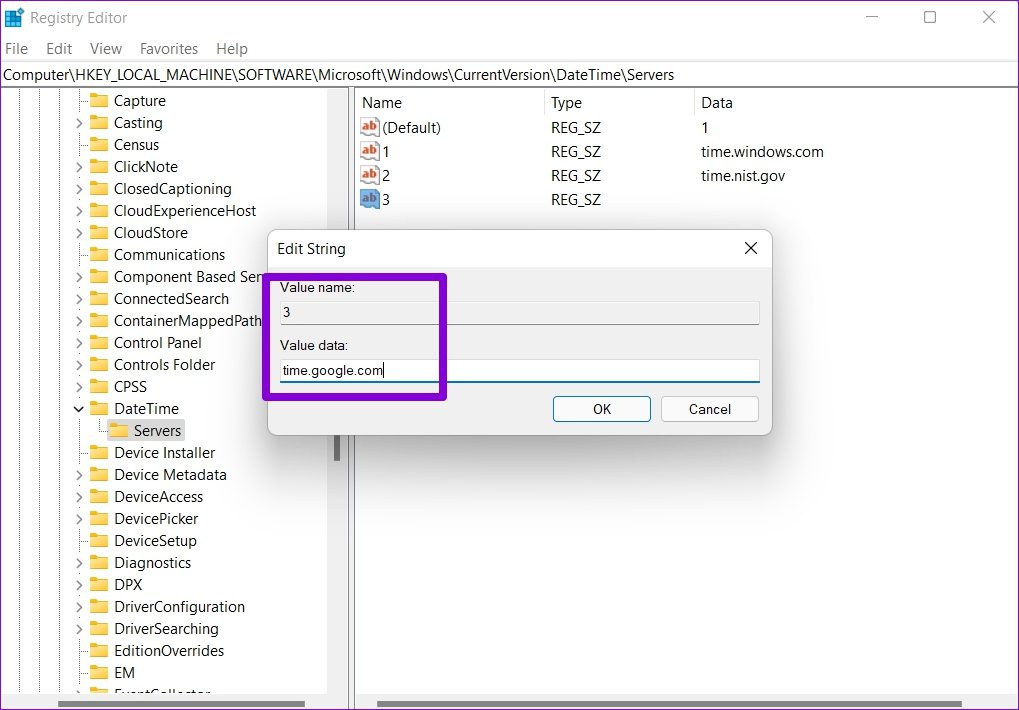
Step 3: Right-click anywhere on the empty space, go to New, and select String Value.

Step 4: In Value name, enter the number for the server. Since we already have 2 servers, we’ll enter the 3rd one. In the Value data field, type in time.google.com and hit OK.
You can create more string values to add more time servers if you like. Once added, follow the steps mentioned in Method 3 above to change the time server on Windows.
Always on Time
Such time sync errors can easily lead to connection issues with several apps on Windows. Plus, any files or documents you create may also end up with a wrong time stamp, leading to more issues. Hopefully, one of the above solutions has helped you fix the times sync issue on Windows 11 for good.
Was this helpful?
Last updated on 02 October, 2023
3 Comments
Leave a Reply
Read Next
 Top 8 Ways to Fix Google Chrome Installation Failed on Windows
Microsoft brought massive performance and compatibility improvements with the chromium-based Edge browser on Windows.
Top 8 Ways to Fix Google Chrome Installation Failed on Windows
Microsoft brought massive performance and compatibility improvements with the chromium-based Edge browser on Windows.
 Top 7 Ways to Fix App Removal Failed Error 0x80073CFA in Windows 11
Uninstalling an app from your Windows 11 PC is an easy task that doesn’t take much time.
Top 7 Ways to Fix App Removal Failed Error 0x80073CFA in Windows 11
Uninstalling an app from your Windows 11 PC is an easy task that doesn’t take much time.
 Top 7 Ways to Fix the ‘nvlddmkm.sys Failed’ Error in Windows
NVIDIA makes powerful GPUs and captures the lion's share of the GPU market.
Top 7 Ways to Fix the ‘nvlddmkm.sys Failed’ Error in Windows
NVIDIA makes powerful GPUs and captures the lion's share of the GPU market.
 Top 8 Ways to Fix Failed to Load Web Page Error in Steam for Windows
Steam for Windows has gone through several updates and refinements over the years.
Top 8 Ways to Fix Failed to Load Web Page Error in Steam for Windows
Steam for Windows has gone through several updates and refinements over the years.
 Top 10 Ways to Fix ‘Display Driver Failed to Start’ Error in Windows 10 and 11
Display drivers facilitate communication between the Windows operating system (or any OS) with your GPU.
Top 10 Ways to Fix ‘Display Driver Failed to Start’ Error in Windows 10 and 11
Display drivers facilitate communication between the Windows operating system (or any OS) with your GPU.
 6 Ways to Fix iCloud Sync Not Working in Windows 11
Fix 1: Restart File Explorer & Photos App iCloud is integrated into File Explorer and the Photos App.
6 Ways to Fix iCloud Sync Not Working in Windows 11
Fix 1: Restart File Explorer & Photos App iCloud is integrated into File Explorer and the Photos App.
 Top 13 Ways to Fix Call Failed Error on iPhone
You pick up your iPhone and dial a number or contact in your phonebook.
Top 13 Ways to Fix Call Failed Error on iPhone
You pick up your iPhone and dial a number or contact in your phonebook.
 Top 9 Ways to Fix Failed to Obtain IP Address Error on Android
Is your Android phone showing the ‘Failed to obtain IP address’ error while connecting to a Wi-Fi network?
Top 9 Ways to Fix Failed to Obtain IP Address Error on Android
Is your Android phone showing the ‘Failed to obtain IP address’ error while connecting to a Wi-Fi network?
The article above may contain affiliate links which help support Guiding Tech. The content remains unbiased and authentic and will never affect our editorial integrity.
Saved my day.
Thanks for in-depth article.
Nothing worked for me 🙁
Same here. No response from any time server.