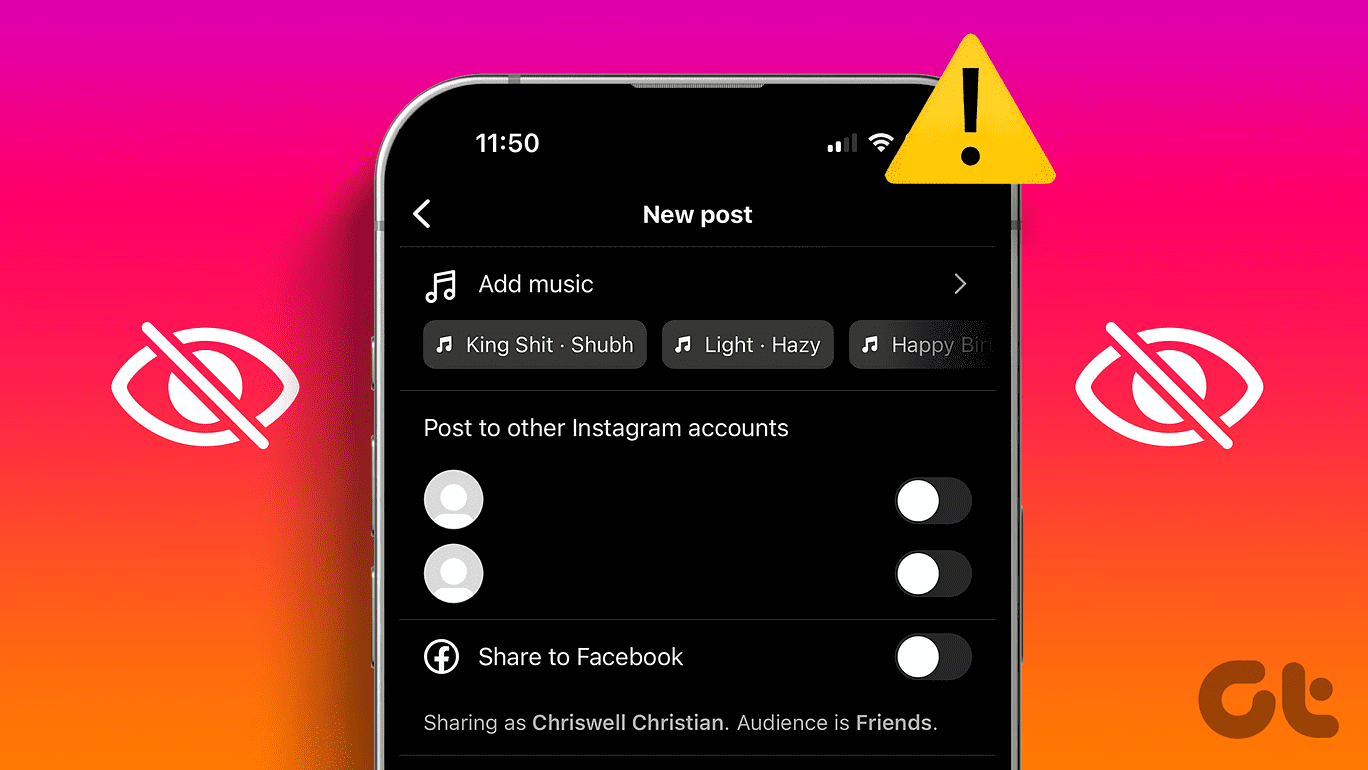
Instagram’s main purpose remains to let you share photos and videos with followers. However, you may face a situation when Instagram won’t let you post on the platform. If you are suffering from the same, read along to fix Instagram not letting you post.
Instagram is the new Facebook these days. Social media addiction is real, and with the app not letting you post a recent picture from a trip or a delicious dinner, you might be left wondering about the problem. We will share methods to fix Instagram not letting you post from iPhone and Android.
Also Read: Fix Instagram story not uploading on iPhone and Android
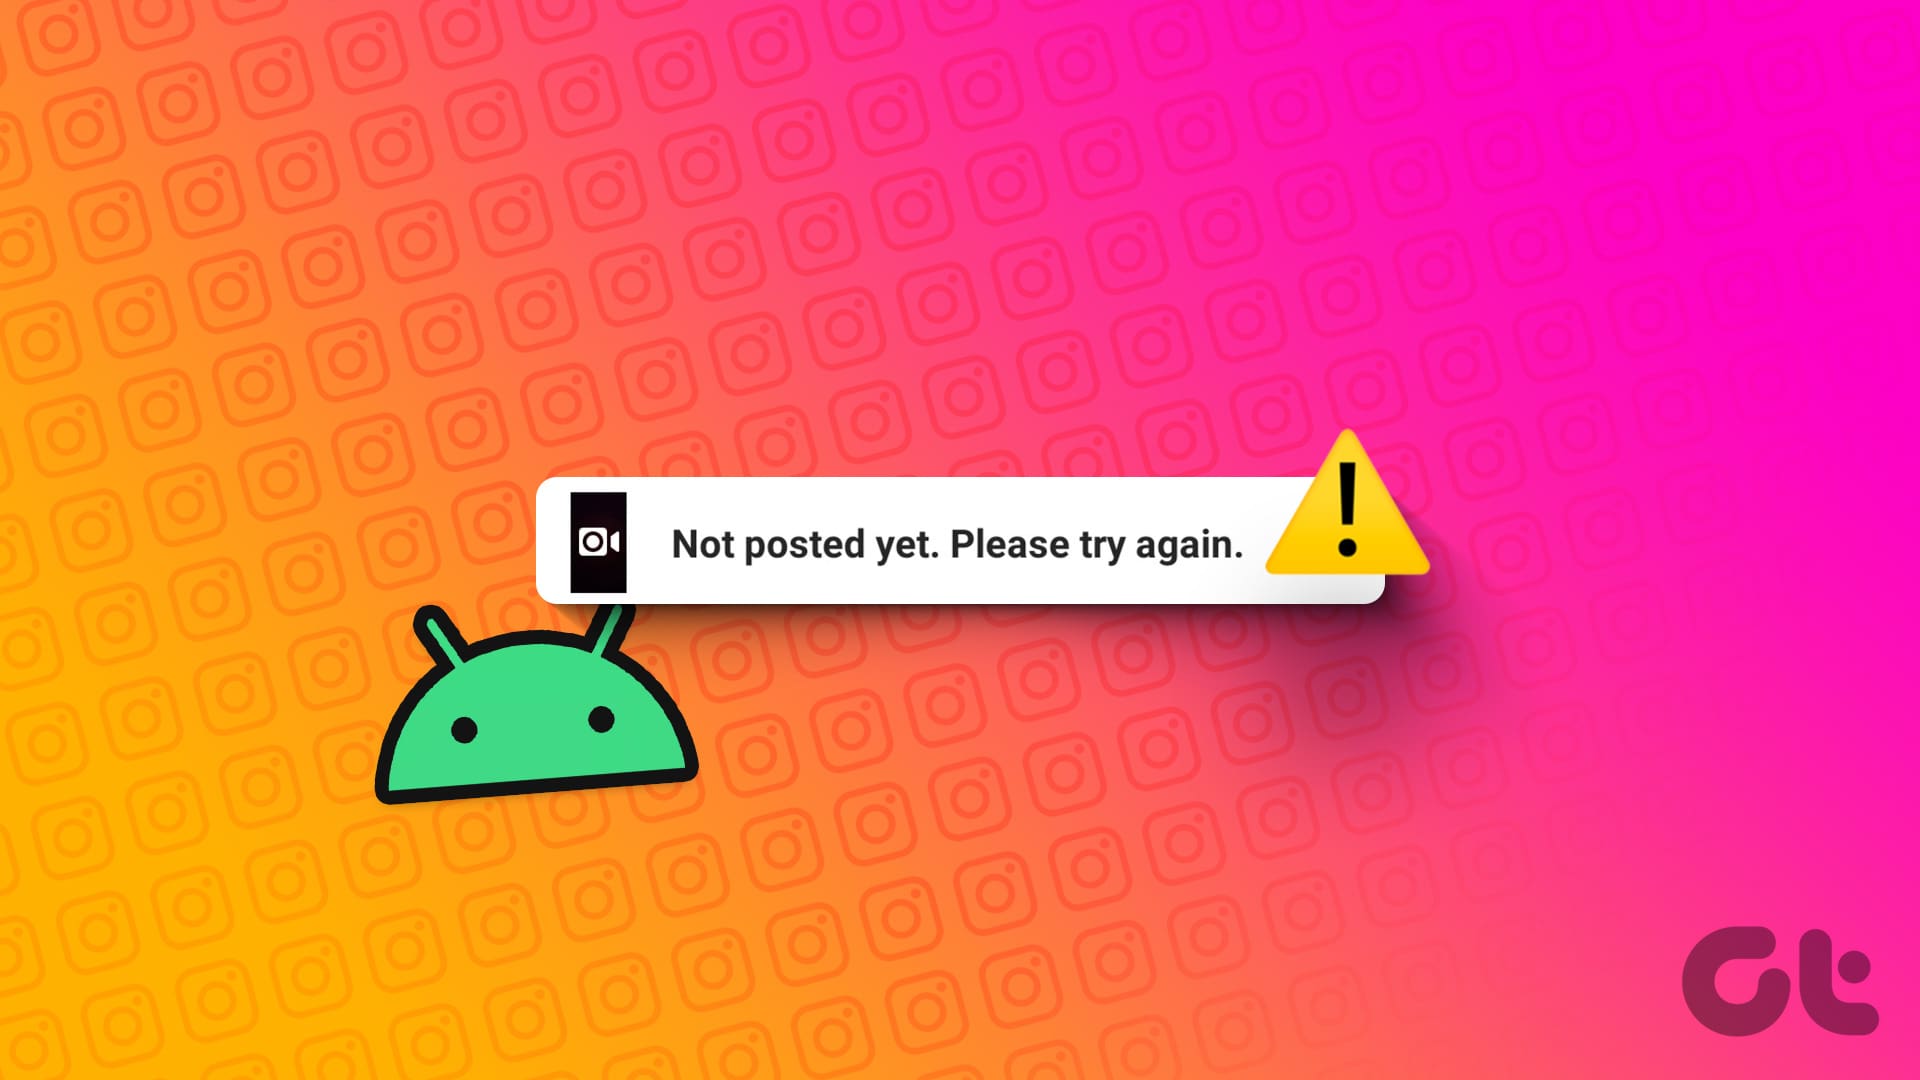
Why Does Instagram Say, “Not Posted Yet, Try Again”
The most common reason why your Instagram post isn’t uploading is the lack of a good internet connection. Other reasons, like a buggy app or issues related to the media that are being uploaded, are also fairly common.
Alternatively, you may also see error messages that say :
- “Your post could not be shared. Please try again.”
- “There was a problem with your Instagram post. Please try again later.”
While it is hard to precisely understand why the issue actually occurs, what isn’t hard are the ways in which you can troubleshoot the issue. So, here are the 13 best ways that can help.
How to Fix if You Are Unable to Post on Instagram
Here are thirteen ways to resolve the issue and post content on Instagram without any issue. Let’s begin.
1. Restart Instagram
If the error message “Not Posted Yet. Try Again” occurs due to a bug, closing the app and starting it again will help you wipe the bug. Hence, try restarting Instagram to see if the issue is fixed.
Step 1: Open the multi-tasking window on your smartphone. If you don’t have a dedicated button, drag upwards from your home screen.
Step 2: Swipe up to close the app and reopen it from your App Library.


2. Log out and Log in Again
If there’s an issue with your current login session, you may see the message “Not Posted Yet. Try Again” on Instagram while you are trying to upload a post. Signing out from Instagram and signing in again will help.
Step 1: Open the Instagram app and go to the Profile tab.
Step 2: Tap on the menu button and select Settings.


Step 3: Tap on Log Out.
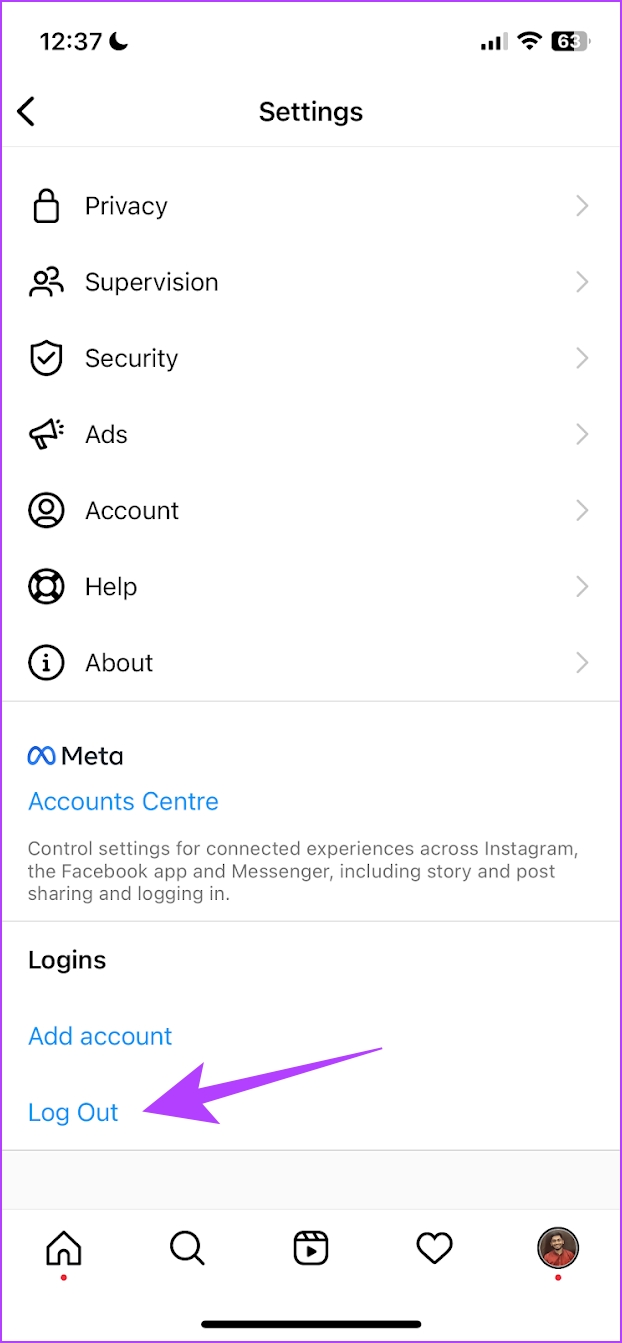
This will log you out of Instagram. Sign in using Instagram account login ID/Password. If you have enabled two-factor authentication for Instagram, it may ask you to verify the code as well.
3. Check Mobile Data or Wi-Fi
Are you using Instagram on a sketchy internet connection? You should disable and enable mobile data or Wi-Fi and try again after some time. You can also enable and disable Airplane mode on your iPhone or Android.

In short, make sure you are dealing with a working internet connection while posting on Instagram.
4. Check Instagram Servers
Instagram is no stranger to occasional outrages. The Facebook-owned company has faced multiple huge outrages in recent times.
You can go to Downdetector and search for Instagram. If you witness heavy server downspikes (which you will), it’s an issue from Instagram’s side.
You don’t have to do anything now. Let Instagram fix the issue from their side and get the latest updates from the company on other social media platforms.
5. Reduce File Size
If you deal with huge RAW image files to upload on Instagram, the service might not let you post them.
Instagram compresses the media upload size, but it may throw an error when dealing with large image files. You must reduce photo file size on your iPhone, Android, or desktop.
We won’t go into details on how to do that, and you can read our dedicated post on how to reduce photo file size on iPhone and Mac.
6. Enable Background App Refresh and Autostart
When uploading large videos as an Instagram post, you must keep the app open on your phone for a successful post. If you return to the home screen, you might face Instagram not letting you post errors.
For a flawless upload process, it’s best to enable Background App Refresh (iPhone) or Autostart (Android) from the Settings menu.
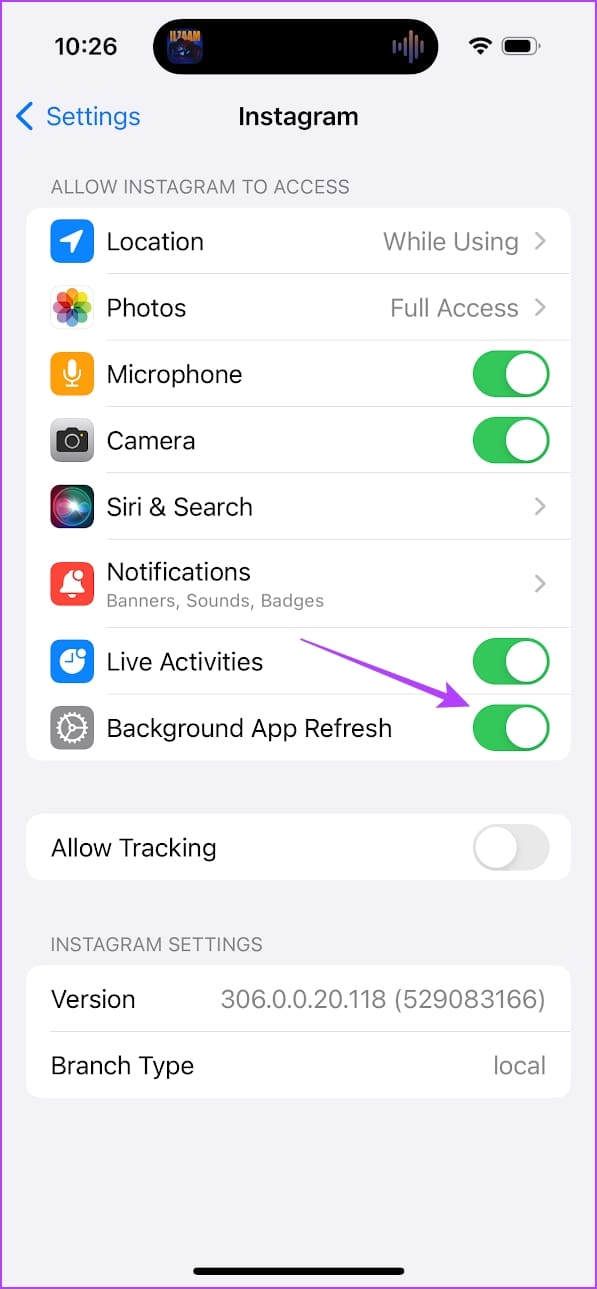
Enable Background App Refresh for Instagram on iPhone
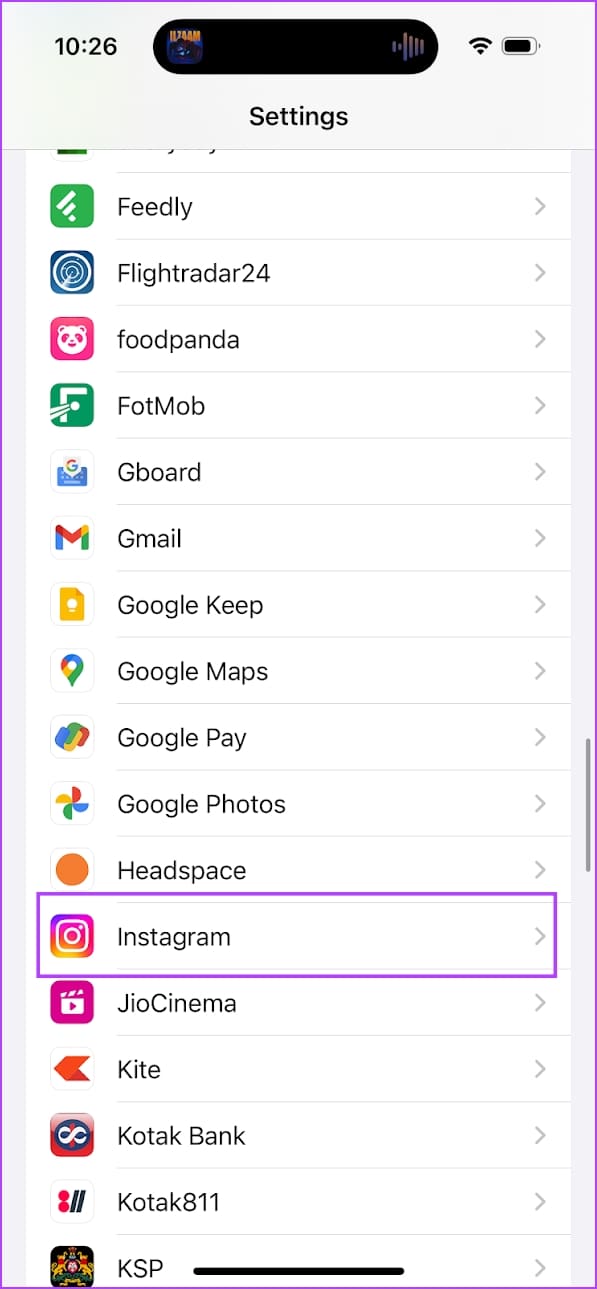
Step 1: Open the Settings app on your iPhone.
Step 2: Scroll down to Instagram.
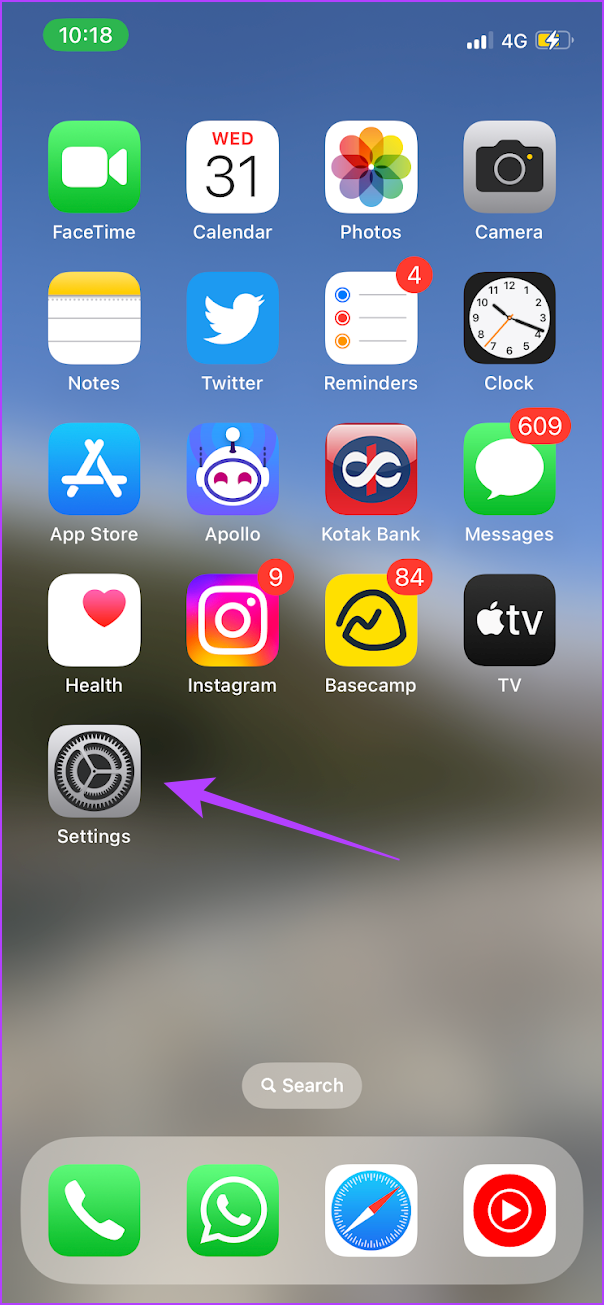
Step 3: Enable Background App Refresh from the following menu.
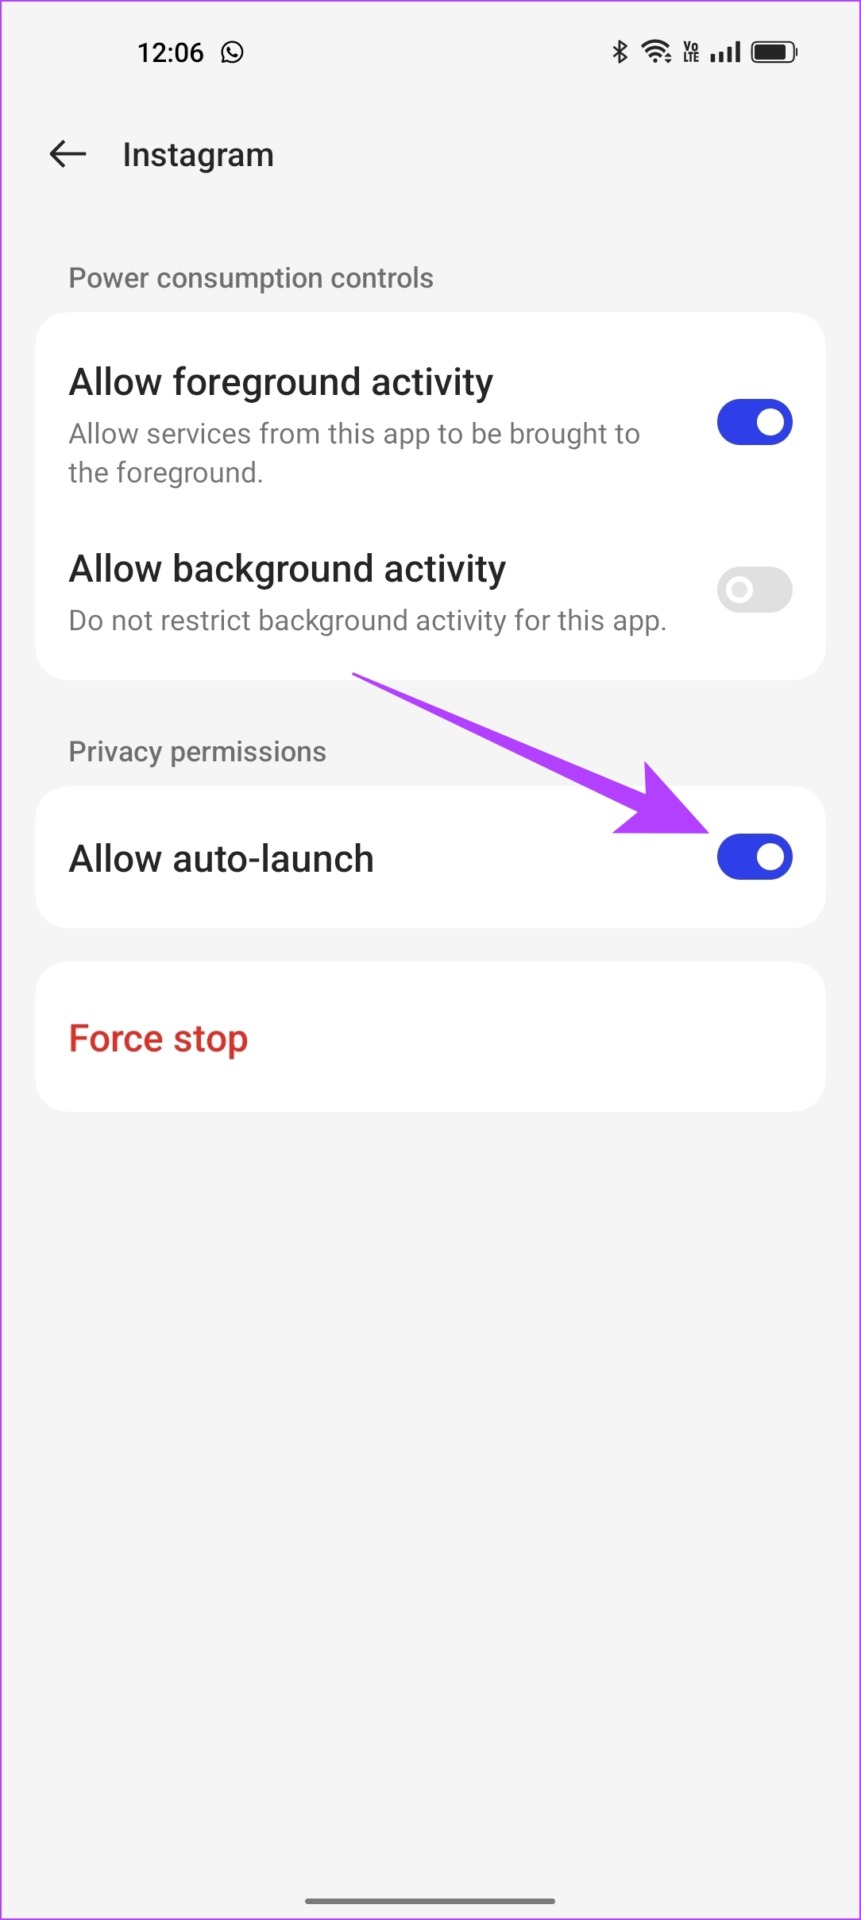
Enable Autostart for Instagram on Android
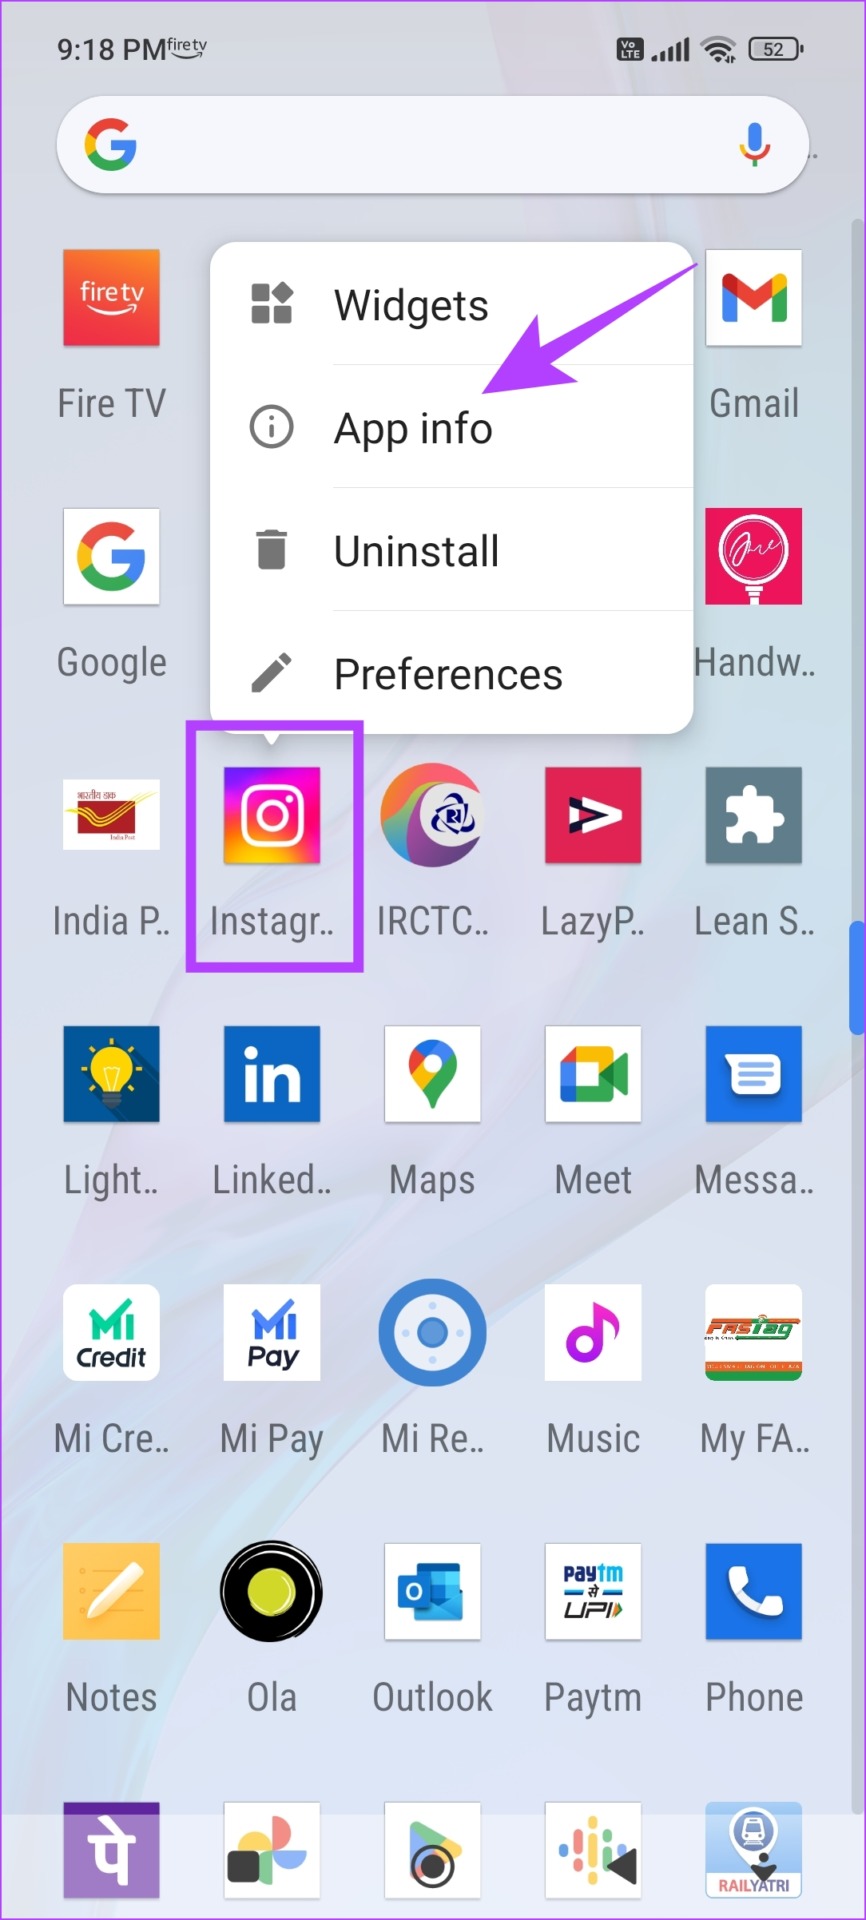
Step 1: Long-tap on the app icon in the launcher and tap on the app info icon.
Step 2: Tap on Battery usage.


Step 3: Enable the toggle for ‘Allow auto-launch’.
Autostart is now enabled for the app, and when necessary, it can launch a few background activities on its own.
7. Clear Instagram Cache (Android)
Every application stores data offline, called cache on your phone, to ensure it saves time instead of downloading it from the Internet again. This helps in faster app launch and reload speeds. However, accumulation of cache may lead to junk files that execute bugs.
Therefore, if you are facing any issue with the Instagram app, clearing the app cache is one way to resolve the issue. You can check our guide on what happens when you clear your cache on Instagram for a better understanding.
Note: Unfortunately, clearing the cache is only possible on Android devices, so iPhone users can jump to the next fix.
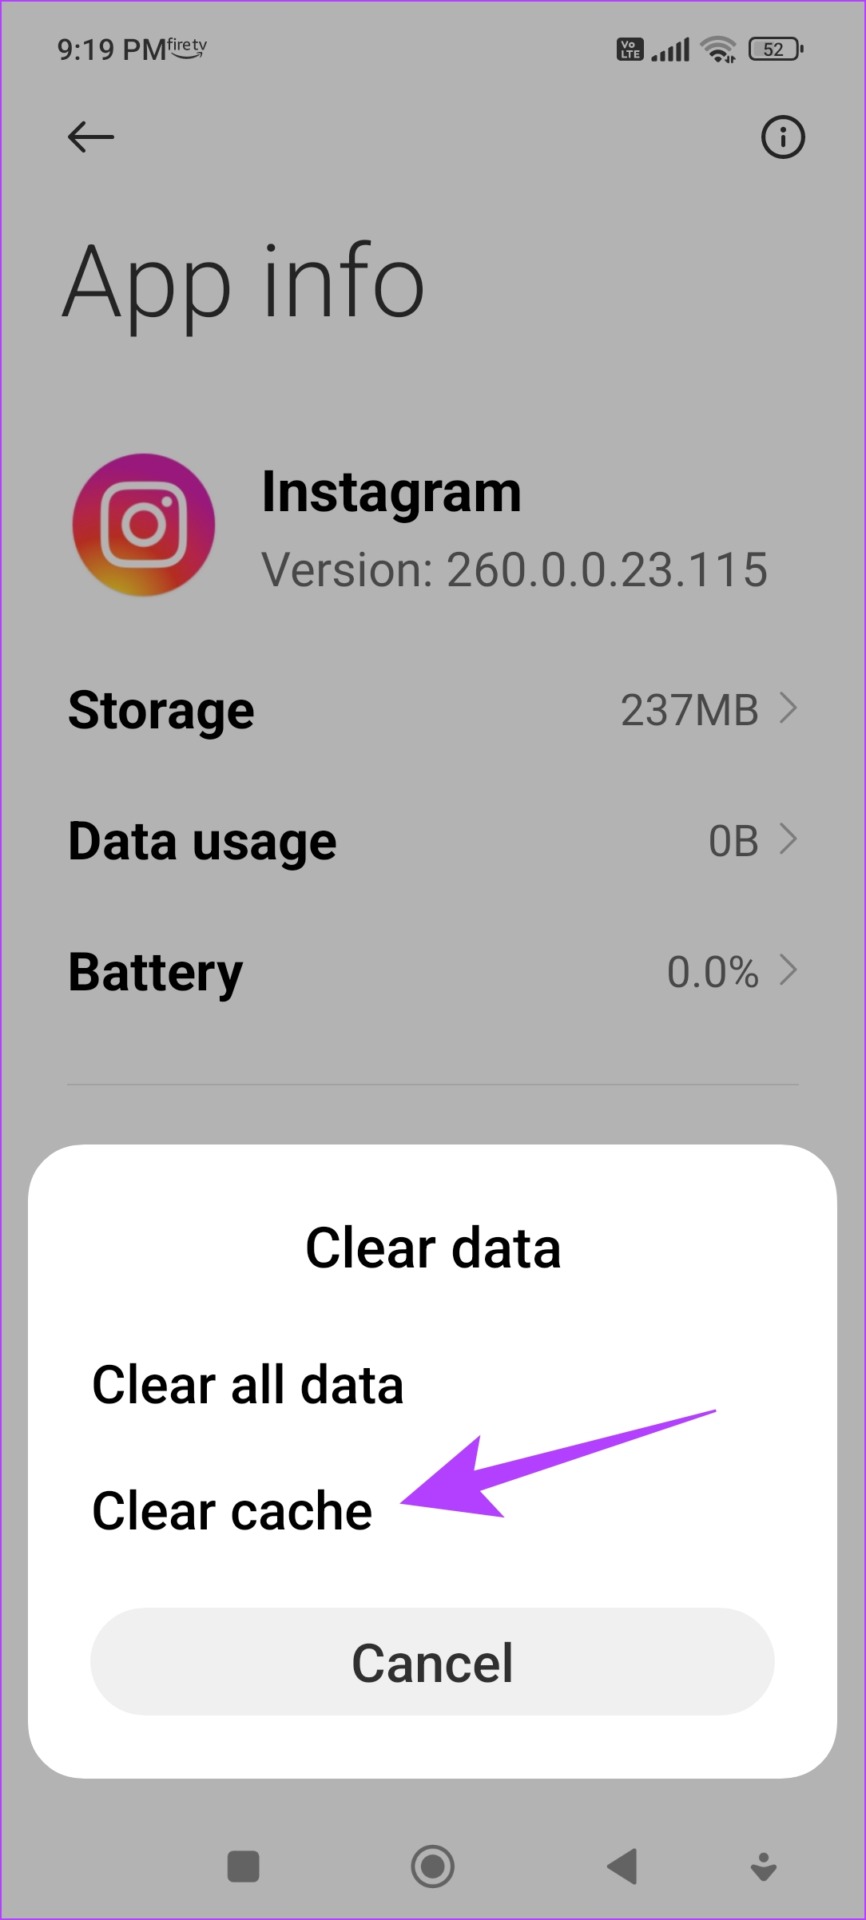
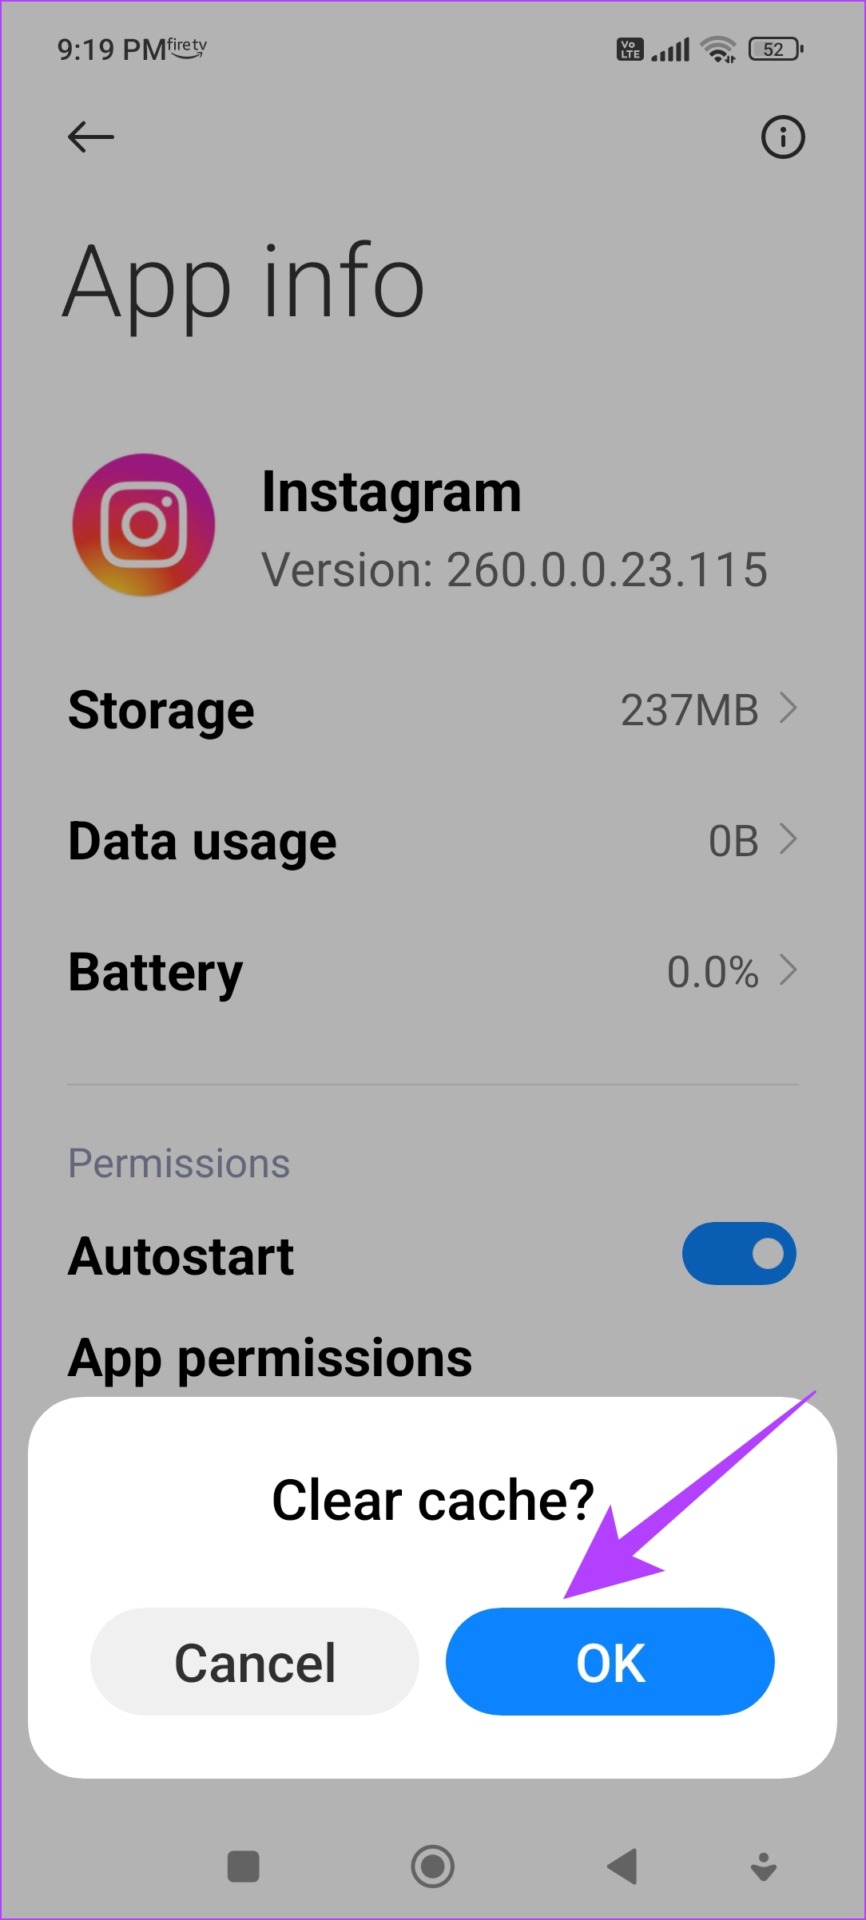
Step 1: Long-press the Instagram app on the home screen and tap on App info.
Step 2: Tap on Clear Data.

Step 3: Tap on Clear cache and select OK to confirm.
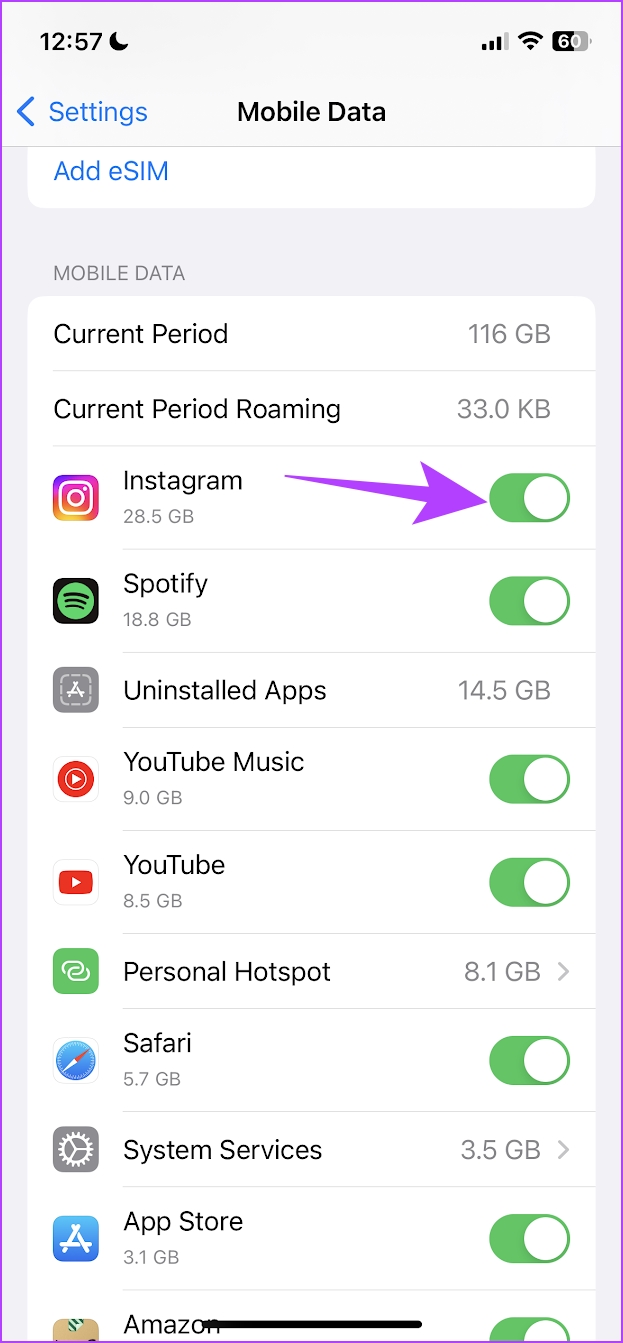
8. Enable Cellular Data Usage for Instagram
On both iPhone and Android, you can manually disable mobile data access for apps. If you are using mobile data and if you have accidentally disabled it for Instagram, you can’t upload stories or even access anything on Instagram that requires an internet connection.
Enable Cellular Data for Instagram on iPhone
Step 1: Open the Settings app and tap on Mobile Data.


Step 2: Turn on the toggle for Instagram.
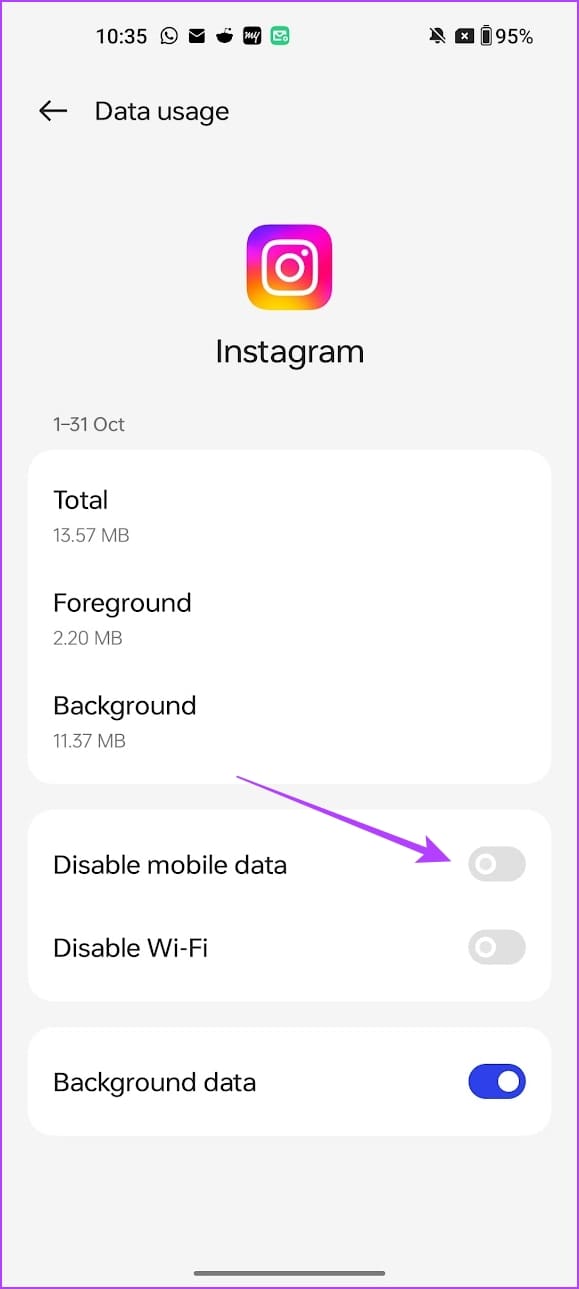
Enable Cellular Data for Instagram on Android
Step 1: Long-press the Instagram app icon and tap on the i button.
Step 2: Next, tap on Data usage.
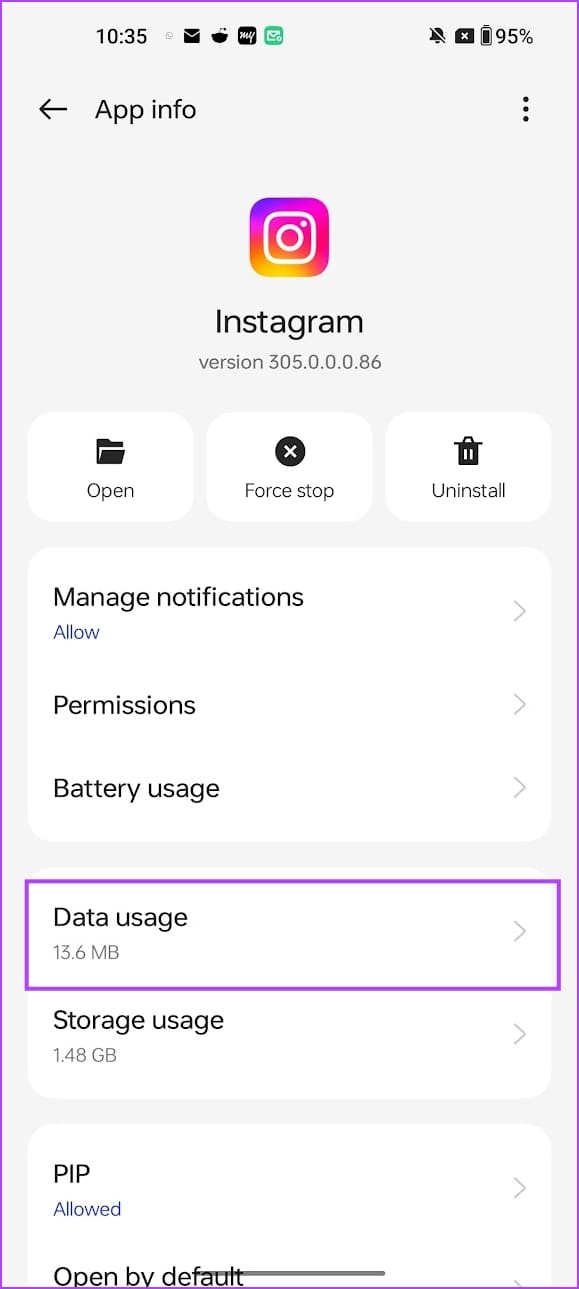
Step 3: Ensure the toggle for ‘Disable Mobile Data’ is turned off.
9. Update Instagram
If a large group of users is unable to post on Instagram, it is most probably caused by a bug present in that specific app version. Hence, Instagram will certainly take notice of it and release a fix via an update. Here’s how you can check for updates and install the latest version of the app.
Step 1: Tap on the link below to update the app depending on your device.
Step 2: Tap on Update and wait for the latest version of Instagram to download and update.

10. Disable VPN
A VPN is a private connection that sends internet traffic both inbound and outbound through a private server. However, the VPN you are using may be slow or experiencing an outage. If you’re using a VPN and you are unable to upload on Instagram, your best approach is to make sure you’re not connected to any VPN.
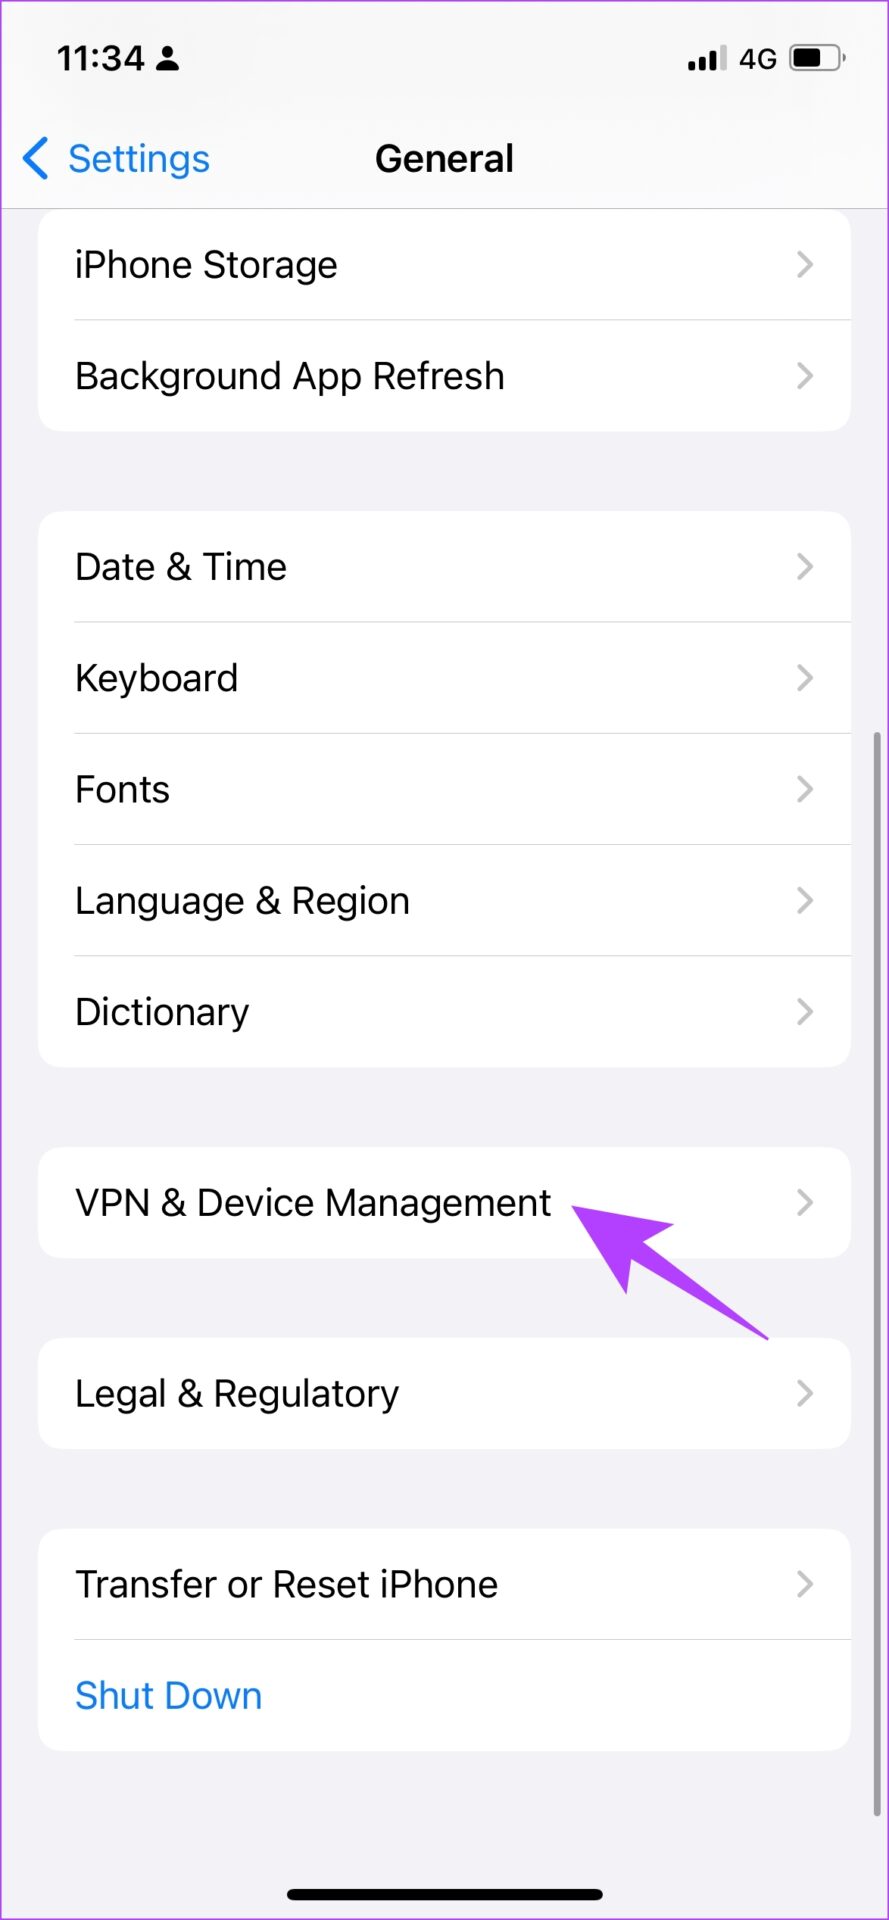
Disable VPN on iPhone
Step 1: Open the Settings app and select General.
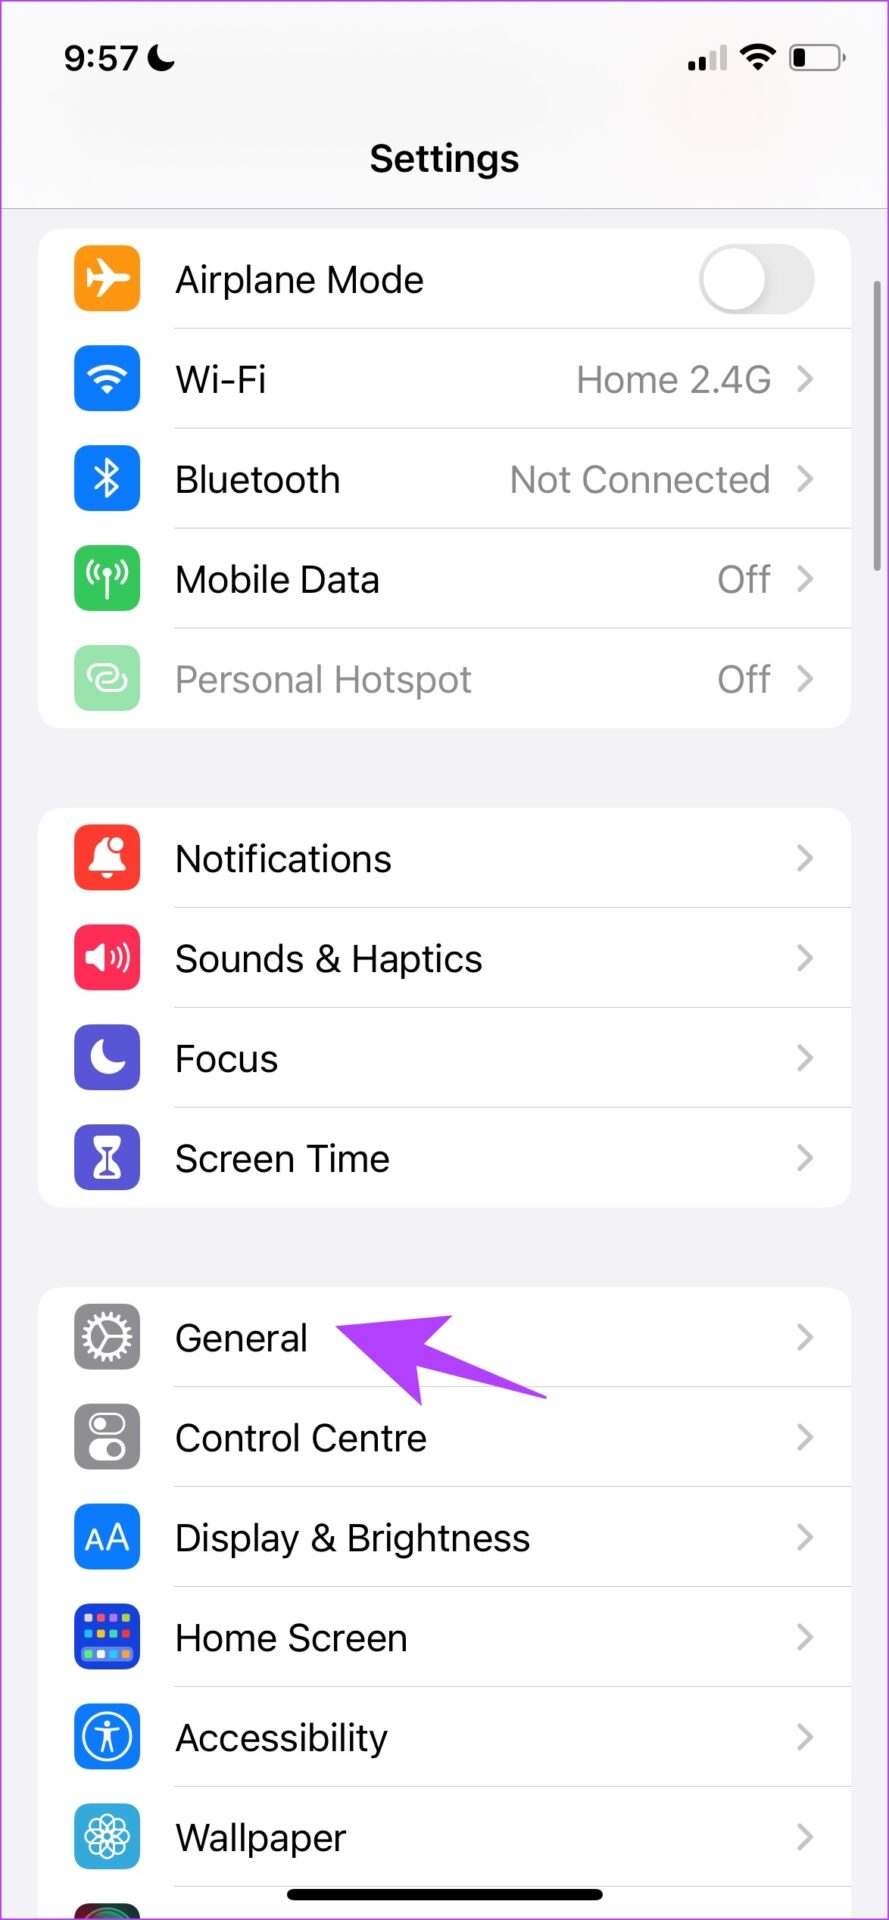
Step 2: Tap on ‘VPN & Device Management’.
Step 3: Ensure the status says ‘Not Connected’ meaning you are not connected to a VPN service.

Disable VPN on Android
Step 1: Open the Settings app and select ‘Connection & sharing’ (or a similar panel in settings, based on the device you are using)
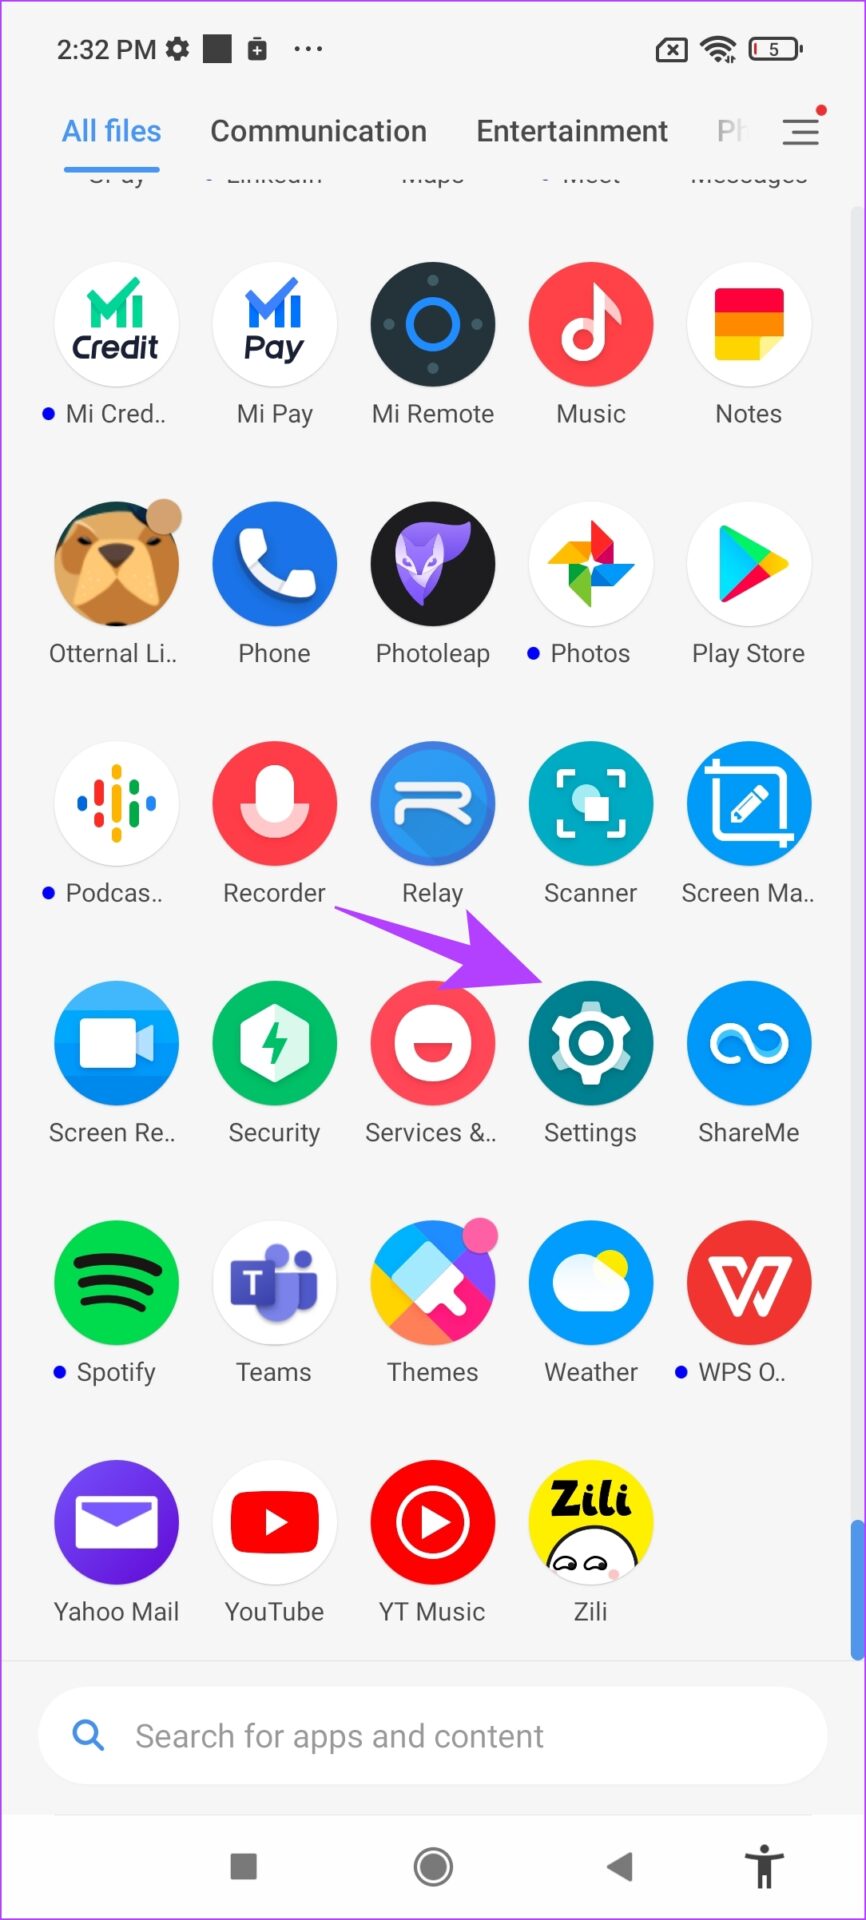

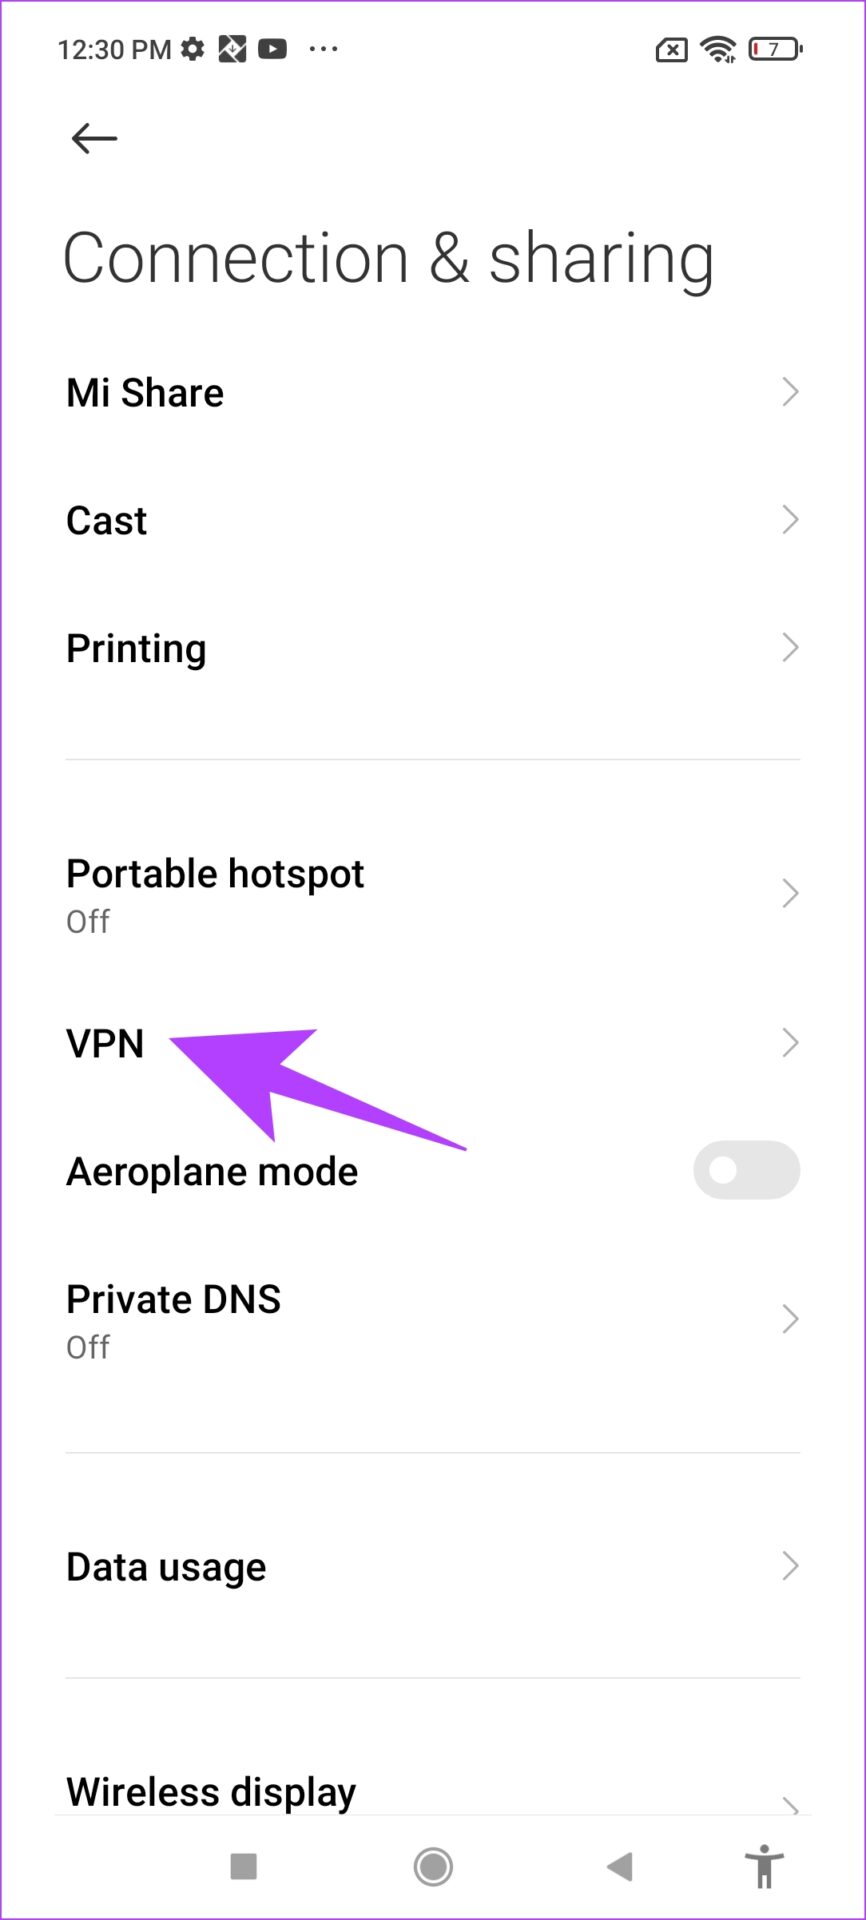
Step 2: Tap on VPN. Ensure the toggle is turned off, which means you are not connected to any VPN service.
11. Resinstall Instagram
Reinstalling Instagram essentially lets you run the app afresh, clearing all the previously applied configurations. There is a good chance you can post your content without any problems on a fresh version of the app.
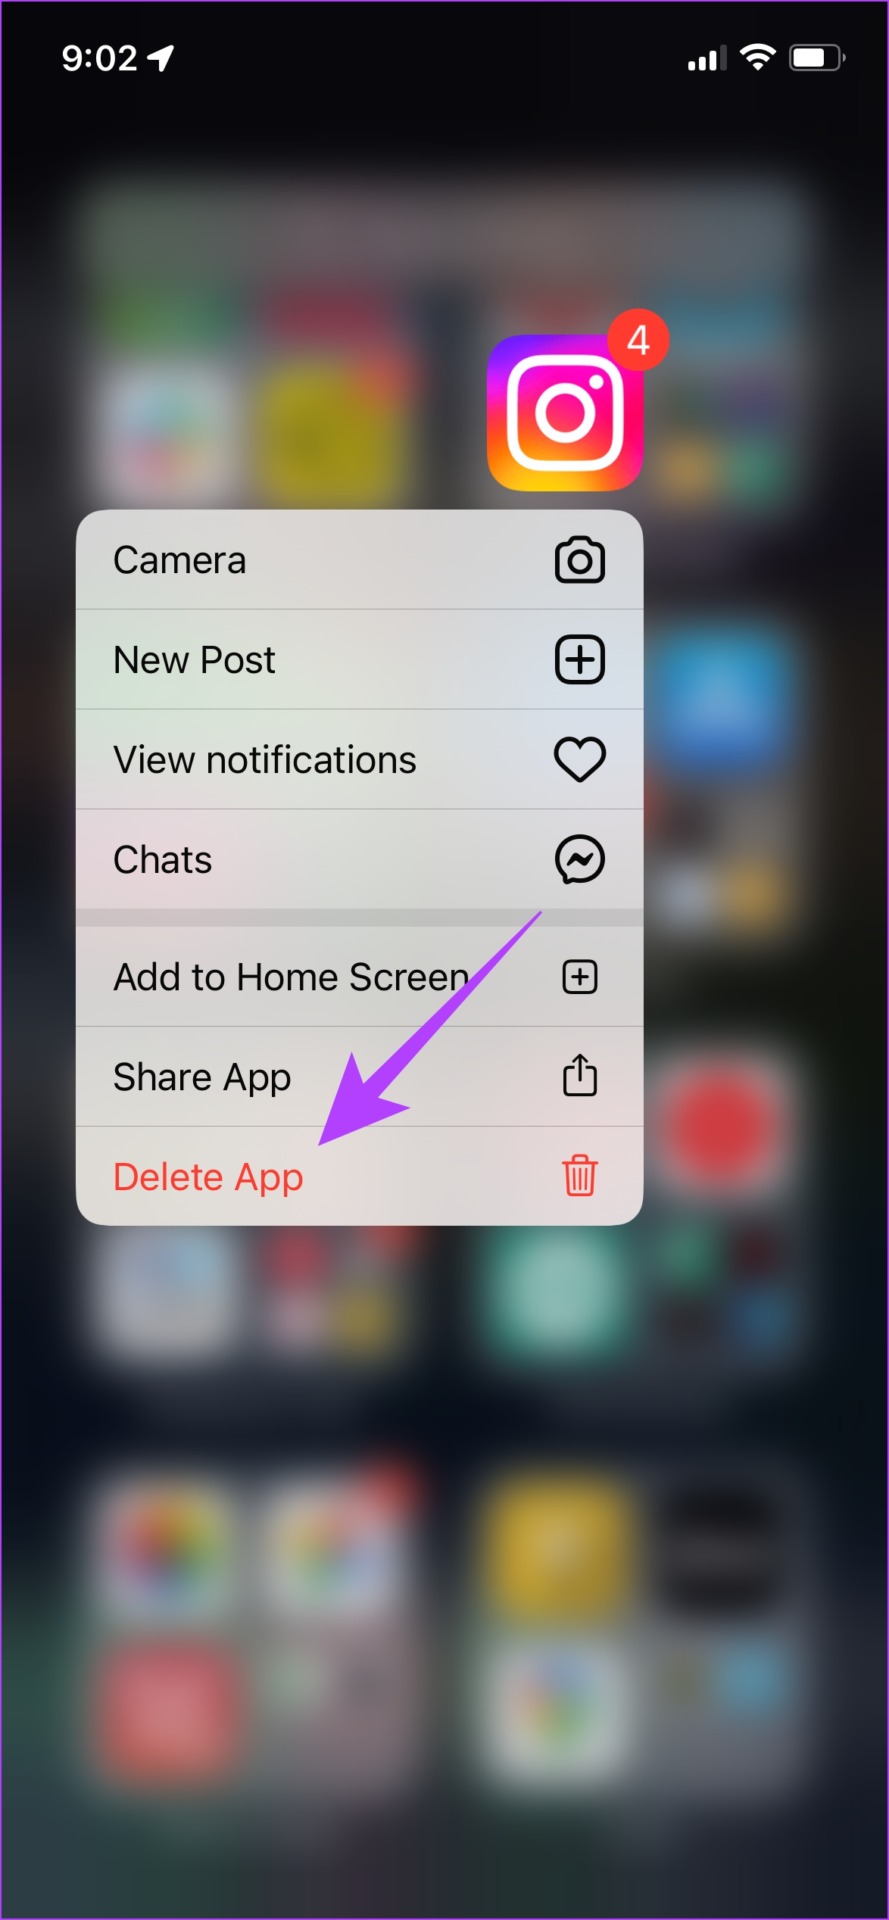
Step 1: Long-press on Instagram’s icon on the home screen.
Step 2: Tap on Delete App on iPhone or Uninstall on Android and again confirm to Delete the app.
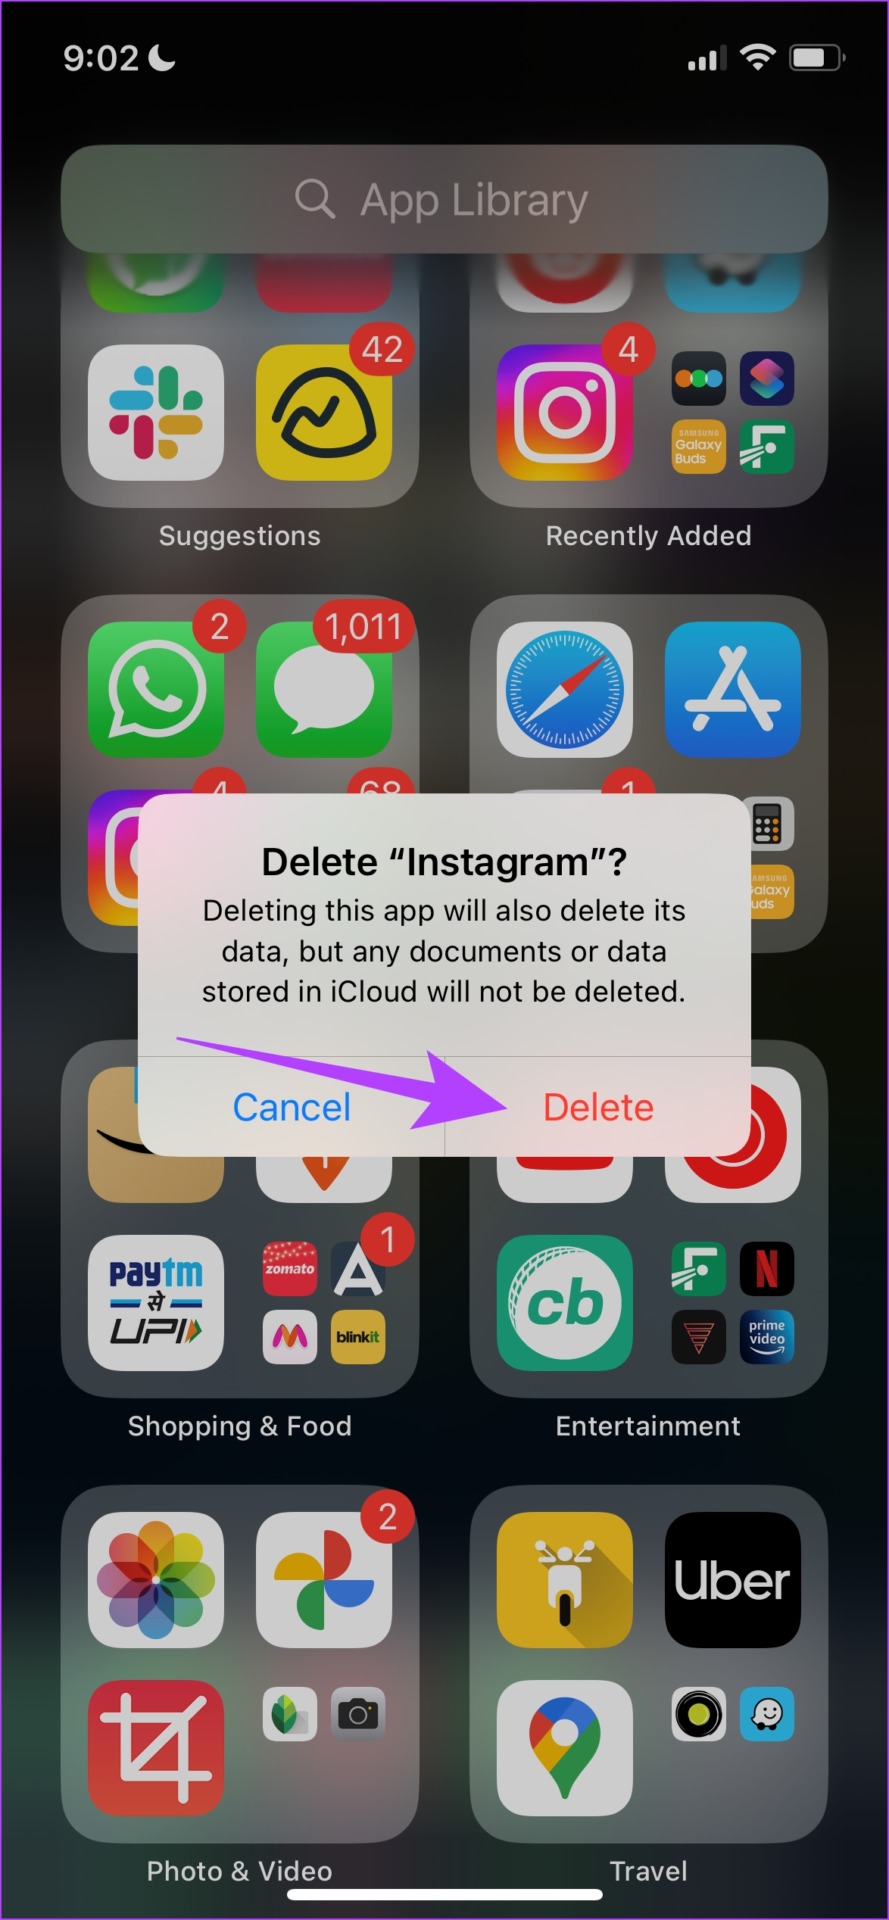
Step 3: Reinstall the app using the links below.
12. Post From Instagram Web
As an alternative to the app, you can log in and use Instagram on your web browser. There is a good chance your post will be uploaded via the web version if the app is buggy and you just can’t upload your post on it. Use the link below to access the Instagram web.
13. Contact Instagram Support
You can report any bug on the Instagram app to the developers. They will take note and get back to you on the same. They are known to quickly respond to such reports.
Step 1: Open Instagram, go to your profile, and tap on the menu button.
Step 2: Tap on Settings.

Step 3: Tap on Help and select ‘Report a Problem’.


Step 4: Tap on ‘Report problem without shaking.’
Step 5: Tap on ‘Include and Continue’ to add logs to help Instagram understand the problem better.
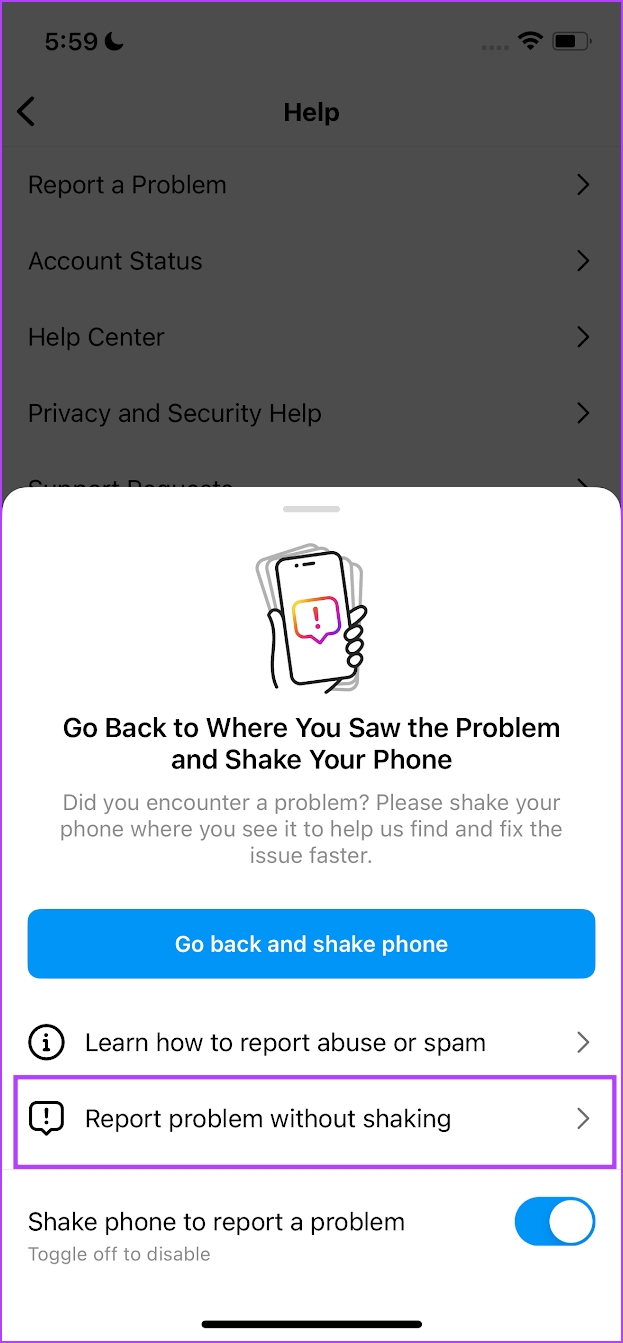

Step 6: Explain the problem in brief and tap on Send.

That is everything you need to know if you can’t post on Instagram. If you have any further questions, look at the FAQ section below.
FAQs on Unable to Post on Instagram
To enable data saver on Instagram, go to your profile, tap the three horizontal lines in the top right, select Settings and Privacy > Media Quality > turn on Use less cellular data.
Yes. However, you need to use a stable VPN that offers decent speeds to post content on Instagram without any problems.
Yes, you can get banned from posting on Instagram for violating their community guidelines, including posting inappropriate content, engaging in spammy behavior, or violating their terms of service.
Post Content Without Problems
We hope this article helps you post content without any problems on Instagram. If you are still facing issues despite trying all the workarounds, leave your queries in the comment section below, and we shall get back to it at the earliest!
Was this helpful?
Last updated on 01 November, 2023
Read Next
 11 Ways to Fix the Couldn’t Post Comment Error on Instagram App
So, you come across a hilarious meme on Instagram and want to tag your buddies, only to realize Instagram won't let you comment on the post.
11 Ways to Fix the Couldn’t Post Comment Error on Instagram App
So, you come across a hilarious meme on Instagram and want to tag your buddies, only to realize Instagram won't let you comment on the post.
 8 Ways to Fix Add Music to Instagram Post Not Showing
Adding music enhances the vibe of an Instagram post.
8 Ways to Fix Add Music to Instagram Post Not Showing
Adding music enhances the vibe of an Instagram post.
 4 Easy Ways to Copy Text From an Instagram Post
Scrolling through Instagram, we often come across posts containing inspirational quotes, useful links, funny pictures, etc.
4 Easy Ways to Copy Text From an Instagram Post
Scrolling through Instagram, we often come across posts containing inspirational quotes, useful links, funny pictures, etc.
 How To Post Multiple Landscape and Portrait Photos on Instagram
Instagram is a visual platform, i.e., showcasing your creativity by posting a variety of photos.
How To Post Multiple Landscape and Portrait Photos on Instagram
Instagram is a visual platform, i.e., showcasing your creativity by posting a variety of photos.
 How to Share a Facebook Post to Instagram Automatically or Manually
Between a bunch of social media platforms and their respective content formats, crossposting is a boon.
How to Share a Facebook Post to Instagram Automatically or Manually
Between a bunch of social media platforms and their respective content formats, crossposting is a boon.
 Why Can’t I Share My Facebook Post to Instagram
Preliminary Checks Before Troubleshooting Is the post private or restricted?
Why Can’t I Share My Facebook Post to Instagram
Preliminary Checks Before Troubleshooting Is the post private or restricted?
 How to Share Instagram Post to Snapchat Story
Are you looking for a seamless way to share your favorite posts across popular social media platforms like Instagram and Snapchat?
How to Share Instagram Post to Snapchat Story
Are you looking for a seamless way to share your favorite posts across popular social media platforms like Instagram and Snapchat?
 What Happens When You Archive a Post on Instagram
Picture this: your Instagram profile contains old posts irrelevant to your account.
What Happens When You Archive a Post on Instagram
Picture this: your Instagram profile contains old posts irrelevant to your account.
The article above may contain affiliate links which help support Guiding Tech. The content remains unbiased and authentic and will never affect our editorial integrity.